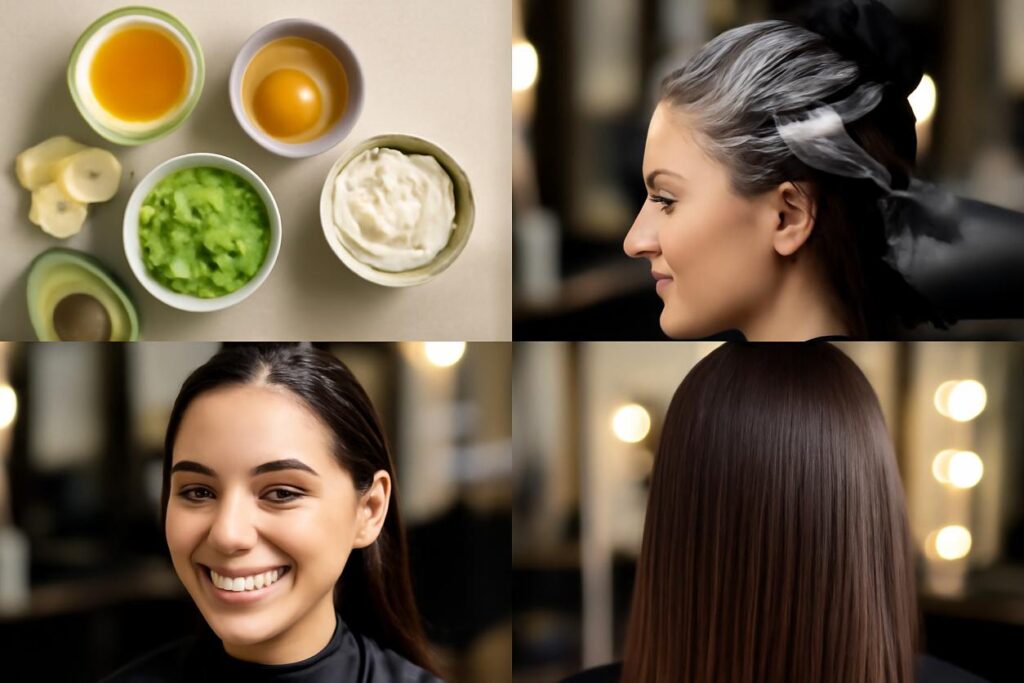
Introduction: Why a DIY Hair Mask is Your Secret Weapon
Tired of browsing endless aisles of hair products with confusing labels and high price tags? What if the secret to luscious, healthy hair isn’t in a fancy bottle, but right in your kitchen pantry? Welcome to the world of the DIY hair mask. Creating your own treatments is not only incredibly cost-effective but also gives you complete control over what you put on your hair and scalp. You can skip the synthetic fragrances, silicones, and preservatives, opting instead for fresh, natural ingredients tailored precisely to your hair’s needs.
Whether your locks are feeling dry, brittle, oily, or just plain lackluster, a homemade hair mask can offer a potent dose of nutrients. This guide will walk you through everything you need to know to become a home stylist, empowering you to mix and match simple ingredients for transformative results. Get ready to unlock the potential of your pantry and give your hair the personalized care it deserves.
The Science-ish Bit: How Homemade Hair Masks Affect Hair Structure
To understand why a DIY hair mask works so well, it helps to know a little about your hair’s structure. Each hair strand is made of three main layers. The innermost layer is the medulla, the middle layer is the cortex (which gives hair its strength and color), and the outermost layer is the cuticle. Think of the cuticle as a layer of overlapping scales, like shingles on a roof.
When hair is healthy and moisturized, these scales lie flat, creating a smooth, shiny surface that reflects light. However, when hair is damaged by heat, chemical treatments, or environmental factors, these scales lift and become rough. This allows moisture to escape, leading to frizz, dullness, and breakage.
The ingredients in a homemade hair mask work by targeting this outer cuticle layer. Oils and butters (emollients) help to seal and smooth the cuticle, locking in moisture. Proteins can temporarily patch up gaps in the cuticle, adding strength. Humectants, like honey, draw moisture into the hair shaft. By applying a nutrient-rich DIY hair mask, you are essentially feeding your hair from the outside in, helping to restore that smooth, healthy cuticle.
Match Your Mask to Your Hair Goals and Type
The beauty of a DIY hair mask is its versatility. You can create a unique formula just for you. First, identify your hair type and primary goal. Are you battling dryness, seeking strength, or aiming for a glossy shine? The table below can help you pinpoint the best starting ingredients for your specific needs.
| Hair Type | Common Goal | Recommended Ingredient Focus |
|---|---|---|
| Fine Hair | Volume and strength without weight | Light proteins (yogurt), lightweight oils (jojoba), clarifying ingredients (green tea) |
| Thick or Coarse Hair | Deep moisture and frizz control | Heavy oils (coconut, olive), butters (shea), rich ingredients (avocado) |
| Oily Hair or Scalp | Balance oil production, gentle cleansing | Clay (bentonite), aloe vera, apple cider vinegar (diluted) |
| Dry or Damaged Hair | Intense hydration and repair | Rich humectants (honey), proteins (egg), heavy oils (avocado) |
| Curly or Coily Hair | Define curls, enhance moisture, reduce frizz | Avocado, banana, aloe vera, rich oils, honey |
The Pantry A-Team: Key Ingredient Groups for Your DIY Hair Mask
When you start creating your own hair mask recipe, you’ll be working with three main categories of ingredients. Understanding their roles is key to crafting the perfect treatment.
- Oils (Emollients): These are the sealers. Oils coat the hair strand, smoothing the cuticle and preventing moisture loss. They are responsible for adding softness and shine.
- Proteins: These are the builders. Protein-rich ingredients temporarily fill in the weak, damaged spots along the hair shaft, reinforcing its structure and improving elasticity.
- Humectants: These are the hydrators. Humectants are ingredients that attract water molecules from the environment and draw them into the hair, providing a powerful moisture boost.
A well-balanced DIY hair mask often contains at least one ingredient from each category, but you can adjust the ratios based on your hair’s specific needs on any given day.
Oils Explained: Which Oil for Which Hair Type?
Not all oils are created equal. Choosing the right one is crucial to avoid weighing your hair down or not providing enough moisture.
- For Fine or Oily Hair (Lightweight Oils): These oils are less greasy and absorb more easily. They provide shine and softness without causing buildup. Examples include:
- Jojoba Oil: Its molecular structure is very similar to our scalp’s natural sebum, making it excellent for balancing oil production.
- Almond Oil: Rich in Vitamin E, it’s great for adding shine and smoothness.
- Grapeseed Oil: Extremely lightweight and non-greasy, perfect for a subtle conditioning effect.
- For Dry, Thick, or Coarse Hair (Heavyweight Oils): These oils have larger molecules and are better at penetrating thick hair strands for deep conditioning. Examples include:
- Coconut Oil: Famous for its ability to penetrate the hair shaft and prevent protein loss. Best used on non-protein sensitive hair.
- Olive Oil: A classic emollient that deeply moisturizes and adds a beautiful sheen.
- Avocado Oil: Packed with fatty acids, it’s fantastic for nourishing very dry and brittle hair.
The Building Blocks: When to Use Protein in Your Mask
Protein is essential for hair strength, but it is possible to have too much of a good thing. A protein treatment is a key part of a repair-focused DIY hair mask.
Signs your hair needs protein:
- Your hair feels limp, mushy, or overly soft when wet.
- It stretches significantly before snapping (poor elasticity).
- It has high porosity (absorbs water quickly but doesn’t retain it).
- It’s been recently colored or chemically treated.
Common kitchen sources of protein:
- Yogurt or Kefir: Contain lactic acid for gentle exfoliation and proteins for strengthening.
- Egg: The yolk is rich in fats and vitamins, while the white is pure protein. An entire egg offers a balanced treatment.
- Gelatin: A potent source of protein that can coat and fortify the hair strand.
A word of caution: Be mindful of protein overload. If your hair feels stiff, dry, or brittle after a protein mask, you’ve used too much or too often. Balance it with a moisturizing mask next time and limit protein treatments to once or twice a month.
The Moisture Magnet: Humectants for Supreme Hydration
For hair that feels perpetually thirsty, humectants are your best friend. They pull moisture from the air into your hair, providing deep, lasting hydration.
Top humectants from your kitchen:
- Honey: A natural humectant and emollient, it both attracts moisture and helps seal it in. It also has antibacterial properties, making it great for scalp health.
- Aloe Vera Gel: Packed with vitamins and enzymes, aloe vera is incredibly hydrating and soothing for both hair and scalp.
- Banana: Rich in potassium and natural oils, bananas improve elasticity and moisture, helping to prevent split ends and breakage.
Important Do’s and Don’ts: Humectants work best in environments with some humidity. In very dry, arid climates, they can sometimes have the opposite effect, pulling moisture from the deeper layers of your hair. To prevent this, always pair a humectant with a sealing oil in your DIY hair mask to lock the moisture in.
Quick Fixes: 10-Minute DIY Hair Mask Recipes
Short on time? These simple, two-ingredient masks can be whipped up in a minute and deliver a quick boost in just 10 minutes.
- The Quick Shine Mask: Mix 2 tablespoons of plain yogurt with 1 tablespoon of honey. Apply to damp hair, focusing on the mid-lengths and ends. Let it sit for 10 minutes, then rinse thoroughly with cool water.
- The Fast Frizz-Fighter: Mash half a banana and mix with 1 tablespoon of olive oil until smooth. Apply to hair, leave for 10 minutes, and rinse well. This is a great pre-shampoo treatment.
- The Speedy Moisture Boost: Combine 2 tablespoons of aloe vera gel with 1 teaspoon of jojoba oil. Apply to dry or damp hair for 10 minutes before washing as usual.
The Deep Dive: Overnight and Extended Hair Masks
For a truly restorative treatment, especially for very dry or damaged hair, an extended or overnight mask is the way to go. The extra time allows the ingredients to penetrate the hair shaft more deeply. Looking ahead to hair care strategies for 2025 and beyond, focusing on deep, intentional treatments will be key.
The Ultimate Hydration DIY Hair Mask:
- Ingredients: Half a ripe avocado, 2 tablespoons of coconut oil, and 1 tablespoon of honey.
- Instructions: Mash the avocado until completely smooth to avoid chunks. Whisk in the coconut oil and honey. Apply the mixture generously to clean, damp hair from roots to ends.
- Application: Cover your hair with a shower cap or plastic wrap to trap heat and aid penetration. Leave the mask on for at least one hour or, for maximum benefit, overnight. If leaving overnight, be sure to cover your pillow with a towel to prevent stains. Rinse thoroughly in the morning with lukewarm water and style as usual.
Get to the Root: Scalp Treatments and Growth-Supporting Masks
Healthy hair starts with a healthy scalp. A targeted DIY hair mask can soothe irritation, remove buildup, and create an optimal environment for hair growth.
Soothing and Stimulating Scalp Mask:
- Ingredients: 2 tablespoons of finely ground oatmeal (colloidal), 1/4 cup of cool green tea, and 2-3 drops of peppermint essential oil.
- Why it works: Oatmeal is incredibly soothing for irritated or itchy scalps. Green tea is packed with antioxidants, and peppermint oil can help stimulate blood flow to the follicles.
- Instructions: Mix the ingredients into a paste. Part your hair into sections and apply the mask directly to your scalp with your fingertips or a brush. Gently massage for a few minutes. Leave on for 20 minutes before rinsing and washing your hair.
Safety First: How to Patch Test Your DIY Hair Mask
Even with natural ingredients, allergic reactions are possible. Before applying any new mixture to your entire head, it is crucial to perform a patch test. This is a non-negotiable step for safe DIY beauty practices.
- Mix a small amount of your intended DIY hair mask.
- Apply a dab of the mixture to a discreet area of skin, such as behind your ear or on your inner elbow.
- Wait 24 hours. Do not wash the area during this time.
- Check for a reaction. If you experience any redness, itching, swelling, or irritation, wash the area immediately and do not use the mask on your scalp or hair. If no reaction occurs, you are good to go! For more information on safety, you can refer to guidelines from official sources like the FDA on DIY safety.
Troubleshooting Common Results and FAQs
Frequently Asked Questions
- Why does my hair feel greasy after a DIY hair mask?
This is usually caused by one of two things: you used too much oil for your hair type, or you didn’t rinse thoroughly enough. It can take two rounds of shampoo to get all the residue out, especially with heavier oils. Start with less oil next time.
- My hair feels dry and brittle. What happened?
This is the classic sign of protein overload. You may have used a protein-heavy mask when your hair really just needed moisture. Counteract this by using a moisturizing mask (with ingredients like aloe, banana, or honey) for your next few treatments and limit protein masks to once a month.
- How often should I use a homemade hair mask?
This depends on your hair’s condition. For most hair types, once a week is a great routine. If your hair is extremely damaged, you might start with twice a week. If your hair is relatively healthy, once every two weeks might be enough.
- Can I store my leftover DIY hair mask?
Because you are using fresh, preservative-free ingredients, it is best to make a new batch for each use. Fresh food ingredients can spoil quickly and grow bacteria, which you do not want to put on your scalp.
Sources and Further Reading
For those interested in delving deeper into the science and best practices of hair care, these resources offer valuable information from trusted authorities.
- For scientific studies on nutrients and hair health: Hair Nutrition Research
- For general advice on hair care from a health perspective: Natural Hair Care Information
- For a global health perspective on traditional and home remedies: Home remedies for hair growth