Welcome to the ultimate guide to the DIY hair mask for 2025 and beyond. If you are looking for a natural, affordable, and effective way to nourish your locks, you have come to the right place. Forget expensive salon treatments; your kitchen holds the secret to healthier, shinier hair. This guide will walk you through everything you need to know, from understanding your hair type to whipping up the perfect homemade hair mask with ingredients you already own.
Why make your own hair mask at home
Creating a DIY hair mask is more than just a fun weekend project. It is a conscious choice for your hair and the planet. Here is why so many people are turning to their pantries for haircare solutions:
- Complete Control Over Ingredients: When you make it yourself, you know exactly what is going on your hair and scalp. You can avoid harsh chemicals, synthetic fragrances, and preservatives often found in commercial products.
- Cost-Effective: Salon-quality results do not need to come with a high price tag. A homemade hair mask uses affordable, everyday ingredients like bananas, honey, and olive oil, saving you money.
- Eco-Friendly: By using ingredients you already have, you reduce packaging waste and the carbon footprint associated with manufacturing and shipping commercial products.
- Perfectly Customizable: Your hair is unique. A DIY hair mask can be tailored to meet your exact needs, whether you have oily roots, dry ends, or color-treated damage.
How hair masks work in three simple steps
Ever wonder what is happening when you let a mask sit on your hair? It is a simple but powerful process that delivers deep nourishment where it is needed most.
Step 1: Penetration
The base ingredients of your mask, usually containing water and oils, work to gently lift the hair’s outer layer, known as the cuticle. This allows the beneficial nutrients to get inside the hair shaft.
Step 2: Nourishment
Once the cuticle is open, the active ingredients get to work. Fatty acids from oils moisturize, proteins from eggs or yogurt help repair damage, and vitamins and antioxidants from fruits provide essential nourishment to strengthen and protect the hair from within.
Step 3: Sealing
After rinsing, the hair cuticle smooths back down, sealing in the moisture and nutrients. This is what gives your hair that silky, shiny, and frizz-free finish. It creates a protective barrier that leaves hair feeling soft and revitalized.
Quick primer on hair types and needs
Knowing your hair type is the first step to creating the perfect DIY hair mask. Each type has different needs, and the right ingredients will make all the difference.
- Fine or Oily Hair: This hair type gets weighed down easily and can be prone to greasy roots. It needs lightweight hydration and clarifying ingredients that cleanse without stripping natural oils. Avoid heavy butters and oils.
- Dry or Curly Hair: Curls and dry hair crave moisture. The main goal is to hydrate, reduce frizz, and enhance definition. Rich oils, butters, and humectants (moisture-attracting ingredients) are your best friends.
- Color-Treated or Damaged Hair: Chemical treatments, heat styling, and environmental factors can weaken the hair’s structure. This hair type needs a balance of protein to rebuild strength and intense moisture to restore softness and elasticity.
- Sensitive Scalp: If your scalp is easily irritated, you need gentle, soothing ingredients. Focus on anti-inflammatory and calming components like oatmeal and chamomile, and always perform a patch test before a full application.
Key ingredients and what they do
Your kitchen is a treasure trove of powerful haircare ingredients. Understanding what each one does will help you mix and match like a pro.
Oils and fats: benefits and best choices
Oils are the foundation of most moisturizing hair masks. They seal the hair cuticle to lock in moisture, provide essential fatty acids, and add incredible shine.
- Coconut Oil: Its small molecular structure allows it to penetrate the hair shaft for deep conditioning. Best for most hair types, but can be too heavy for very fine hair.
- Olive Oil: Rich in vitamins A and E, it is a fantastic emollient that smooths and softens dry, thick, or coarse hair.
- Avocado Oil: Packed with nutrients and monounsaturated fats, it is great for moisturizing and strengthening damaged hair.
- Jojoba Oil: Its composition is very similar to our scalp’s natural sebum, making it an excellent lightweight choice for fine or oily hair types.
Proteins and eggs: when to use them
Our hair is primarily made of a protein called keratin. When hair is damaged, it loses protein, leading to weakness and breakage. Protein treatments help fill in these gaps.
- Eggs: The yolk is rich in fats and vitamins, while the white is packed with protein. An egg-based DIY hair mask is a classic treatment for strengthening damaged hair.
- Greek Yogurt: Contains lactic acid to cleanse the scalp and proteins to nourish and strengthen strands.
A word of caution: Too much protein can make hair stiff and brittle, a condition known as ‘protein overload.’ Use protein-based masks sparingly, about once or twice a month, to maintain a healthy moisture-protein balance.
Humectants and hydrating ingredients
Humectants are ingredients that pull moisture from the air into your hair, providing a serious hydration boost.
- Honey: A natural humectant and emollient, honey attracts moisture and helps to smooth the hair follicle, adding shine.
- Agave Nectar: Similar to honey, it is a great vegan alternative for drawing in hydration.
- Aloe Vera Gel: Packed with vitamins and enzymes, it hydrates the hair, soothes the scalp, and can help reduce dandruff.
- Banana: Rich in potassium and natural oils, bananas improve elasticity, prevent split ends, and moisturize the scalp.
Four pantry friendly DIY hair mask recipes
Ready to get mixing? Here are four simple, effective recipes customized for different hair types. Always use fresh ingredients and mix in a clean, non-metallic bowl.
Fine or oily hair recipe
This clarifying mask absorbs excess oil and cleanses the scalp without weighing down your hair.
- Ingredients: 2 tablespoons bentonite or kaolin clay, 3 tablespoons aloe vera gel, 1 teaspoon jojoba oil, 1 tablespoon apple cider vinegar.
- Instructions:
- In a non-metallic bowl, mix the clay and aloe vera gel into a smooth paste.
- Stir in the jojoba oil and apple cider vinegar until well combined.
- Apply to your scalp and hair, focusing on the roots. Leave on for 15-20 minutes. Do not let it dry completely. Rinse thoroughly.
Dry or curly hair recipe
This ultra-hydrating mask will quench thirsty strands, fight frizz, and enhance curl definition.
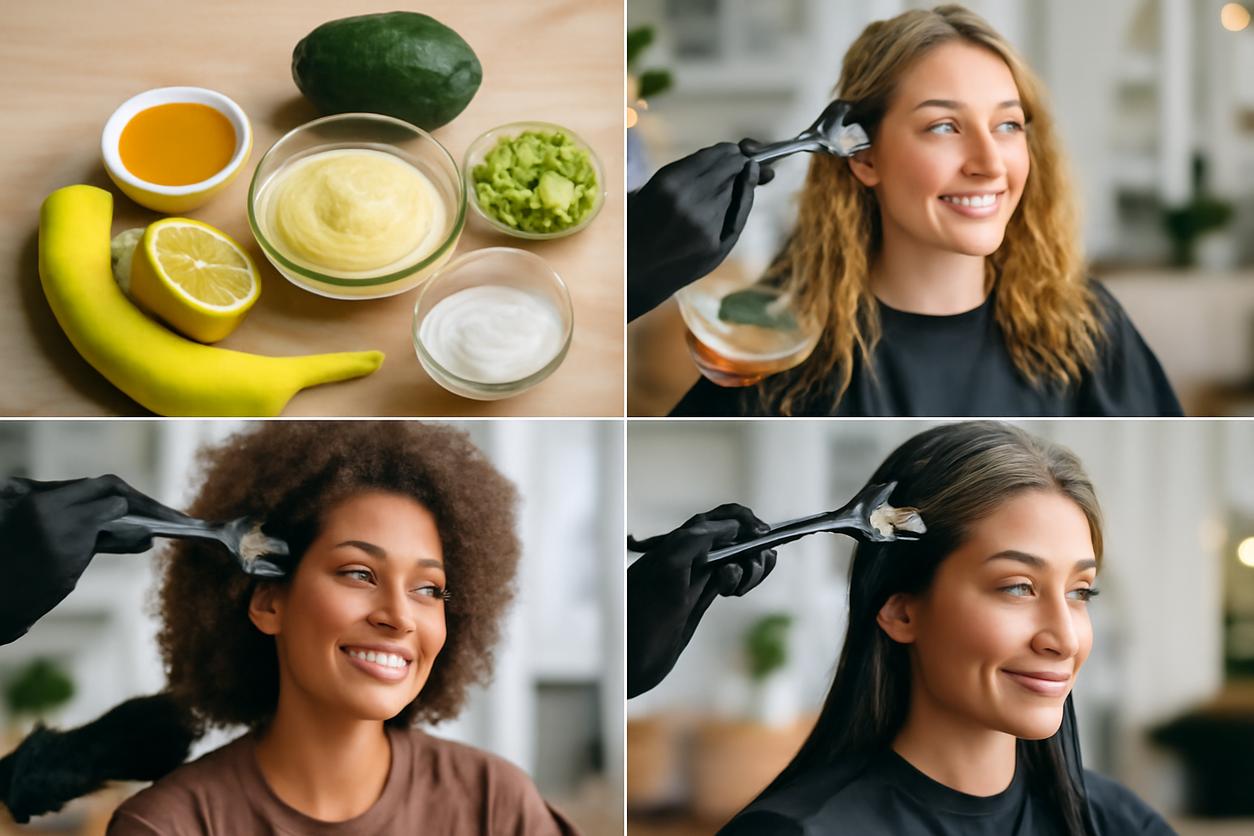
- Ingredients: 1/2 ripe avocado, 1 ripe banana, 1 tablespoon olive oil, 1 tablespoon honey.
- Instructions:
- Mash the avocado and banana together until completely smooth and free of lumps. A blender works best for this.
- Stir in the olive oil and honey until you have a creamy consistency.
- Apply generously to your hair, from roots to ends. Leave on for 30 minutes, then rinse.
Color treated or damaged hair recipe
This strengthening and repairing mask helps to restore protein and moisture to weak, brittle hair.
- Ingredients: 1 egg, 2 tablespoons Greek yogurt, 1 tablespoon coconut oil (melted).
- Instructions:
- Whisk the egg in a bowl until frothy.
- Stir in the Greek yogurt and melted coconut oil. Mix well.
- Apply to damp hair, paying special attention to the ends. Leave on for 20-30 minutes. Important: Rinse with cool or lukewarm water to avoid cooking the egg in your hair.
Sensitive scalp and allergy friendly recipe
A gentle, soothing mask to calm irritation and provide mild hydration without common allergens.
- Ingredients: 1/2 cup cooked oatmeal (cooled), 1 ripe banana, 1 tablespoon sunflower oil.
- Instructions:
- Blend the cooked, cooled oatmeal with the banana and sunflower oil until you get a smooth, spreadable paste.
- Gently massage into the scalp and apply through the lengths of your hair.
- Leave on for 20-30 minutes. Rinse gently but thoroughly.
Ingredient swaps and allergy safe alternatives
One of the best things about a DIY hair mask is its flexibility. If you have allergies or are missing an ingredient, try these simple swaps.
| Original Ingredient | Allergy-Safe or Vegan Alternative |
|---|---|
| Nut Oils (Almond, Argan) | Seed Oils (Sunflower, Grapeseed, Jojoba) |
| Honey | Agave Nectar or Maple Syrup |
| Egg (for protein) | Greek Yogurt (non-vegan) or mashed Avocado and Banana blend |
| Greek Yogurt (dairy) | Full-fat Coconut Cream or Coconut Yogurt |
How to apply, time and rinse techniques
Getting the application right ensures you get the maximum benefit from your homemade hair mask.
- Start Clean: Apply your mask to freshly washed, towel-dried (damp) hair. This allows for better absorption.
- Section Your Hair: Divide your hair into 4-6 sections. This makes it easier to apply the mask evenly and ensure every strand is coated.
- Apply: Use your fingers or a brush to apply the mask. For oily hair, focus on the mid-lengths and ends. For dry or damaged hair, apply from root to tip.
- Cover and Wait: Wrap your hair in a shower cap or warm towel. This traps heat, which helps open the hair cuticle for deeper penetration. Leave the mask on for 20-30 minutes.
- Rinse Thoroughly: Rinse the mask out completely using lukewarm water. For protein masks, use cool water. You may need to rinse for several minutes to remove all residue. Follow with your regular conditioner to seal the cuticle.
Storage, shelf life and hygiene tips
Because your DIY hair mask is made from fresh ingredients, it is highly perishable. Proper hygiene is essential to prevent bacteria growth.
- Make Fresh, Use Fresh: The best practice is to make only enough for a single application and use it immediately.
- Short-Term Storage: If you have leftovers, store them in an airtight container in the refrigerator and use them within 24 hours. Discard if it smells off or changes color.
- Cleanliness is Key: Always use clean bowls, utensils, and blenders when preparing your mask to avoid introducing bacteria.
Troubleshooting common outcomes
Sometimes your first attempt at a DIY hair mask might not go as planned. Here is how to fix common issues.
- My hair feels greasy or weighed down. This usually means you used an oil that was too heavy for your hair type, used too much oil, or did not rinse thoroughly. Try a lighter oil next time (like jojoba) or add a teaspoon of apple cider vinegar to your final rinse water as a clarifying step.
- My hair feels dry and brittle. This is a classic sign of protein overload. You have used a protein-rich mask (like egg or yogurt) too frequently. Give your hair a break from protein for a few weeks and focus on moisture-only masks with ingredients like avocado, banana, and aloe vera.
- I did not see any difference. Healthy hair takes time. Consistency is key. Use a mask weekly to see cumulative benefits. You may also need to experiment with different recipes to find the perfect match for your hair’s specific needs.
Frequently asked questions and quick answers
How often should I use a DIY hair mask?
For most hair types, once a week is ideal. For very damaged hair, you might start with twice a week, while for fine hair, once every two weeks may be sufficient.
Can I sleep with a DIY hair mask in my hair?
It is generally not recommended. Fresh ingredients can spoil or cause scalp irritation if left on for too long. 20-40 minutes is the optimal time for most masks.
Do I apply the mask to wet or dry hair?
Clean, damp (towel-dried) hair is best. It is porous enough to absorb the nutrients without being so wet that the mask drips off.
Do I need to shampoo after using a mask?
No. You should shampoo *before* applying the mask to remove product buildup. After rinsing the mask out, you can apply conditioner to seal the hair cuticle, but you do not need to shampoo again.
Further resources and Rich Hair UK references
Your journey to healthy hair is an ongoing process of learning and care. For more tips on hair health, styling, and product advice, explore the resources at Rich Hair UK.
If you are experiencing persistent hair or scalp issues such as significant hair loss or severe irritation, it is always best to consult a healthcare professional. You can find reliable information from trusted sources:
- For general information on hair health and common problems, visit the NHS hair health page.
- For expert advice on skin and scalp conditions, refer to the British Association of Dermatologists.
