The Ultimate Guide to Crafting the Perfect DIY Hair Mask for Your Hair Type
Table of Contents
- Introduction: Why Craft a Custom DIY Hair Mask at Home?
- How Hair Structure and Porosity Determine Your Perfect Mask
- Quick Hair Assessment: Easy Tests to Find Your Type
- Key Ingredients and What They Do (Oils, Proteins, Humectants)
- Deep Nourishing DIY Hair Mask for Dry, Damaged Hair
- Clarifying DIY Hair Mask for Oily or Buildup-Prone Scalps
- Curl-Loving Moisturizing DIY Hair Mask for Textured Hair
- Protein Boost DIY Hair Mask for Weak or Brittle Strands
- Step-by-Step Application and Timing Guide
- Rinse and Follow-Up Care to Preserve Results
- Frequency, Seasonal Tweaks, and How to Track Progress
- Ingredient Swaps and Allergy-Safe Alternatives
- Safety Checklist and Patch Testing Instructions
- Troubleshooting Common DIY Hair Mask Issues
- FAQ: Quick Answers to Common Questions
- Suggested Reading and Resources
- Closing Summary and a Simple Routine Example
Introduction: Why Craft a Custom DIY Hair Mask at Home?
Welcome to the world of personalized hair care! If you’re tired of store-bought treatments that promise the world but deliver lackluster results, you’ve come to the right place. Creating a DIY hair mask isn’t just a fun, budget-friendly activity; it’s the ultimate way to give your hair exactly what it needs, using fresh, natural ingredients from your own pantry. Unlike one-size-fits-all products, a homemade hair mask can be tailored to your unique hair structure, concerns, and goals—whether that’s taming frizz, boosting shine, or repairing damage.
This guide moves beyond generic recipes. We’ll explore the “why” behind the “what,” starting with the most crucial factor in your hair’s health: porosity. Understanding this one concept will revolutionize how you choose ingredients and empower you to become your own hair care mixologist.
How Hair Structure and Porosity Determine Your Perfect Mask
Before you start mashing avocados, let’s talk science, but make it simple. Your hair strand is covered in tiny overlapping scales called the cuticle. Hair porosity refers to how open or closed these scales are, which determines how well your hair can absorb and retain moisture. It’s the single most important factor in crafting an effective DIY hair mask.
- Low Porosity: The cuticles are tightly packed and flat. This hair type is often shiny and healthy-looking but resists moisture. Water and products tend to sit on top rather than soaking in. It’s prone to buildup because products don’t absorb easily. The goal for this hair type is to use gentle heat and lightweight ingredients to help the cuticle lift and let moisture in.
- Medium (Normal) Porosity: The cuticles are slightly raised, allowing moisture to enter and be retained easily. This hair type holds styles well and responds favorably to most treatments. It’s the easiest to care for, requiring a balance of moisture and protein without going overboard.
- High Porosity: The cuticles are wide open, often due to damage from heat styling, chemical treatments, or genetics. This hair type absorbs moisture like a sponge but loses it just as quickly, leading to frizz, dryness, and breakage. The goal is to fill the gaps in the cuticle with proteins and seal in moisture with heavier oils and butters.
Quick Hair Assessment: Easy Tests to Find Your Type
Not sure about your hair’s porosity? Try these simple tests with clean, product-free hair.
The Float Test
Pluck a clean, dry strand of hair and drop it into a glass of room-temperature water. Watch what happens for a few minutes:
- It floats on top: You likely have low porosity hair.
- It sinks slowly or hovers in the middle: You likely have medium porosity hair.
- It sinks quickly to the bottom: You likely have high porosity hair.
The Spray Bottle Test
Mist a section of your dry, clean hair with water from a spray bottle. Observe the water:
- Beads up on the surface: This indicates low porosity.
- Absorbs after a minute or two: This suggests medium porosity.
- Sucks up the water instantly: This is a sign of high porosity.
Key Ingredients and What They Do (Oils, Proteins, Humectants)
Your kitchen is a treasure trove of hair-loving ingredients. Understanding their roles is key to customizing your DIY hair mask recipes.
| Category | Examples | What It Does | Best For |
|---|---|---|---|
| Moisturizers (Oils and Butters) | Coconut oil, olive oil, avocado, shea butter, jojoba oil | Seals the hair cuticle to lock in moisture, adds shine, and reduces frizz. | Heavier oils (coconut, shea) for high porosity; lighter oils (jojoba, argan) for low porosity. |
| Humectants | Honey, agave nectar, aloe vera, glycerin | Attracts and binds water from the environment into your hair, providing hydration. | All hair types, but especially beneficial for dry or textured hair. Use sparingly in very dry or very humid climates. |
| Proteins | Egg, Greek yogurt, gelatin | Temporarily fills gaps in the hair cuticle, strengthening weak or damaged strands and reducing breakage. | High porosity and chemically treated hair. Use with caution on low porosity hair, as it can cause stiffness (protein overload). |
| Clarifiers | Apple cider vinegar (ACV), bentonite clay, lemon juice | Removes product buildup, hard water minerals, and excess oil from the scalp and hair. | Oily hair, low porosity hair prone to buildup, and before a deep conditioning treatment. |
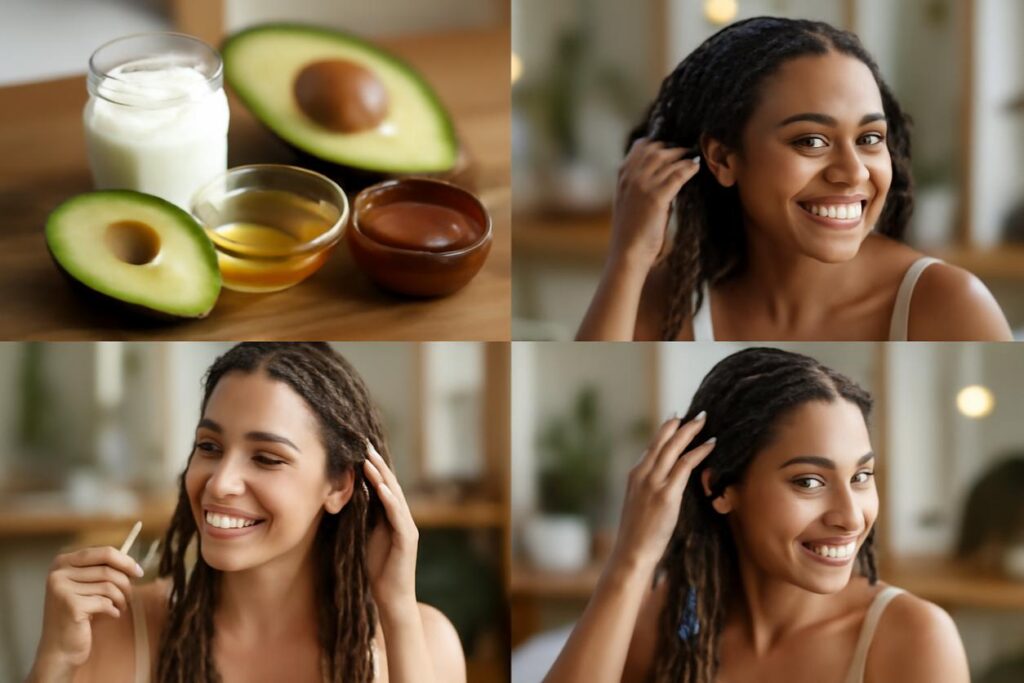
Deep Nourishing DIY Hair Mask for Dry, Damaged Hair
This mask is a savior for high porosity hair that feels like straw. It delivers intense moisture and helps seal the cuticle to prevent hydration from escaping.
Ingredients:
- 1/2 ripe avocado
- 1 tablespoon olive oil or coconut oil
- 1 tablespoon honey
Instructions:
- Mash the avocado in a bowl until it’s completely smooth and free of lumps.
- Stir in the olive oil and honey until you have a creamy, consistent paste.
- Adjust the consistency with more oil if it’s too thick.
Why it works: Avocado and olive oil are rich in fatty acids that penetrate and seal the hair shaft, while honey acts as a natural humectant, drawing moisture into your thirsty strands. This is an excellent nourishing DIY hair mask for recovery.
Clarifying DIY Hair Mask for Oily or Buildup-Prone Scalps
Perfect for low porosity hair or anyone experiencing limp, greasy strands. This mask gently removes buildup without stripping natural oils.
Ingredients:
- 2 tablespoons bentonite clay or rhassoul clay
- 1 tablespoon apple cider vinegar (ACV)
- 3-4 tablespoons water or aloe vera juice
Instructions:
- In a non-metal bowl (clay reacts with metal), combine the bentonite clay and ACV. It will fizz!
- Slowly add water or aloe vera juice, stirring with a non-metal utensil until you get a smooth, yogurt-like consistency.
- Apply immediately to the scalp and hair.
Why it works: Bentonite clay has a negative charge that attracts the positively charged toxins and buildup in your hair, lifting them away. ACV helps restore the scalp’s pH balance and closes the hair cuticle for extra shine.
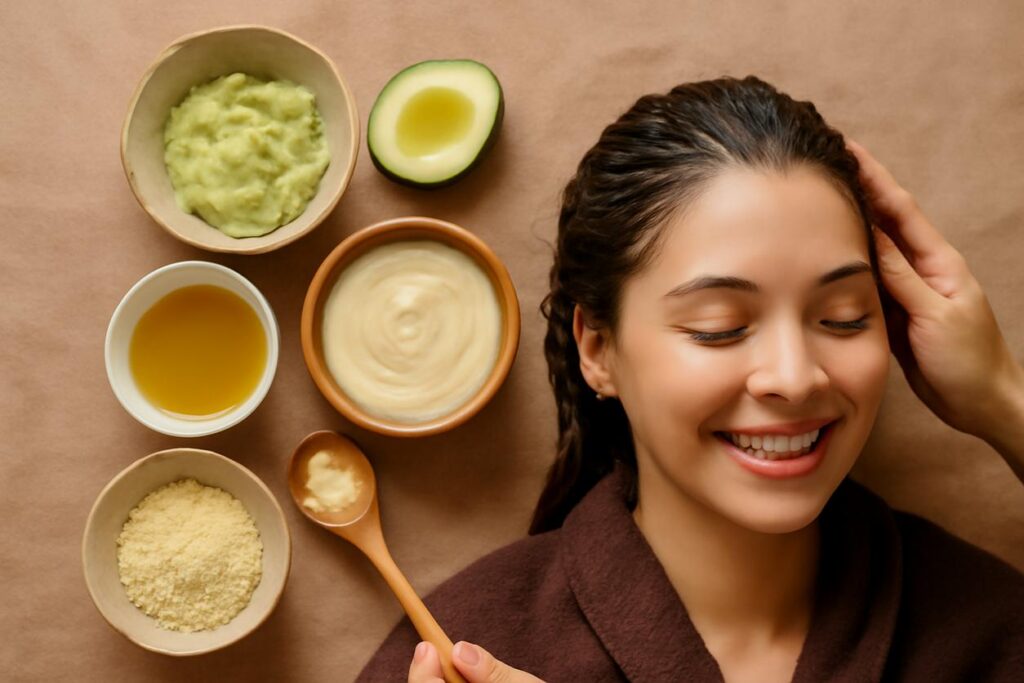
Curl-Loving Moisturizing DIY Hair Mask for Textured Hair
Textured, curly, and coily hair craves moisture. This mask provides hydration, slip for detangling, and encourages curl definition.
Ingredients:
- 1/2 cup full-fat coconut milk or plain yogurt
- 2 tablespoons aloe vera gel
- 1 tablespoon jojoba or sweet almond oil
Instructions:
- Whisk all ingredients together in a bowl until smooth. The mixture should be pourable but not watery.
- For extra smoothness, you can blend the ingredients in a blender.
Why it works: Coconut milk and yogurt provide a gentle mix of protein and fat for strength and moisture. Aloe vera is a fantastic humectant, and the lightweight oil seals it all in without weighing down your beautiful curls. This hydrating DIY hair mask is a game-changer for definition.
Protein Boost DIY Hair Mask for Weak or Brittle Strands
If your hair is mushy when wet, overly elastic, or breaking easily (classic signs of high porosity needing strength), a protein treatment is in order.
Ingredients:
- 1 egg (use the whole egg for normal hair, just the yolk for dry hair, or just the white for oily hair)
- 2 tablespoons plain Greek yogurt
Instructions:
- Whisk the egg and Greek yogurt together until you have a uniform, creamy mixture.
- Do not apply heat with this mask on your hair, as the egg can cook!
Why it works: Eggs and yogurt are packed with protein that temporarily patches the weak spots in your hair’s cuticle, adding structure and resilience. Important: Protein treatments should be used sparingly (once every 4-6 weeks) to avoid protein overload, which can make hair stiff and brittle.
Step-by-Step Application and Timing Guide
Getting the most from your DIY hair mask is all in the application.
- Prep: Start with damp, towel-dried hair. This helps the mask spread evenly. For low porosity hair, using slightly warm water to dampen your hair can help open the cuticle.
- Section: Divide your hair into 4-6 manageable sections. This ensures every strand gets coated.
- Apply: Using your fingers or a brush, apply the mask from roots to ends, focusing on the areas that need it most (e.g., dry ends or an oily scalp).
- Massage: Gently massage your scalp for a minute to stimulate blood flow.
- Cover and Wait: Pile your hair on top of your head and cover it with a shower cap or plastic wrap. This traps heat, which helps the ingredients penetrate more effectively. Leave the mask on for 20-30 minutes. Do not exceed 15 minutes for protein-heavy or clay-based masks.
Rinse and Follow-Up Care to Preserve Results
Rinsing properly is crucial to avoid greasy or stiff results.
- Rinse Thoroughly: Use lukewarm water to rinse the mask out completely. This may take a few minutes, especially with thicker, oil-based masks.
- Cool Rinse Finale: Finish with a quick blast of cool water to help seal the hair cuticle, locking in the benefits and boosting shine.
- Follow Up: For moisturizing masks, you may be able to skip your regular conditioner. For protein or clay masks, always follow up with a moisturizing conditioner to restore softness and balance.
- Style Gently: Avoid high-heat styling immediately after a treatment to let your hair enjoy the benefits.
Frequency, Seasonal Tweaks, and How to Track Progress
How often you use a DIY hair mask depends on your hair’s needs.
- For dry or damaged hair: Once a week.
- For normal or oily hair: Once every two weeks.
- For protein masks: Once every 4-6 weeks.
Pay attention to the seasons! You might need more moisturizing masks in the dry winter months and more clarifying treatments in the humid summer. Keep a small journal to track which DIY hair mask recipes you use and how your hair feels afterward. This will help you perfect your formulas over time.
Ingredient Swaps and Allergy-Safe Alternatives
The beauty of a homemade hair mask is its flexibility. Don’t have an ingredient? No problem.
- No Avocado? Use a ripe banana (mashed well!) for moisture and potassium.
- No Olive Oil? Any carrier oil like grapeseed, sweet almond, or jojoba oil will work.
- Nut Allergy? Swap almond oil for sunflower or grapeseed oil.
- Vegan? Use agave instead of honey, and full-fat coconut cream instead of yogurt or egg.
- No ACV? A squeeze of fresh lemon juice diluted in water can provide a similar clarifying effect.
Safety Checklist and Patch Testing Instructions
Natural doesn’t always mean non-reactive. Always prioritize safety.
- Patch Test: Before applying a new ingredient or mixture to your entire head, apply a small amount to a discreet area of skin, like behind your ear or on your inner elbow. Wait 24 hours to check for any signs of irritation, redness, or itching.
- Fresh is Best: Always make your DIY hair mask fresh for each use. Without preservatives, these mixtures can grow bacteria quickly. Discard any leftovers.
- Avoid Metal: When working with ingredients like bentonite clay, always use glass, plastic, or wooden bowls and utensils to prevent a chemical reaction that deactivates the clay.
Troubleshooting Common DIY Hair Mask Issues
My hair feels greasy or weighed down.
Fix: You may have used too much oil for your hair type, or you didn’t rinse thoroughly enough. Next time, reduce the amount of oil by half. Ensure you rinse with lukewarm water until your hair feels clean.
My hair feels dry or straw-like after the mask.
Fix: This is a common sign of “protein overload.” You may have used a protein-rich mask (like egg or yogurt) when your hair needed moisture instead, or you left it on for too long. Counteract this by using a moisturizing mask (like the avocado recipe) next time and reserve protein treatments for monthly use.
The mask was clumpy and hard to rinse out.
Fix: Your ingredients weren’t blended smoothly enough. For ingredients like avocado, banana, or oatmeal, using a blender is the best way to achieve a silky-smooth texture that rinses out easily.
FAQ: Quick Answers to Common Questions
Can I apply a DIY hair mask to dry hair?
You can, but applying to damp hair generally allows for more even distribution and better absorption of water-based ingredients like aloe and honey.
Can I sleep with a hair mask on?
It’s generally not recommended for homemade masks. Leaving ingredients, especially protein or acidic ones, on for too long can cause damage or irritation. 20-30 minutes is the sweet spot.
Do I need to shampoo after a DIY hair mask?
It depends on the mask. If you use a heavy oil mask, you may need a gentle shampoo to remove the excess. For most others, a thorough rinse followed by conditioner is sufficient. Always apply your mask to clean hair for best results.
Suggested Reading and Resources
Deepening your understanding of hair science can take your care routine to the next level. For more in-depth information on hair health, structure, and professional insights, exploring resources like Rich Hair UK can provide valuable context for your DIY journey in 2025 and beyond.
Closing Summary and a Simple Routine Example
Crafting the perfect DIY hair mask is a journey of discovery. By understanding your hair’s porosity and listening to its needs, you can move beyond generic recipes and create truly personalized treatments that deliver visible results. Remember the core principles: low porosity hair needs lightweight moisture and gentle heat, while high porosity hair needs protein and heavier sealants.
A Simple Starter Routine:
- Assess: Use the float test to determine your hair porosity.
- Select a Recipe: Choose one of the recipes above that best matches your hair type.
- Treat: Apply your fresh DIY hair mask once a week.
- Track: Note how your hair feels. Is it softer? Shinier? Stronger?
- Adjust: Based on your results, fine-tune your ingredients for the next application.
Happy mixing! Your journey to healthier, happier hair is just a few pantry staples away.