- Introduction — why make hair masks at home
- How homemade masks affect hair structure
- Safety first: allergies, patch testing and hygiene
- Core ingredients and their functions
- Simple recipes by hair goal and type
- Step by step application and timing
- How often to use masks and how to layer with other care
- Storage, shelf life and safe disposal
- Troubleshooting common issues and adjustments
- Quick FAQ
- Wrap up and suggested weekly routines
Introduction — why make hair masks at home
Tired of browsing endless aisles of hair products with complicated ingredient lists and high price tags? You’re not alone. The journey to healthy, vibrant hair doesn’t have to be expensive or confusing. The secret might just be hiding in your own kitchen. Creating a DIY hair mask is an empowering, cost-effective, and incredibly beneficial way to give your hair the specific nourishment it craves. By making your own treatments, you gain complete control over what you put on your hair, ensuring every ingredient is fresh, natural, and tailored to your unique needs. Whether your hair is dry and brittle, fine and flat, or recovering from chemical treatments, there’s a simple homemade solution waiting for you. This guide will walk you through everything you need to know to become a confident creator of your own perfect DIY hair mask.
How homemade masks affect hair structure
To understand why a DIY hair mask can be so effective, it helps to know a little about your hair’s structure. Each strand of hair is composed of three main layers: the medulla (the innermost core), the cortex (the middle layer that provides strength and color), and the cuticle (the outermost protective layer, made of overlapping scales). When hair is healthy, these cuticle scales lie flat, giving hair a smooth, shiny appearance. When hair is damaged, these scales lift, leading to frizz, dullness, and tangles. The primary goal of a hair mask is to penetrate this outer cuticle layer to deliver concentrated nutrients, moisture, and proteins directly to the cortex. For a deeper dive into the science of hair, resources like Rich Hair UK offer excellent explanations. The right ingredients can temporarily fill in gaps in the cuticle, smooth it down, and deeply hydrate the inner structure, leading to hair that is visibly healthier, stronger, and more manageable.
Understanding hair porosity and how it guides ingredient choice
One of the most crucial factors in crafting an effective DIY hair mask is understanding your hair’s porosity. Porosity refers to your hair’s ability to absorb and retain moisture, and it’s largely determined by the state of your hair cuticle. Knowing your porosity level allows you to choose ingredients that will work with your hair, not against it.
- Low Porosity: The cuticles are tightly packed and lie flat. This makes it difficult for moisture to get in, but also difficult for it to get out. Hair can be prone to product buildup because treatments tend to sit on the surface.
- Medium Porosity: The cuticles are looser, allowing moisture to penetrate easily and be retained well. This is often considered the “normal” or ideal porosity.
- High Porosity: The cuticles have gaps or holes and are lifted, often due to damage from heat styling or chemical treatments. This hair absorbs moisture quickly but also loses it just as fast, leading to frizz and dryness.
A simple way to test your porosity is the float test. Drop a clean, dry strand of hair into a glass of water. If it floats, you likely have low porosity. If it sinks slowly, you have medium porosity. If it sinks quickly, you have high porosity.
Here’s how to choose ingredients based on this knowledge:
- For Low Porosity Hair: Focus on lightweight, penetrating ingredients. Use humectants like aloe vera and glycerin, and lighter oils like argan or grapeseed oil. Applying your DIY hair mask with gentle heat (like wrapping your hair in a warm towel) can help open the cuticles for better absorption. Avoid heavy proteins and butters, which can cause buildup.
- For High Porosity Hair: Your hair needs help sealing in moisture. Use richer, sealing oils like olive oil and avocado oil, along with proteins like yogurt or egg to help fill the gaps in the cuticle. Aloe vera is also excellent for hydration.
Safety first: allergies, patch testing and hygiene
Before you start mixing your first DIY hair mask, safety is paramount. Just because an ingredient is natural doesn’t mean it’s right for everyone. Your skin and scalp can be sensitive, so it’s essential to take a few precautions.
- Patch Testing: Always perform a patch test before applying a new ingredient or mask all over your scalp and hair. Apply a small amount of the mixture to a discreet area of skin, like behind your ear or on your inner elbow. Wait 24 hours to see if any irritation, redness, or itching occurs.
- Allergies: If you are allergic to a food, do not put it on your hair or scalp. The potential for an allergic reaction remains, even with topical application.
- Hygiene and Freshness: Always use clean bowls, utensils, and blenders when preparing your mask. Because you are using fresh, preservative-free ingredients, bacteria can grow quickly. Make your DIY hair mask fresh for each use and never use ingredients that are past their prime.
For more general guidance on hair care and addressing scalp issues, the NHS provides reliable advice on maintaining healthy hair and scalp.
Core ingredients and their functions
The beauty of a DIY hair mask lies in its simple, powerful ingredients. Understanding what each one does will help you customize recipes perfectly. Many of these ingredients have benefits supported by scientific review, as seen in research cataloged by sources like PubMed on hair nutrition.
Oils for moisture and sealing
Oils are a cornerstone of many hair masks, but they serve different purposes. It’s helpful to distinguish between moisturizing oils, which penetrate the hair shaft, and sealing oils, which coat the strand to lock moisture in.
- Moisturizing (Penetrating) Oils: These have smaller molecules that can get past the cuticle. Examples include coconut oil, olive oil, and avocado oil. They are excellent for deeply nourishing and strengthening the hair from within.
- Sealing Oils: These have larger molecules and sit on the surface of the hair, creating a barrier that prevents moisture from escaping. Examples include jojoba oil, grapeseed oil, and argan oil. They are fantastic for adding shine and reducing frizz, especially for high porosity hair.
Proteins for strength and repair
Your hair is made primarily of a protein called keratin. When hair is damaged, it loses some of this protein, creating weak spots. Protein-based ingredients in a DIY hair mask can temporarily patch these spots, adding strength and structure.
- Common Sources: Greek yogurt (rich in protein and probiotics), eggs (a complete protein), gelatin, and rice water are popular choices.
- A Word of Caution: It is possible to have too much of a good thing. “Protein overload” can make hair feel stiff, brittle, and dry. If you have low porosity hair, use protein treatments sparingly. Listen to your hair—if it starts feeling straw-like, scale back on the protein.
Humectants and hydrators
Humectants are ingredients that attract water molecules from the surrounding environment and draw them into the hair shaft, providing a boost of hydration.
- Popular Choices: Honey is a natural humectant with antibacterial properties. Aloe vera gel is incredibly hydrating and soothing for the scalp. Glycerin is another powerful humectant, though it’s best used in humid conditions, as in very dry air it can potentially draw moisture out of the hair.
Simple recipes by hair goal and type
Ready to start mixing? Here are some simple, effective recipes to begin your DIY hair mask journey. Remember to adjust quantities based on your hair length and thickness.
Deep moisturizing mask for dry hair
This mask is a superfood smoothie for parched, thirsty hair, ideal for high porosity types.
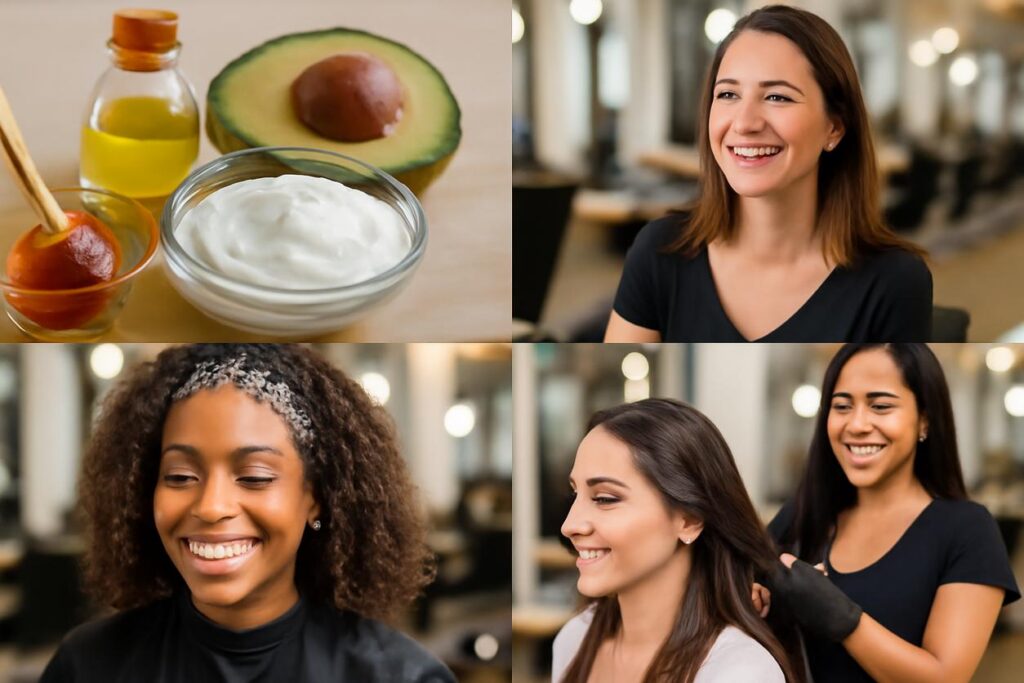
- Ingredients: 1/2 ripe avocado, 2 tablespoons olive oil, 1 tablespoon honey.
- Instructions: Mash the avocado until completely smooth to avoid chunks. Stir in the olive oil and honey until you have a creamy consistency. Apply to damp hair, focusing on the ends. Leave on for 30-45 minutes before rinsing thoroughly.
Lightweight revitalizing mask for fine hair
This recipe provides hydration without weighing down fine or low porosity hair.
- Ingredients: 1/2 cup aloe vera gel, 1 tablespoon argan or jojoba oil.
- Instructions: Whisk the aloe vera gel and argan oil together until well combined. Apply to the lengths and ends of your hair. Leave on for 20-30 minutes, then rinse. This mask is light enough that you may not even need to follow with a conditioner.
Strengthening mask for damaged or chemically treated hair
Packed with protein, this mask helps to fortify weakened, over-processed hair.
- Ingredients: 3 tablespoons plain Greek yogurt, 1 egg, 1 tablespoon coconut oil (melted).
- Instructions: Whisk the egg first, then blend in the yogurt and melted coconut oil until smooth. Apply the mixture to your hair from root to tip. Let it sit for 20 minutes. Rinse with cool water to avoid scrambling the egg.
Scalp balancing mask for oily roots
This clarifying mask helps absorb excess oil and soothe the scalp without stripping your ends.
- Ingredients: 2 tablespoons bentonite or kaolin clay, 3 tablespoons apple cider vinegar, 2-3 drops of tea tree essential oil.
- Instructions: In a non-metallic bowl, mix the clay and apple cider vinegar until it forms a paste. Add the tea tree oil. Apply this DIY hair mask primarily to your scalp and roots. Leave it on for 15-20 minutes, but do not let it dry completely. Rinse very well.
Overnight restorative mask and quick 10 minute options
Sometimes you need a deep treatment, and other times you need a quick fix.
- Overnight Mask: For an intense moisture boost, mix equal parts aloe vera gel and argan oil. Apply to your lengths, braid your hair, and cover with a silk cap or scarf. Wash it out in the morning.
- Quick 10-Minute Mask: Mash one ripe banana and mix with a tablespoon of honey. The banana provides moisture and potassium, while honey adds shine. Apply, wait 10 minutes, and rinse.
Step by step application and timing
Getting the application process right ensures you receive the maximum benefit from your homemade hair mask.
- Start with Clean, Damp Hair: It’s best to apply a DIY hair mask after shampooing, as this removes any product buildup and allows the ingredients to penetrate more effectively. Gently towel-dry your hair until it’s damp, not soaking wet.
- Section Your Hair: Divide your hair into 4-6 manageable sections. This makes it easier to apply the mask evenly and ensure every strand is coated.
- Apply the Mask: Using your fingers or a brush, apply the mask from the roots to the tips, or just to the areas that need it most (e.g., ends for dryness, scalp for oiliness).
- Cover and Wait: Once your hair is fully saturated, pile it on top of your head and cover it with a shower cap or plastic wrap. This traps your body heat, which helps open the hair cuticle for deeper penetration. Most masks work best when left on for 20-30 minutes.
- Rinse Thoroughly: Rinse the mask out with lukewarm or cool water. Hot water can strip moisture, while cool water helps to seal the cuticle. Rinse until your hair feels clean and free of residue.
How often to use masks and how to layer with other care
Consistency is key for seeing results. For most hair types, using a DIY hair mask once a week is a great starting point. If your hair is extremely dry or damaged, you might benefit from using a hydrating mask twice a week initially. Conversely, if you have fine hair or are using a heavy protein mask, once every two weeks might be sufficient.
The correct order of application in your wash day routine is also important:
Shampoo -> DIY Hair Mask -> Conditioner
You shampoo first to cleanse the hair and open the cuticles. You then apply the mask to deliver its nutrients deep into the hair shaft. You finish with a conditioner to seal the hair cuticle, locking in the benefits of the mask and leaving your hair smooth.
Storage, shelf life and safe disposal
Because your DIY hair mask is made from fresh ingredients without preservatives, it has a very short shelf life.
- Storage: It is always best to make just enough for one application. If you have leftovers, store them in an airtight container in the refrigerator.
- Shelf Life: Most fresh masks (containing avocado, banana, egg, or yogurt) should be used within 24-48 hours. After this, they can spoil and grow bacteria.
- Safe Disposal: Be mindful of your drains. Avoid pouring large amounts of oils or thick, clay-based masks down the sink, as this can cause clogs over time. Scrape excess mask into your compost or trash bin before rinsing the bowl.
Troubleshooting common issues and adjustments
Sometimes your first attempt at a DIY hair mask might not go as planned. Here’s how to fix common problems:
- My hair feels greasy or weighed down: This usually means you used too much oil or a butter that was too heavy for your hair type. Try using less oil next time or switching to a lighter one like jojoba. Ensure you are rinsing thoroughly.
- My hair feels stiff and brittle: This is a classic sign of protein overload. Your hair has too much protein and not enough moisture. Clarify your hair and follow up with a protein-free, moisture-rich mask (like the avocado and honey recipe).
- The mask was too lumpy/runny: If you’re using ingredients like avocado or banana, blend them until completely smooth to avoid rinsing out chunks later. If a mask is too runny, try adding a thickener like a spoonful of yogurt or a tiny bit of cornstarch.
Quick FAQ
Can I use a DIY hair mask on colored hair?
Yes, but be cautious with acidic ingredients like lemon juice or apple cider vinegar, which can potentially fade color over time. Always do a strand test first. Most moisturizing masks with oils, aloe, and avocado are perfectly safe for color-treated hair.
Do I apply the mask to wet or dry hair?
Damp hair is ideal. Dry hair can have product buildup that prevents absorption, while soaking wet hair can dilute the mask. Applying to clean, damp hair provides the best canvas for the ingredients to work their magic.
Can I leave a mask on overnight?
You can leave some moisturizing masks on overnight, especially those with oils and aloe vera. However, avoid leaving masks with protein (egg, yogurt) or highly acidic ingredients (ACV) on for more than an hour, as this can potentially cause damage or irritation.
Wrap up and suggested weekly routines
Embracing the world of the DIY hair mask is a rewarding step towards achieving your hair goals in 2025 and beyond. It’s a creative, natural, and highly personalized approach to hair care that puts you in control. By understanding your hair’s porosity and the function of core ingredients, you can address your hair’s specific needs, from deep hydration to protein-powered repair.
Consider establishing a simple weekly ritual, like “Self-Care Sunday,” dedicated to your hair treatment. This consistency will yield the best results. Start with one of the recipes above, observe how your hair responds, and don’t be afraid to experiment with different ingredients. The journey to healthier hair is a personal one, and with these tools, you’re well on your way to discovering the perfect natural recipe that lets your hair truly shine.