Table of Contents
- Unlock Your Hair’s Potential: The Ultimate Guide to a DIY Hair Mask
- Understanding Your Canvas: Hair Basics in Plain Terms
- Kitchen vs. Counter: The Unique Benefits of a Homemade Hair Mask
- Your Personal Hair Apothecary: How to Pick Ingredients for Your DIY Hair Mask
- Safety First: A Crucial Step Before You Mix
- The Ritual: Step-by-Step Guide to Your Perfect DIY Hair Mask
- The Finishing Touch: Rinsing and Post-Mask Care
- Eight Targeted DIY Hair Mask Recipes for Every Concern
- Perfect Timing: When and How Often to Use Your DIY Hair Mask
- Common Conundrums: Troubleshooting Your Homemade Mask
- Customizing Your Creation: Adapting Recipes for Your Hair
- Frequently Asked Questions About DIY Hair Masks
- Further Reading and Resources
Unlock Your Hair’s Potential: The Ultimate Guide to a DIY Hair Mask
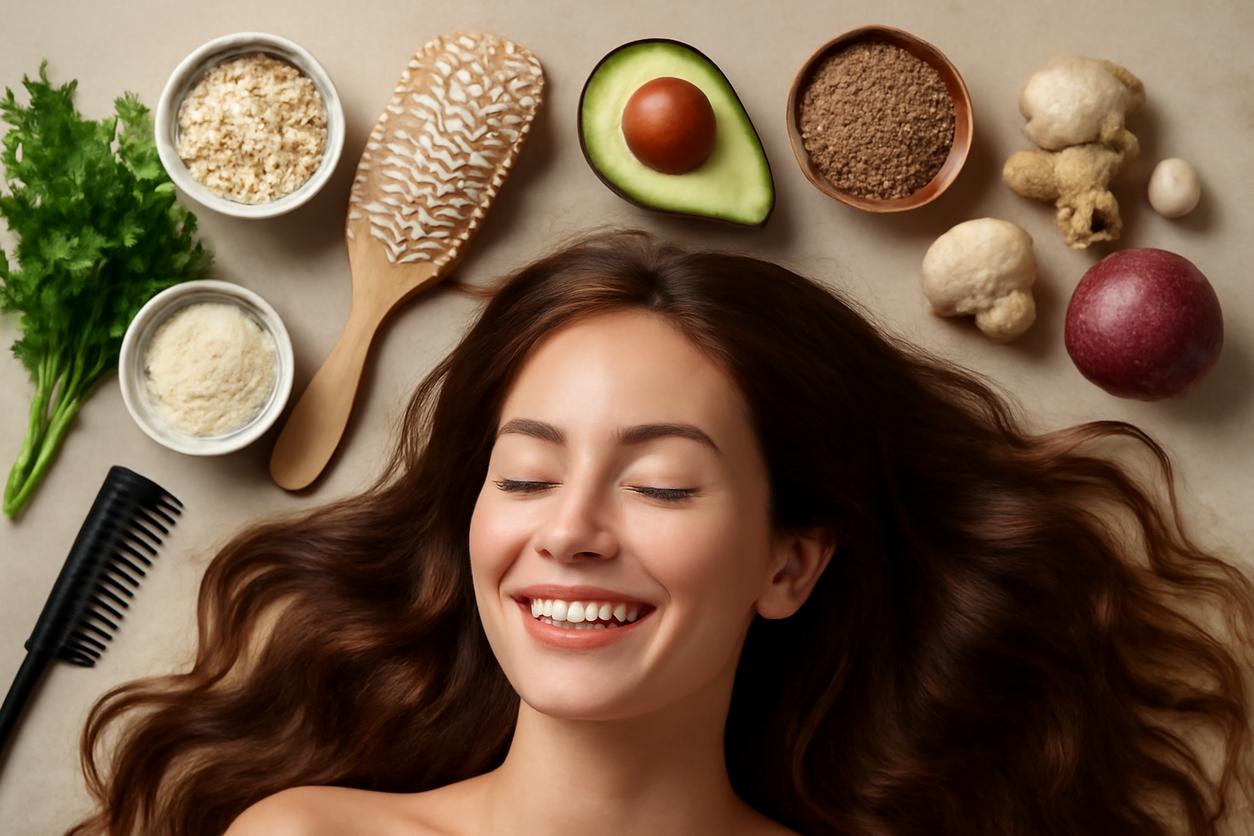
There is a unique magic in creating something with your own hands. Imagine the rich, creamy texture of a freshly mashed avocado, the sweet, golden drizzle of honey, or the cool, soothing gel of aloe vera. Now, imagine channeling that sensory experience into a potent treatment for your hair. Welcome to the world of the DIY hair mask—a simple, effective, and deeply personal way to nourish your locks from root to tip. Forget deciphering complex chemical names on store-bought products. Your kitchen already holds a treasure trove of ingredients waiting to be transformed into a luxurious, targeted treatment.
This guide is designed for beginners and at-home hair care enthusiasts who are ready to take control of their hair health. We will walk you through the simple science of your hair, help you cherry-pick the perfect ingredients for your specific needs, and provide step-by-step recipes and techniques. Get ready to turn your hair care routine into a mindful, effective, and beautifully simple ritual.
Understanding Your Canvas: Hair Basics in Plain Terms
Before you start mixing, it helps to understand what you are working with. Think of your hair not just as something to be styled, but as a living fiber with specific needs. Understanding its basic structure is the first step to choosing the right DIY hair mask ingredients.
The Structure of a Hair Strand
Each strand of hair has three main layers:
- The Cuticle: This is the outermost layer, made of overlapping scales like shingles on a roof. When the cuticles are smooth and flat, your hair looks shiny and feels soft. When they are raised due to damage or dryness, hair can appear dull and frizzy.
- The Cortex: The middle layer, which makes up most of the hair’s weight. It contains the protein (keratin) and pigment that gives your hair its strength, elasticity, and color. Damage to the cortex leads to breakage and split ends.
- The Medulla: The innermost, core layer. Its presence and size can vary, and it doesn’t play a major role in day-to-day hair care routines.
Common Hair Needs: What Is Your Hair Telling You?
Your hair communicates its needs through its texture and appearance. Frizz and dullness often signal a need for moisture to smooth the cuticle. Limpness and breakage point to a weak cortex that craves protein. An itchy scalp might be asking for soothing, anti-inflammatory ingredients. By learning to read these signals, you can create a homemade hair mask that delivers exactly what your hair is asking for.
Kitchen vs. Counter: The Unique Benefits of a Homemade Hair Mask
While commercial hair masks are convenient, crafting your own offers distinct advantages that go beyond just hair care.
- Fresh, Potent Ingredients: You are using ingredients at their peak freshness, without added preservatives, silicones, or sulfates that can cause buildup.
- Complete Customization: You have absolute control. Is your hair extra dry this week? Add more oil. Does your scalp feel sensitive? Use oatmeal. You can tailor every single batch to your hair’s current state.
- Cost-Effective: Many powerful hair-loving ingredients are already in your pantry. A single avocado or egg can form the base of a luxurious treatment for a fraction of the price of a high-end product.
- A Mindful Ritual: The act of preparing and applying your mask can be a calming, sensory experience—a moment of self-care in a busy week.
Your Personal Hair Apothecary: How to Pick Ingredients for Your DIY Hair Mask
The heart of a great DIY hair mask is choosing the right ingredients. Let’s break them down by what they do, so you can mix and match with confidence.
For Dryness and Thirst: Hydrators and Humectants
These ingredients attract and seal moisture into the hair shaft, smoothing the cuticle for softness and shine.
- Avocado: Rich in fatty acids, vitamins, and minerals. Its creamy texture coats hair beautifully, delivering deep moisture.
- Banana: Packed with potassium and natural oils, it helps improve elasticity and prevent split ends. Ensure it’s blended completely to avoid chunks.
- Honey: A natural humectant, meaning it draws moisture from the air into your hair. It’s also antibacterial, which is great for scalp health.
- Aloe Vera Gel: Incredibly hydrating and soothing. Its slick consistency provides great slip, making it easy to distribute through the hair.
- Olive or Coconut Oil: These oils penetrate the hair shaft to moisturize from within, reducing protein loss and adding softness.
For Damage and Breakage: Proteins and Strengtheners
These ingredients temporarily patch weak spots in the hair’s cortex, adding strength and structure.
- Egg: The yolk is rich in fats and vitamins, while the white is packed with protein. An excellent all-in-one treatment for strengthening.
- Greek Yogurt: Contains lactic acid to cleanse and proteins to fortify the hair. Its creamy base is easy to apply.
- Rice Water: The starchy water left after rinsing rice is rich in amino acids and inositol, a carbohydrate known to strengthen and repair hair.
For Dullness: Shine-Enhancing Ingredients
These ingredients work by smoothing the hair cuticle so it reflects more light.
- Apple Cider Vinegar (ACV): An ACV rinse after your mask can help seal the cuticle, clarifying buildup and leaving a brilliant shine. Always dilute it with water (1 part ACV to 4 parts water).
- Black Tea: Contains tannins that can enhance shine, especially for darker hair colors.
For an Unhappy Scalp: Soothers and Clarifiers
A healthy scalp is the foundation of healthy hair. These ingredients help balance and calm it.
- Oatmeal: Colloidal oatmeal is a well-known skin soother that can relieve itching and irritation.
- Tea Tree Oil: A powerful antiseptic and anti-inflammatory. Use sparingly (a few drops) mixed into a carrier oil like coconut or olive oil.
- Green Tea: Rich in antioxidants and nutrients, it can help soothe the scalp and stimulate follicles.
Safety First: A Crucial Step Before You Mix
Just because an ingredient is natural doesn’t mean it’s right for everyone. Always prioritize safety before applying a new mixture to your hair and scalp.
The Importance of a Patch Test
Before you apply any new DIY hair mask, perform a patch test. Apply a small amount of the mixture to a discreet area of skin, like behind your ear or on your inner elbow. Wait 24 hours to check for any signs of redness, itching, or irritation. If a reaction occurs, do not use the mask.
Ingredient Awareness
Be mindful of potential allergies (e.g., to nuts if using almond oil) and the potency of certain ingredients. Essential oils like tea tree or peppermint must always be diluted in a carrier oil to prevent skin irritation. Avoid using highly acidic ingredients like pure lemon juice directly on your hair, as they can be overly harsh and cause light-sensitivity.
The Ritual: Step-by-Step Guide to Your Perfect DIY Hair Mask
Applying your mask correctly ensures you get the maximum benefit from your carefully chosen ingredients.
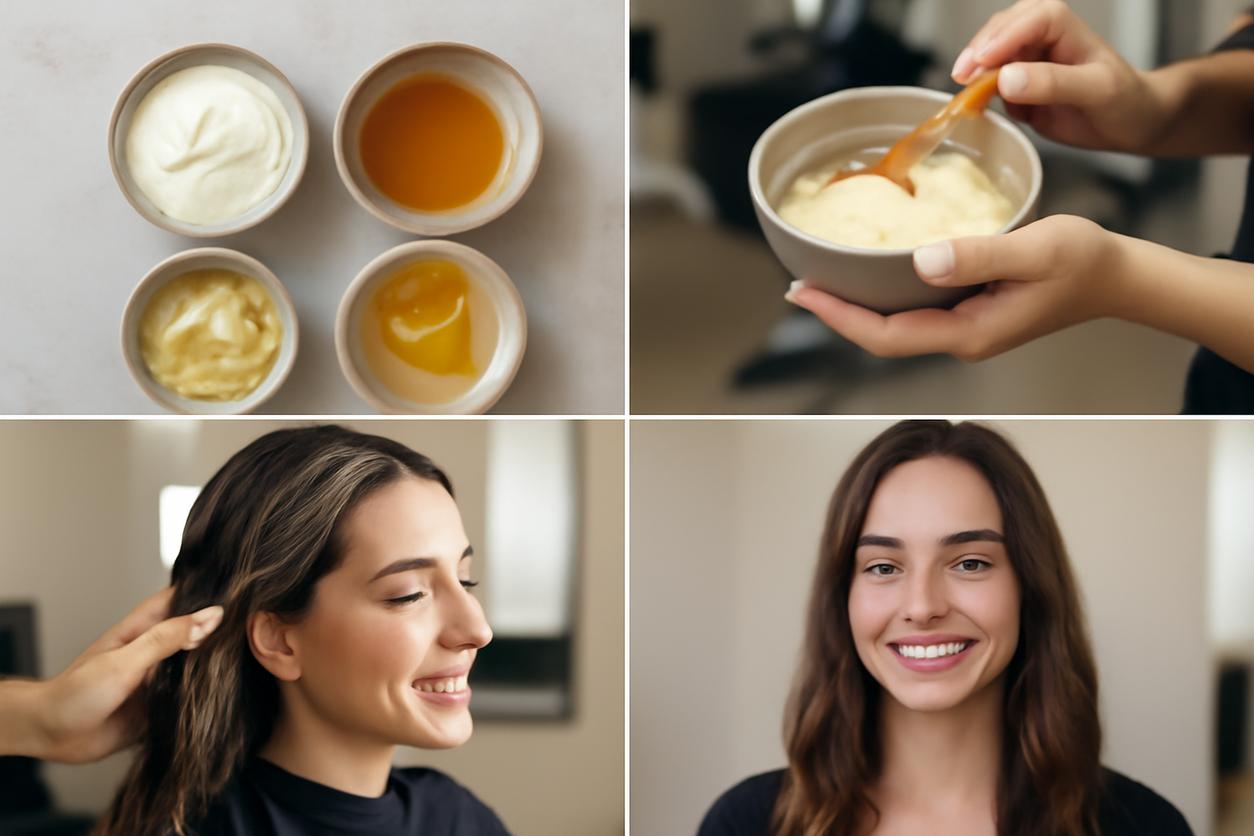
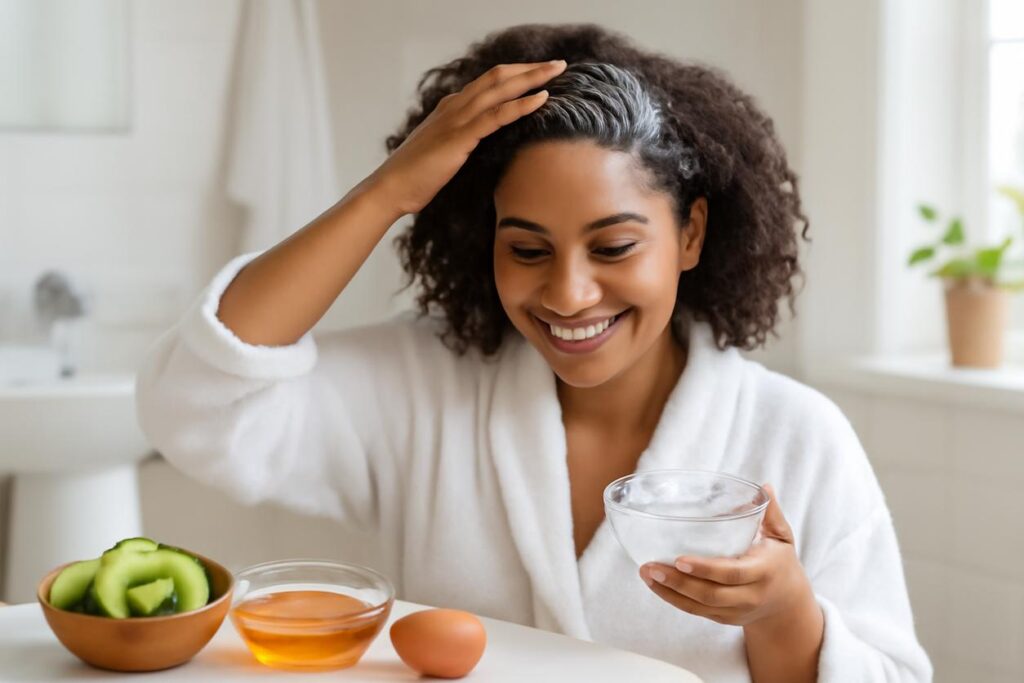
Step 1: Gather Your Tools and Ingredients
You will need a non-metallic bowl and spoon (metal can react with some ingredients), your fresh ingredients, a towel to protect your clothes, and hair clips to section your hair. It’s best to apply your mask to clean, damp hair, as this allows the ingredients to penetrate more easily.
Step 2: Mix Your Mask
Combine your ingredients in the bowl. For smooth, creamy ingredients like banana and avocado, using a blender is the best way to achieve a lump-free consistency that is easy to rinse out later. Your final mask should be the texture of a thick conditioner.
Step 3: Application
Section your hair using the clips. Starting from the bottom and working your way up, use your fingers to apply the mask generously from roots to ends. Pay special attention to the ends, which are usually the driest and most damaged part of the hair. Once your hair is fully saturated, twist it up and cover it with a shower cap or warm towel. The heat will help the ingredients penetrate more deeply. Leave the mask on for 20-30 minutes (or as specified in the recipe).
The Finishing Touch: Rinsing and Post-Mask Care
Rinsing thoroughly is key to avoiding residue and buildup. Use lukewarm water and gently massage your scalp to lift the mask away. Avoid hot water, as it can strip moisture and raise the hair cuticle. Depending on the ingredients used, you may or may not need to follow with shampoo. For masks containing heavy oils or egg, a light shampoo may be necessary. For purely moisturizing masks, a simple rinse might be enough. Always follow up with your regular conditioner to seal the cuticle and lock in the benefits.
Eight Targeted DIY Hair Mask Recipes for Every Concern
Here are eight simple, effective recipes to get you started. Remember, these are templates—feel free to adjust them based on what your hair loves!
1. The Ultimate Hydration Mask (for Dry, Thirsty Hair)
This mask is a rich, creamy drink for parched strands.
- Ingredients: 1 ripe avocado, 2 tablespoons olive oil, 1 tablespoon honey.
- Instructions: Blend all ingredients until completely smooth. Apply to damp hair, focusing on the ends. Leave on for 30 minutes, then rinse thoroughly.
2. The Repair Crew Mask (for Damaged, Weakened Hair)
A protein-packed treatment to fortify and strengthen.
- Ingredients: 1 egg, 3 tablespoons Greek yogurt, 1 tablespoon coconut oil.
- Instructions: Whisk ingredients together. Apply to hair from root to tip. Leave on for 20 minutes. Rinse with cool water to prevent the egg from scrambling. Follow with shampoo and conditioner.
3. The Feather-Light Volume Mask (for Fine, Limp Hair)
This mask provides a boost without weighing hair down.
- Ingredients: 1/4 cup flat beer (the yeast plumps hair), 1 egg, 1 tablespoon sunflower oil.
- Instructions: Let the beer sit out to decarbonate. Whisk with the egg and oil. Apply to hair, leave for 15 minutes, and rinse with cool water.
4. The Liquid Gold Shine Mask (for Dull Hair)
A simple recipe to smooth the cuticle and boost reflection.
- Ingredients: 1/2 cup fermented rice water, 1 tablespoon honey.
- Instructions: Mix until honey is dissolved. Pour over clean, damp hair. Massage it in, leave for 15-20 minutes, and rinse.
5. The Serene Scalp Soother (for Itchy, Flaky Scalps)
Calm irritation and gently exfoliate with this soothing blend.
- Ingredients: 1/2 cup blended oatmeal (into a powder), 1/4 cup warm water or green tea, 2 drops tea tree oil.
- Instructions: Mix into a paste. Apply directly to the scalp, massaging gently. Let it sit for 20 minutes before rinsing.
6. The Curl Definer’s Dream (for Curly and Coily Hair)
This mask provides moisture, slip, and definition.
- Ingredients: 1/2 cup aloe vera gel, 1 ripe banana, 2 tablespoons castor oil.
- Instructions: Blend until silky smooth. Apply to sectioned hair, ensuring each curl is coated. Leave on for 30 minutes, then rinse.
7. The Color-Care Custard (for Color-Treated Hair)
Nourish and protect your color with this gentle, moisturizing mask.
- Ingredients: 1/2 cup full-fat coconut milk, 1 tablespoon argan oil, 1 tablespoon honey.
- Instructions: Mix well and apply to hair. The fats in the coconut milk are excellent for moisturizing processed hair. Leave for 30 minutes and rinse.
8. The Deep Sleep Overnight Treatment (for Intense Repair)
For a truly intensive treatment, this mask works while you rest.
- Ingredients: 3 tablespoons melted shea butter, 2 tablespoons coconut oil, a few drops of lavender essential oil.
- Instructions: Mix and apply to dry hair, focusing on the ends. Braid your hair, cover with a silk scarf or cap, and sleep. Shampoo out in the morning. Best for very dry or damaged hair.
Perfect Timing: When and How Often to Use Your DIY Hair Mask
Consistency is key, but overdoing it can lead to buildup. Here’s a general guideline for your 2025 hair care strategy:
- Moisturizing Masks (like the Hydration or Curl Definer): Can be used once a week to maintain softness and manageability.
- Protein Masks (like the Repair Crew): Should be used less frequently, about once or twice a month. Too much protein can make hair stiff and brittle.
- Scalp Treatments (like the Serene Scalp Soother): Use as needed, typically once every 1-2 weeks to maintain a healthy scalp environment.
Common Conundrums: Troubleshooting Your Homemade Mask
Even the simplest recipes can have hiccups. Here’s how to fix common issues.
- The Texture is Lumpy: This is a common issue with banana or avocado. The solution is to use a blender instead of a fork to ensure a completely smooth purée that won’t leave bits in your hair.
- It’s Hard to Rinse Out: You may have used too much oil. Next time, reduce the amount of oil or add an emulsifier like a small amount of conditioner to your mix. Rinsing with a diluted ACV solution can also help cut through residue.
- The Smell is Unpleasant: Some ingredients, like egg or ACV, have strong odors. You can add a few drops of a pleasant-smelling essential oil like lavender or rosemary to your mask to improve the sensory experience.
Customizing Your Creation: Adapting Recipes for Your Hair
Your hair is unique, and so your DIY hair mask should be too. Use the provided recipes as a starting point and adjust them based on your hair’s length and density.
- For Short Hair: Halve the recipe to avoid waste.
- For Long or Very Thick Hair: Double the recipe to ensure you have enough to fully saturate your strands.
- For Oily Roots and Dry Ends: Apply a moisturizing mask only from the mid-lengths to the ends, avoiding the scalp.
Frequently Asked Questions About DIY Hair Masks
Do I apply a DIY hair mask to wet or dry hair?
Applying your mask to clean, towel-dried (damp) hair is usually best. The water helps the cuticle swell slightly, allowing the beneficial ingredients to penetrate more effectively than they would on dry hair. However, oil-based overnight treatments are often best applied to dry hair.
Can I leave a homemade hair mask on for too long?
For most moisturizing masks, leaving them on for an extended period (an hour or two) is generally fine and can be beneficial. However, for masks containing potent ingredients like protein (egg) or ACV, it’s crucial to stick to the recommended time. Leaving protein masks on too long can cause protein overload, leading to stiff, brittle hair.
Can I store leftover DIY hair mask?
Because these masks are made with fresh, preservative-free ingredients, they should be made and used immediately. They can spoil quickly, even in the refrigerator, and may grow bacteria or lose their potency. It’s always best to make a fresh batch for each application.
Further Reading and Resources
To continue your journey into hair science and health, explore these trusted sources:
- Rich Hair UK: A resource for in-depth articles on hair care and hair health science.
- NHS Hair Health Overview: The UK’s National Health Service provides reliable information on common hair and scalp conditions.
- PubMed: A database of scientific studies where you can search for research on the efficacy of natural ingredients for hair care.