Unlock Your Healthiest Hair: The Ultimate Guide to a DIY Hair Mask
Tired of browsing endless shelves of hair treatments that promise the world but deliver less? The secret to transformative hair care might already be in your kitchen. A DIY hair mask is more than just a cost-effective alternative; it is a powerful, customizable tool to give your hair precisely what it needs, using fresh, natural ingredients. This guide will empower you to move beyond random recipes and start creating science-informed treatments that deliver visible results, safely and effectively.
Understanding Your Hair: A Simple Guide
Before you start mixing, understanding two core concepts about your hair will change the game: porosity and the protein-moisture balance. Getting this right is the key to an effective DIY hair mask that doesn’t leave your hair feeling greasy or brittle.
Hair Porosity: The Key to Absorption
Hair porosity refers to your hair’s ability to absorb and retain moisture. It is determined by the structure of your hair’s outer layer, the cuticle.
- Low Porosity: The cuticles are tightly packed. Hair takes a long time to get wet and a long time to dry. It is prone to product buildup because ingredients sit on top of the strand rather than soaking in. You need lightweight ingredients that can penetrate easily.
- Medium Porosity: The cuticles are looser, allowing moisture to enter and exit at a moderate, healthy rate. This hair type is the easiest to manage.
- High Porosity: The cuticles have gaps or holes, causing hair to absorb moisture quickly but lose it just as fast. This hair is often dry, frizzy, and prone to damage. It needs richer ingredients and sealing oils to lock in hydration.
The Protein vs. Moisture Balance
Healthy hair needs a delicate balance of protein and moisture. Your DIY hair mask should cater to what your hair is currently lacking.
- Protein provides structure and strength. If your hair feels mushy when wet, overly elastic, or limp, you likely need a protein boost. Ingredients like eggs, yogurt, and gelatin are excellent sources. But beware of protein overload, which can make hair feel stiff and brittle.
- Moisture provides elasticity, softness, and flexibility. If your hair feels dry, rough, or snaps easily when stretched, it is craving moisture. Humectants (like honey) and rich emollients (like avocado or oils) are what you need.
The Science of DIY Hair Mask Ingredients
Every ingredient in your DIY hair mask serves a purpose. Understanding the roles of lipids, humectants, and proteins will help you create a truly effective formula.
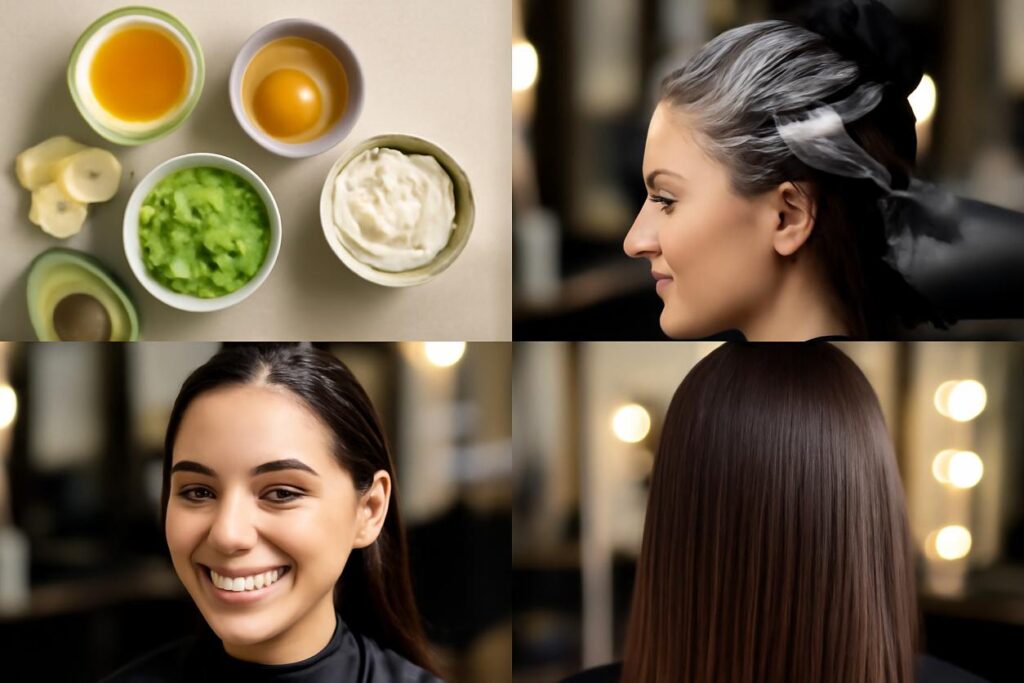
Choosing Your Base: The Foundation of Your Mask
The base makes up the bulk of your mask and provides primary benefits. Good options include:
- Yogurt or Kefir: Rich in proteins and lactic acid, which gently exfoliates the scalp and adds shine.
- Avocado: Packed with fatty acids, vitamins, and minerals that deeply moisturize and nourish.
- Banana: High in potassium and silica, which can help strengthen hair and improve elasticity.
- Coconut Milk/Cream: Contains lauric acid and healthy fats that penetrate the hair shaft for intense moisture.
- Non-Dairy Alternatives: For vegan or allergy-friendly options, soy yogurt, oat cream, or pumpkin puree work beautifully.
Lipids, Humectants, and Proteins Explained
These are the power players you will add to your base.
- Lipids (Oils and Butters): These are essential for sealing in moisture. Lighter oils like jojoba or almond are great for fine hair, while richer oils like olive, avocado, or butters like shea are perfect for dry, high-porosity hair.
- Humectants (Moisture Magnets): These ingredients draw moisture from the air into your hair. Honey, agave nectar, and vegetable glycerin are potent humectants that boost hydration.
- Proteins (Strengthening Blocks): These temporarily patch holes in the hair cuticle, adding strength and reducing breakage. Eggs are a classic choice, but hydrolyzed proteins (if you choose to buy them) or the proteins in yogurt can be gentler.
Customizable DIY Hair Mask Recipes for Your Hair Type
Use these formulations as a starting point. Feel free to adjust based on your hair’s response.
For Dry, Thirsty Hair (Moisture Focus)
This mask is a deep drink of hydration for parched strands.
- Ingredients: 1/2 ripe avocado, 1 tablespoon honey, 1 tablespoon olive oil.
- Instructions: Mash the avocado until completely smooth. Stir in the honey and olive oil until you have a creamy, lump-free paste.
For Oily or Weighed-Down Hair (Clarifying and Balancing)
A clarifying DIY hair mask that removes buildup without stripping natural oils.
- Ingredients: 1/4 cup plain yogurt, 1 teaspoon lemon juice, 1 tablespoon brewed (and cooled) green tea.
- Instructions: Whisk all ingredients together until well combined. The consistency will be thinner than other masks.
For Fine Hair (Lightweight Strength)
This mask provides strength without weighing down delicate strands.
- Ingredients: 1 egg white, 2 tablespoons aloe vera gel, 1 teaspoon almond oil.
- Instructions: Beat the egg white until frothy, then gently fold in the aloe vera gel and almond oil.
For Curly Hair (Hydration and Definition)
Enhance your curl pattern and fight frizz with this moisture-rich blend.
- Ingredients: 1/2 ripe banana, 2 tablespoons plain yogurt, 1 tablespoon jojoba oil.
- Instructions: Blend the banana until it is a complete puree (no chunks!). Mix in the yogurt and jojoba oil.
For Color-Treated Hair (Protection and Repair)
Gently nourish and protect fragile, color-treated hair.
- Ingredients: 1/4 cup papaya (mashed), 2 tablespoons full-fat coconut milk, 1 teaspoon argan oil.
- Instructions: Mash the papaya thoroughly, then stir in the coconut milk and argan oil for a tropical, restorative treat.
Quick Fixes and Deep Treatments
Sometimes you need a quick boost, and other times you need an intensive overhaul.
The Ten-Minute Revitalizer Mask
When you are short on time, this simple mask adds instant shine and smoothness. Mix 3 tablespoons of aloe vera gel with 1 tablespoon of a light oil like grapeseed or argan. Apply to damp hair, leave on for 10 minutes, and rinse thoroughly.
The Overnight Reconstructive DIY Hair Mask
For deep repair, an overnight mask can work wonders. Melt 2 tablespoons of shea butter with 1 tablespoon of coconut oil. Let it cool slightly, then apply to the lengths and ends of your hair. Braid your hair, cover it with a shower cap or silk scarf to protect your pillow, and shampoo it out in the morning.
Safety First: Allergies, Substitutions, and Vegan Options
Always prioritize safety when creating your own beauty products.
Allergy-Aware Swaps
If you have known allergies, use this table to make safe substitutions.
| Allergen | Safe Substitution |
|---|---|
| Eggs (Protein) | Mashed Banana, Avocado, Flaxseed Gel |
| Dairy (Protein/Moisture) | Coconut Cream, Soy Yogurt, Oat Milk |
| Nuts (Oils) | Sunflower Oil, Grapeseed Oil, Jojoba Oil |
| Honey (Humectant) | Agave Nectar, Maple Syrup (use sparingly) |
Creating a Vegan DIY Hair Mask
It is easy to make your homemade hair mask completely plant-based. The key is to replace animal-derived ingredients:
- Swap eggs for mashed banana or avocado for a creamy, protein-like effect.
- Replace dairy yogurt with coconut yogurt, soy yogurt, or a thick plant-based cream.
- Switch honey for agave nectar or maple syrup as your humectant.
The A-to-Z of Application
How you apply and remove your mask is just as important as the recipe itself.
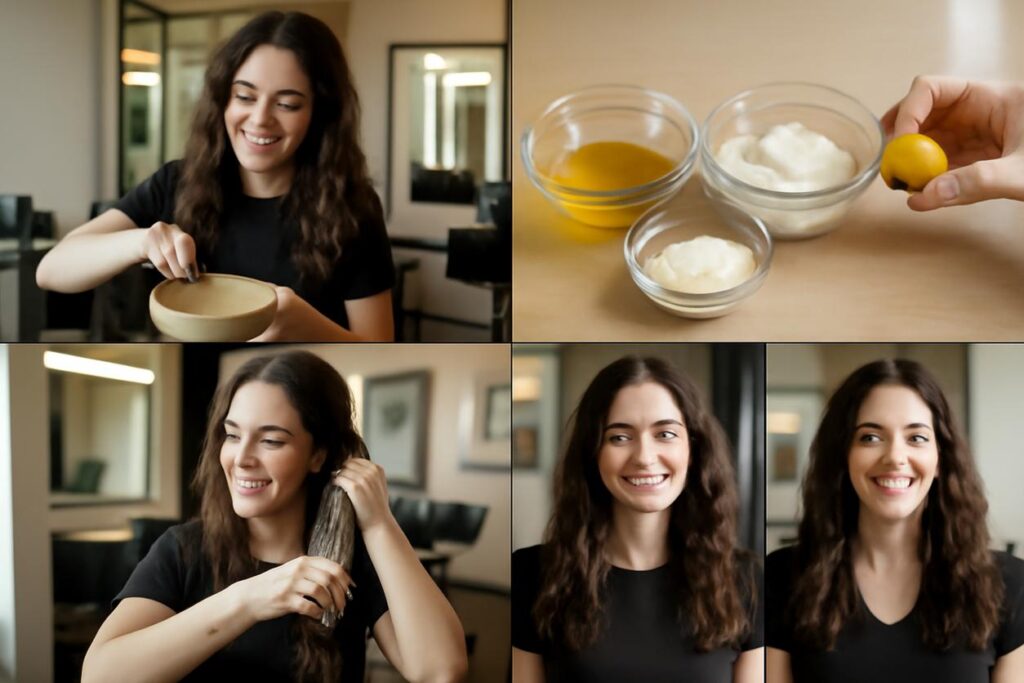
Tools, Measuring, and Mixing
You do not need fancy equipment. A small bowl, a fork or a small whisk, and measuring spoons are all it takes. The key to a good DIY hair mask is to mix thoroughly. You want a smooth, homogenous consistency to ensure even application and prevent leaving food chunks in your hair.
How to Apply Your Mask for Maximum Impact
- Start with clean, towel-dried (damp) hair. This allows for better absorption.
- Section your hair into 4-6 parts to ensure you do not miss any spots.
- Using your fingers or an application brush, apply the mask from the mid-lengths to the ends, which are typically the driest parts. If you have an oily scalp, avoid the roots. If you are targeting scalp health, massage it in gently.
- Work the mask through with your fingers or a wide-tooth comb to ensure every strand is coated.
Rinsing and Timing: Getting It Just Right
Most masks work best when left on for 20-30 minutes. Cover your hair with a shower cap to trap heat, which helps open the hair cuticle for deeper penetration. When it is time to rinse, use lukewarm water and be thorough. Follow with a cool water rinse to seal the cuticle and lock in the benefits. You can follow up with a light conditioner if your hair still feels like it needs more slip, but you should not need to shampoo again.
Building Your Hair Care Routine
Consistency is key to seeing long-term results from your homemade hair mask treatments. For hair care strategies in 2025 and beyond, a personalized, consistent routine will be paramount.
How Often Should You Use a DIY Hair Mask?
For most hair types, using a DIY hair mask once a week is an excellent schedule. If your hair is extremely damaged, you might start with twice a week and then taper down as its health improves. Listen to your hair—if it starts to feel weighed down or overly soft, scale back.
Storing Your Homemade Mask
Because these masks are made from fresh food ingredients without preservatives, they are highly perishable. It is best to make a fresh batch for each use. If you have a small amount leftover, you can store it in an airtight container in the refrigerator for a maximum of 48 hours.
The Crucial Step: Patch Testing
Never skip this step. Even with natural ingredients, allergic reactions can occur. To perform a patch test, apply a small amount of the mask to a discreet area of skin, like your inner elbow or behind your ear. Wait 24 hours. If you experience any redness, itching, or irritation, do not use the mask on your scalp or hair.
Troubleshooting Common DIY Hair Mask Issues
Sometimes your first attempt is not perfect. Here is how to adjust.
My Hair Feels Greasy or Weighed Down
This is a common issue, especially for those with fine or low-porosity hair. It usually means you have used too much oil or a butter that is too heavy. Next time, reduce the amount of oil by half or switch to a lighter option like grapeseed or jojoba oil. Ensure you are rinsing thoroughly with lukewarm water.
My Hair Feels Stiff or Brittle
This is the classic sign of protein overload. Your hair has too much structure and not enough moisture, causing it to feel rigid. The solution is to skip protein-heavy ingredients like egg and yogurt for a few weeks and focus exclusively on moisturizing masks with ingredients like avocado, banana, and honey.
Visual Cues: What to Look For
Without photos, your other senses are key to perfecting your mask.
Mask Texture
Aim for a texture that is smooth and spreadable, but not runny. A perfect DIY hair mask should have the consistency of a thick, creamy yogurt or a well-blended smoothie. If you see lumps of banana or avocado, keep mashing or blending to avoid a difficult rinse-out.
Application Cues
When you apply the mask, your hair should feel fully saturated and slippery. Each strand should be coated in a thin layer of the mixture. It should not be dripping excessively, but it should look and feel thoroughly covered.
Before and After
Look for tangible changes. Before the mask, your hair might look dull, feel rough, and have visible frizz. After a successful treatment, you should notice that your hair feels significantly softer to the touch, appears shinier because the cuticles are smoother, and has a more manageable, less frizzy texture.
Conclusion and Further Learning
Embracing the DIY hair mask is about more than just saving money; it is about taking control of your hair health with a personalized, ingredient-conscious approach. By understanding your hair’s unique profile and the science behind simple kitchen ingredients, you can craft powerful treatments that deliver salon-quality results. Start with one of our base recipes, observe how your hair responds, and do not be afraid to experiment. Your journey to your best hair ever has officially begun.
For more insights into professional hair care and treatments, you can explore resources like Rich Hair UK. To dive deeper into the science of cosmetic ingredients, public databases such as PubMed offer extensive research articles.