The Ultimate 2025 Guide to a Perfect DIY Hair Mask: Recipes for Your Hair Type
Table of Contents
- Introduction: Why Make Your Own DIY Hair Mask?
- How to Assess Your Hair Porosity at Home
- Core Ingredients and What They Do for Your Hair
- Tools, Safety, and Allergy Checks Before You Start
- DIY Hair Mask Recipes for Dry or Damaged Hair
- DIY Hair Mask Recipes for Oily Scalp and Fine Hair
- Scalp-Focused Masks for a Healthy Foundation
- Customizing Your Mask by Porosity and Hair Goals
- The Perfect Application: Timing, Heat, and Rinsing Techniques
- Frequency Guide and Maintenance Tips
- Storage, Shelf Life, and Hygiene for Homemade Masks
- Troubleshooting Common Results and Quick Fixes
- Frequently Asked Questions (FAQ)
- References and Further Reading
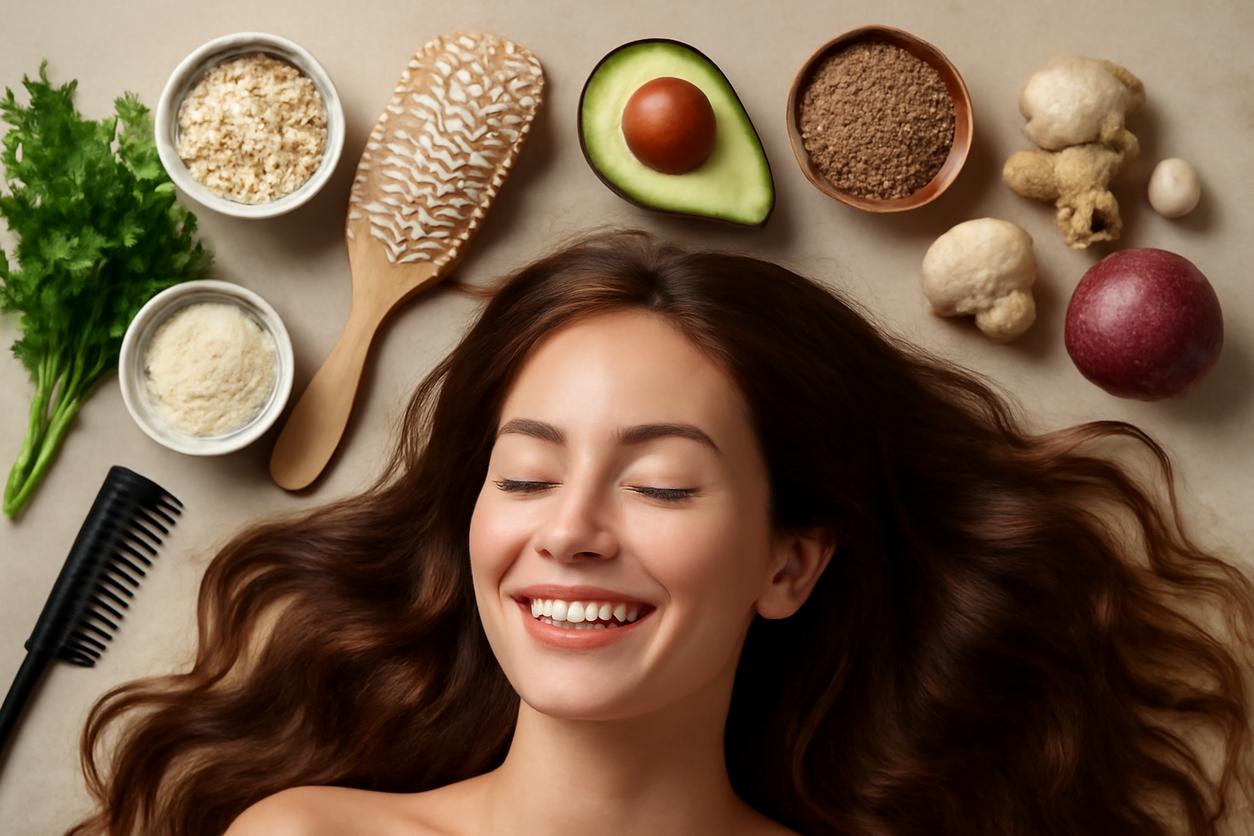
Introduction: Why Make Your Own DIY Hair Mask?
Welcome to the world of personalized haircare! Store-bought treatments are convenient, but crafting your own DIY hair mask puts you in complete control. You can tailor every ingredient to your hair’s unique needs, avoid harsh chemicals, and save money. A homemade hair mask is more than just a beauty treatment; it’s a nourishing ritual that connects you with the simple, powerful ingredients found right in your kitchen pantry.
The primary benefit of a DIY hair mask is customization. Whether your hair is crying out for moisture, needs a protein boost, or your scalp is feeling unbalanced, you can create the perfect formula. This guide will empower you to become your own hair mixologist, starting with the most important factor: understanding your hair’s porosity.
How to Assess Your Hair Porosity at Home
Before you mix anything, you need to understand how your hair absorbs and retains moisture. This is called hair porosity. Knowing your porosity level is the secret to creating a truly effective DIY hair mask that doesn’t leave your hair greasy or dry. Here’s a simple test you can do right now.
The Water Test for Hair Porosity
Follow these simple steps to determine your hair’s porosity level:
- Get a Sample: Take a single strand of clean, dry hair. Make sure there is no product on it. A strand from your brush or comb works perfectly.
- Prepare the Water: Fill a clear glass with room temperature water.
- Observe: Gently place the hair strand into the glass of water and watch what it does for 2-4 minutes.
- Low Porosity: If the strand floats at the top, you have low porosity hair. Your hair cuticles are tightly packed, making it difficult for moisture to get in. You’ll need lightweight ingredients that won’t just sit on top of the hair.
- Medium (Normal) Porosity: If the strand floats for a bit before slowly sinking, you have medium porosity. Your cuticles are looser, allowing moisture to enter and stay in. This hair type is the easiest to manage.
- High Porosity: If the strand sinks quickly to the bottom, you have high porosity hair. Your cuticles have gaps, so while your hair absorbs moisture easily, it also loses it just as fast. It needs sealing oils and proteins to fill the gaps.
Core Ingredients and What They Do for Your Hair
Your kitchen is a treasure trove of hair-loving ingredients. Understanding their properties is key to formulating your perfect DIY hair mask. Here’s a breakdown of common ingredients and their benefits.
Moisturizers and Humectants
These ingredients attract and hold onto water molecules, providing deep hydration.
- Honey: A natural humectant that draws moisture into the hair shaft. It also has antibacterial properties, making it great for scalp health.
- Aloe Vera Gel: Packed with vitamins and enzymes, aloe vera soothes the scalp and hydrates the hair without weighing it down.
- Glycerin: A powerful humectant, but use it sparingly. It can pull moisture from the air into your hair, which is great in humid climates but can have the opposite effect in dry conditions.
- Avocado: Rich in fatty acids, vitamins, and minerals that nourish and moisturize deeply.
Oils (Emollients and Sealants)
Oils smooth the hair cuticle, add shine, and lock in moisture.
- Coconut Oil: A penetrating oil that can reduce protein loss from the hair. Best for medium to high porosity hair.
- Olive Oil: A classic emollient that conditions and adds shine. It’s a heavier oil, suitable for very dry or thick hair.
- Jojoba Oil: A lightweight oil that closely mimics the scalp’s natural sebum. Excellent for all hair types, especially fine or oily-prone hair.
- Argan Oil: Rich in vitamin E and antioxidants, it’s a fantastic lightweight sealant that adds shine and reduces frizz.
Proteins and Strengthening Agents
These ingredients temporarily patch gaps in the hair cuticle, adding strength and structure.
- Egg: The yolk is rich in fats and vitamins, while the white is packed with protein. A whole egg provides both moisture and strength. Use with caution, as too much protein can cause stiffness.
- Greek Yogurt: Contains lactic acid to cleanse the scalp and proteins to strengthen the hair.
- Rice Water: The starchy water left after rinsing rice is rich in inositol, which can penetrate and strengthen hair from within.
Tools, Safety, and Allergy Checks Before You Start
Safety is paramount when creating any homemade cosmetic. Before you begin whipping up your DIY hair mask, follow these essential guidelines.
Essential Tools
- A non-metallic bowl (glass or plastic)
- A non-metallic spoon or whisk for mixing
- A shower cap or plastic wrap
- An old towel to protect your clothing
The All-Important Patch Test
Even natural ingredients can cause allergic reactions. Always perform a patch test 24 hours before applying a new DIY hair mask all over your hair and scalp.
- Mix a small amount of the mask.
- Apply a dab to a discreet area of skin, such as behind your ear or on your inner elbow.
- Leave it on for 30 minutes, then rinse.
- Wait 24 hours. If you experience any redness, itching, or irritation, do not use the mask.
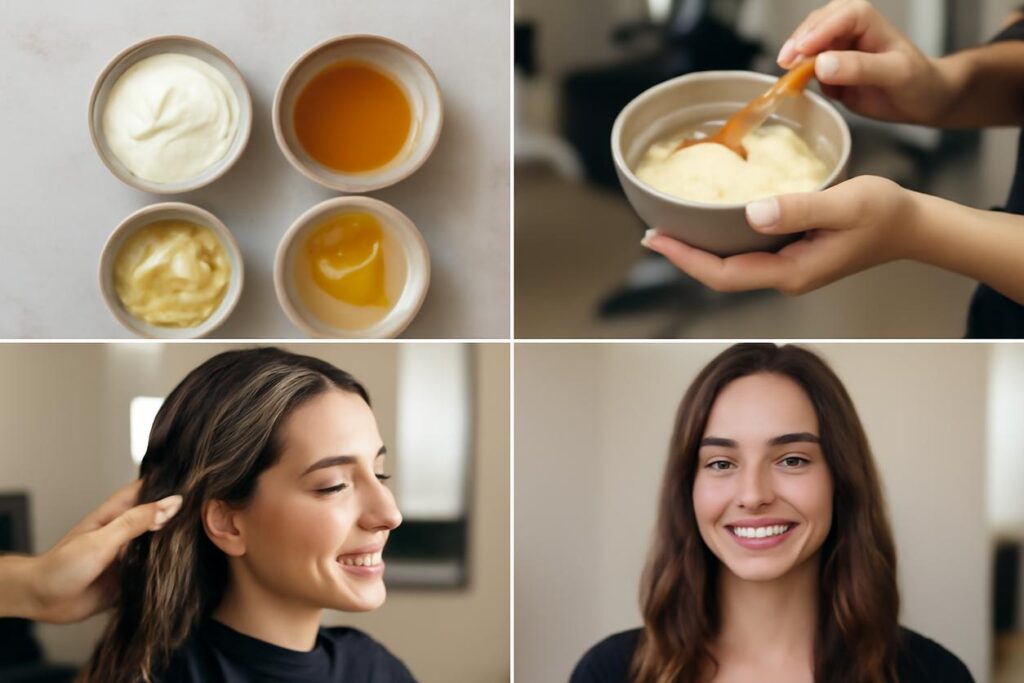
DIY Hair Mask Recipes for Dry or Damaged Hair
This hair type craves moisture and strength. These recipes focus on rich, nourishing ingredients to restore softness and shine.
1. The Intense Hydration Avocado Mask
- Ingredients: 1 ripe avocado, 2 tablespoons of olive oil, 1 tablespoon of honey.
- Directions: Mash the avocado until completely smooth. Stir in the olive oil and honey until you have a creamy consistency. Apply to damp hair, focusing on the ends. Leave on for 30-45 minutes.
2. The Strengthening Egg and Yogurt Mask
- Ingredients: 1 whole egg, 3 tablespoons of full-fat Greek yogurt, 1 tablespoon of coconut oil (melted).
- Directions: Whisk the egg thoroughly. Mix in the yogurt and melted coconut oil. Apply to hair from root to tip. Let it sit for 20-30 minutes. Important: Rinse with cool or lukewarm water to avoid “cooking” the egg in your hair.
DIY Hair Mask Recipes for Oily Scalp and Fine Hair
For oily or fine hair, the goal is to cleanse and condition without weighing hair down. This type of DIY hair mask uses lightweight, clarifying ingredients.
1. The Clarifying Clay and Aloe Mask
- Ingredients: 2 tablespoons of bentonite or rhassoul clay, 3 tablespoons of aloe vera gel, 1 tablespoon of apple cider vinegar.
- Directions: In a non-metallic bowl, mix the clay with the aloe vera gel and apple cider vinegar to form a smooth paste. Add a little water if it’s too thick. Apply mainly to the scalp and roots. Leave on for 15-20 minutes, but do not let it dry completely.
2. The Lightweight Strawberry and Lemon Mask
- Ingredients: A handful of fresh strawberries, 1 tablespoon of lemon juice, 1 tablespoon of honey.
- Directions: Blend the strawberries until pureed. Mix in the lemon juice and honey. Apply to damp hair, focusing on the scalp. Leave for 15 minutes before rinsing thoroughly.
Scalp-Focused Masks for a Healthy Foundation
Healthy hair starts with a healthy scalp. A targeted DIY hair mask can soothe irritation, combat dandruff, and promote a balanced environment for hair growth.
1. The Soothing Oatmeal and Tea Tree Mask
- Ingredients: 1/2 cup of colloidal oatmeal (or finely blended oats), warm water, 2-3 drops of tea tree oil, 1 tablespoon of jojoba oil.
- Directions: Mix the oatmeal with enough warm water to form a paste. Stir in the tea tree oil and jojoba oil. Apply to your scalp, gently massaging it in. Leave for 20-30 minutes.
Customizing Your Mask by Porosity and Hair Goals
Now, let’s combine your porosity knowledge with your hair goals. Use this table as a guide to create a personalized DIY hair mask recipe.
| Porosity | Goal: Moisture | Goal: Strength | Goal: Clarifying |
|---|---|---|---|
| Low Porosity | Lightweight humectants: Honey, aloe vera, glycerin. Lightweight oils: Jojoba, argan, grapeseed. Use gentle heat (warm towel) to help ingredients penetrate. | Rice water rinse, green tea. Avoid heavy proteins like egg, which can cause buildup. | Bentonite clay, apple cider vinegar (diluted). |
| Medium Porosity | Balanced ingredients: Avocado, banana, olive oil (in moderation), yogurt. | A whole egg mask (occasionally), Greek yogurt. This hair type is generally well-balanced. | Can handle most clarifying ingredients in moderation. |
| High Porosity | Rich butters and oils: Shea butter, coconut oil, olive oil. Sealing is key. Use honey and aloe to hydrate, then seal with oil. | Needs protein to fill gaps: Egg, gelatin, Greek yogurt. Alternate between protein and moisture treatments. | Be gentle. Use a yogurt-based mask with lactic acid instead of harsher clays. |
The Perfect Application: Timing, Heat, and Rinsing Techniques
How you apply your homemade hair mask is just as important as what’s in it.
Step-by-Step Application
- Start with Clean, Damp Hair: For best absorption, apply your mask to hair that has been shampooed and towel-dried.
- Section Your Hair: Divide your hair into 4-6 sections to ensure even coverage.
- Apply from Ends to Roots: Start applying the mask to the ends of your hair, which are usually the driest, and work your way up toward the scalp. If it’s a scalp-focused mask, do the reverse.
- Cover and Add Heat: Tuck your hair into a shower cap or wrap it in plastic wrap. For a deeper treatment, wrap a warm, damp towel around your head. The heat opens the hair cuticle, allowing the mask to penetrate more effectively.
- Timing is Everything: Leave the mask on for 20-45 minutes. Protein-based masks should not be left on for longer than 30 minutes to avoid making hair brittle.
- Rinse Thoroughly: Rinse the mask out completely using lukewarm water. For protein masks (like egg), always use cool water first. You may need to follow up with a light conditioner to seal the cuticle.
Frequency Guide and Maintenance Tips
Over-masking is a real thing! The right frequency depends on your hair’s condition.
- For Dry or Damaged Hair: Use a moisturizing DIY hair mask once a week.
- For Normal Hair: A mask every two weeks is sufficient for maintenance.
- For Oily or Fine Hair: Use a clarifying or lightweight mask once every two weeks, or as needed.
- For Protein Treatments: Limit protein-heavy masks to once a month to prevent protein overload, which can lead to stiff, brittle hair.
Storage, Shelf Life, and Hygiene for Homemade Masks
A DIY hair mask is made from fresh ingredients without preservatives, so it has a very short shelf life.
- Make It Fresh: Always make just enough for one application.
- No Leftovers: Discard any unused mixture immediately. Fresh food ingredients can spoil quickly and grow bacteria, which you do not want on your scalp.
- Clean Tools: Always use clean bowls and utensils to prevent contamination.
Troubleshooting Common Results and Quick Fixes
Sometimes your DIY experiment might not go as planned. Here’s what to do.
- My hair feels greasy or weighed down: You likely used an oil that was too heavy for your hair type, or you didn’t rinse thoroughly enough. Try a clarifying shampoo or an apple cider vinegar rinse (1 part ACV to 4 parts water) to remove the residue. Next time, use a lighter oil.
- My hair feels dry or brittle: This is a classic sign of protein overload. You used a strengthening mask when your hair needed moisture. Clarify your hair and follow up with a protein-free deep conditioning treatment.
- I see no difference: Consistency is key! It may take a few applications to see noticeable results. Also, double-check that you’ve correctly identified your hair porosity and are using the right ingredients.
Frequently Asked Questions (FAQ)
Can I apply a DIY hair mask to dry hair?
You can, but damp hair is generally better. The water on the hair helps the ingredients spread more easily and absorb more effectively. The exception is with pure oil treatments, which can be applied to dry hair.
Should I shampoo after my DIY hair mask?
Typically, no. You should shampoo before applying the mask to clean the hair. After the mask, you should just rinse thoroughly and apply conditioner if needed. The mask itself is your treatment step.
Are all-natural ingredients always safe?
Not necessarily. As mentioned, allergies are possible, and some ingredients (like pure lemon juice or vinegar) can be harsh if not properly diluted. Always do a patch test and follow trusted recipes.
References and Further Reading
For those who want to dive deeper into the science of hair and cosmetic ingredients, these resources provide evidence-based information:
- PubMed: A comprehensive database of biomedical literature, perfect for researching the structure and properties of hair.
- Cosmetic Ingredient Review (CIR): An independent, non-profit panel that reviews the safety of ingredients used in cosmetics. You can check the safety profile of common ingredients here.
- American Academy of Dermatology (AAD): Offers expert advice on hair and scalp health. The AAD provides guidance on various haircare topics.