Table of Contents
- Why Choose a DIY Hair Mask? The Power in Your Pantry
- First, Understand Your Hair’s Needs
- The Building Blocks: Key Ingredients for Your DIY Hair Mask
- Safety First: Patch Testing Your DIY Hair Mask
- How to Craft the Perfect DIY Hair Mask: A Step-by-Step Guide
- Six Targeted DIY Hair Mask Recipes for Every Goal
- Mastering the Application: Tips for Maximum Absorption
- How Often Should You Use a DIY Hair Mask?
- Storage, Shelf Life, and Keeping It Fresh
- Common DIY Hair Mask Mistakes and How to Avoid Them
- The Science Behind the Magic: Why Natural Ingredients Work
- Frequently Asked Questions (FAQ)
- Resources and Further Reading
Why Choose a DIY Hair Mask? The Power in Your Pantry
Welcome to the world of homemade hair care, where your kitchen transforms into a personal beauty lab. A DIY hair mask is a nourishing treatment you create using natural, everyday ingredients. Unlike store-bought options that can contain complex chemicals and preservatives, a homemade mask offers complete control. You know exactly what you’re putting on your hair, allowing you to tailor a treatment specifically to your needs, whether you’re battling dryness, frizz, or an oily scalp. Beyond the benefits of customization and fresh ingredients, creating your own hair mask is a cost-effective and sustainable way to achieve luscious, healthy locks. It’s a simple act of self-care that connects you directly to the ingredients that nourish your body, inside and out.
First, Understand Your Hair’s Needs
Before you start mixing, it’s crucial to identify your hair’s primary concerns. Different hair types have different needs, and the right DIY hair mask can make all the difference. Think of it as a personalized prescription for your strands.
Dry or Damaged Hair
This hair type craves moisture and repair. It often looks dull, feels brittle, and is prone to split ends and breakage. The goal is to deeply hydrate and replenish lost lipids and proteins. Look for ingredients rich in healthy fats, vitamins, and humectants (substances that attract moisture).
Oily or Greasy Hair
If your hair feels weighed down and looks greasy soon after washing, you likely have an overactive scalp. The key is to balance sebum production without stripping the hair of its natural oils. A clarifying yet gentle DIY hair mask can help absorb excess oil and soothe the scalp.
Curly or Coily Hair
Curly hair is naturally drier than straight hair because the scalp’s natural oils have a harder time traveling down the coiled strands. Your focus should be on intense hydration, frizz control, and enhancing your natural curl pattern. Masks that provide slip and deep moisture are your best friends.
Fine or Thin Hair
Fine hair can be easily weighed down by heavy products. The objective is to strengthen the hair shaft and add volume without sacrificing moisture. A lightweight DIY hair mask with strengthening proteins and non-heavy oils is ideal.
Color-Treated Hair
Chemically treated hair is more porous and susceptible to damage and moisture loss. It needs gentle, restorative care to maintain its health and vibrancy. Avoid highly acidic ingredients that could potentially alter your color, and focus on deep conditioning and protein-rich formulas.
The Building Blocks: Key Ingredients for Your DIY Hair Mask
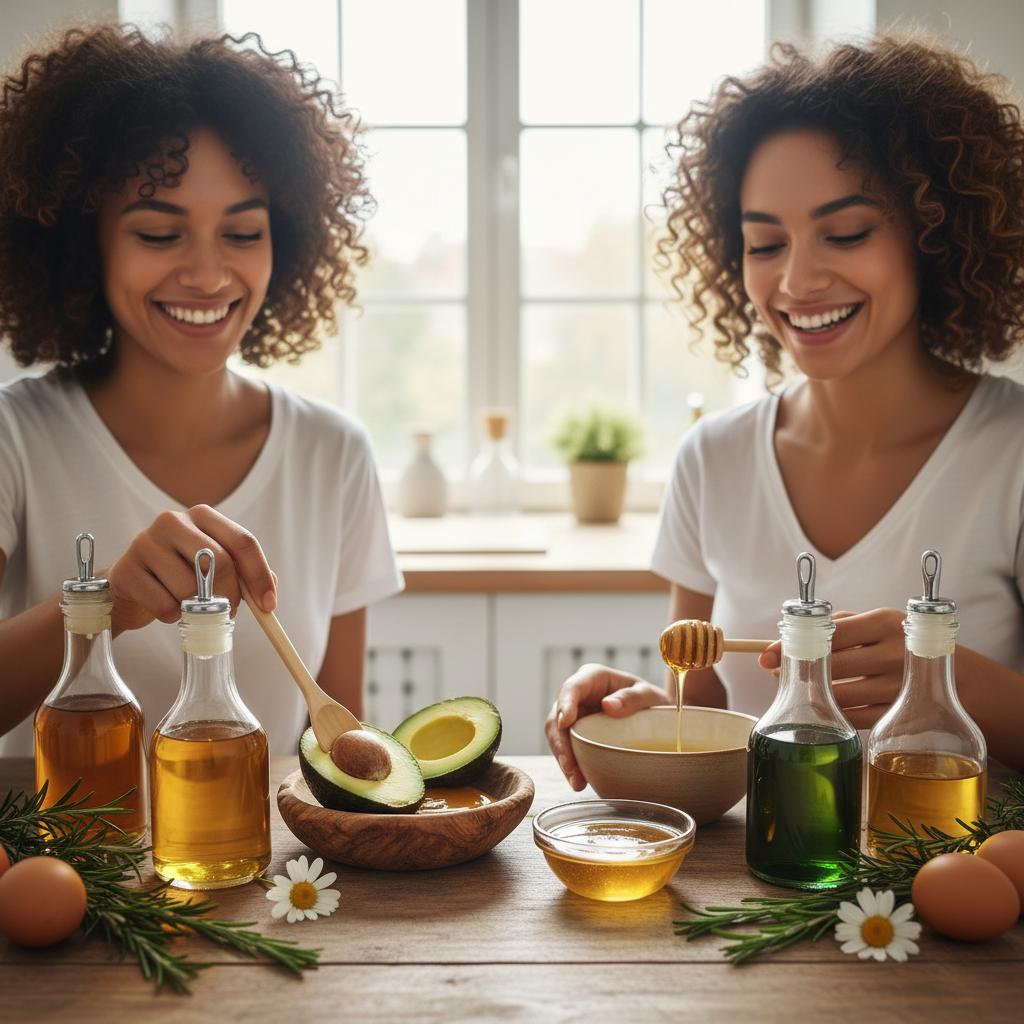
Your kitchen is a treasure trove of hair-loving ingredients. Understanding what each one does will empower you to create the perfect concoction. Here are some of the most effective and popular choices for a homemade hair mask.
| Ingredient | Primary Function | Best For Hair Type |
|---|---|---|
| Avocado | Intense Moisturization, Nourishment | Dry, Damaged, Curly |
| Banana | Hydration, Softening, Frizz Control | Dry, Frizzy, Brittle |
| Egg | Strengthening (Protein), Adds Shine | Fine, Damaged, Oily (whites only) |
| Greek Yogurt | Conditioning (Lactic Acid), Protein | Damaged, Dull, Frizzy |
| Honey | Moisture Attraction (Humectant), Adds Shine | All types, especially Dry and Dull |
| Coconut Oil | Deep Conditioning, Reduces Protein Loss | Dry, Damaged, Curly (use sparingly on fine hair) |
| Olive Oil | Moisturizing, Softening | Dry, Damaged, Thick |
| Aloe Vera Gel | Scalp Soothing, Hydration | Oily Scalp, Irritated, Dry |
| Apple Cider Vinegar | Clarifying, Adds Shine (use diluted) | Oily, Dull, Product Buildup |
Safety First: Patch Testing Your DIY Hair Mask
Even natural ingredients can cause allergic reactions. Before applying any new DIY hair mask to your entire head, it is essential to perform a patch test. This simple step can prevent widespread irritation, redness, or itching.
- How to Patch Test: Apply a small amount of the prepared mask to a discreet area of your skin, like the inside of your elbow or behind your ear.
- Wait and Observe: Leave the mixture on for the recommended mask time, then rinse. Wait for at least 24 hours to see if any reaction occurs.
- Check for Reactions: If you experience any redness, itching, swelling, or irritation, do not use the mask on your scalp or hair. According to organizations like the American Academy of Dermatology Association, skin sensitivity can develop at any time, so it’s a good practice even with familiar ingredients.
How to Craft the Perfect DIY Hair Mask: A Step-by-Step Guide
Creating a hair mask is simple and fun. Follow these basic steps to ensure a smooth, effective treatment every time.
- Choose Your Base: Select a primary moisturizing ingredient like avocado, banana, or yogurt.
- Add Your Boosters: Mix in nourishing extras like honey for shine, an egg for protein, or an oil for deep conditioning.
- Blend Thoroughly: Use a blender or fork to mash and mix your ingredients until you have a smooth, lump-free consistency. This is crucial for easy application and rinsing.
- Apply to Hair: Follow the application techniques outlined below for the best results.
- Let It Sit: Cover your hair with a shower cap to trap heat and help the ingredients penetrate the hair shaft.
- Rinse Completely: Wash the mask out thoroughly with lukewarm water, followed by your regular shampoo and conditioner if needed.
Six Targeted DIY Hair Mask Recipes for Every Goal
Here are six easy-to-make recipes designed for specific hair concerns. Feel free to adjust quantities based on your hair length and thickness.
1. The Ultimate Hydration Mask for Dry Hair
- Ingredients: 1/2 ripe avocado, 1 tablespoon olive oil, 1 tablespoon honey.
- Why It Works: Avocado and olive oil are packed with fatty acids that deeply moisturize, while honey acts as a natural humectant, drawing moisture into the hair.
- Preparation: Mash the avocado until completely smooth, then stir in the olive oil and honey.
- Application: Apply to damp hair, focusing on the ends.
- Timing: Leave on for 20-30 minutes.
2. The Protein Repair Mask for Damaged Hair
- Ingredients: 1 egg, 2 tablespoons Greek yogurt, 1 tablespoon coconut oil.
- Why It Works: The egg provides a strong dose of protein to help rebuild the hair’s keratin structure. Yogurt’s lactic acid gently cleanses while its fat content conditions.
- Preparation: Whisk the egg, then blend in the yogurt and melted coconut oil.
- Application: Apply to hair from roots to tips.
- Timing: Leave on for 20 minutes. Important: Rinse with cool or lukewarm water to avoid “cooking” the egg in your hair.
3. The Clarifying Scalp-Soothing Mask
- Ingredients: 2 tablespoons aloe vera gel, 1 tablespoon honey, 1 teaspoon apple cider vinegar (ACV).
- Why It Works: Aloe vera soothes the scalp, ACV clarifies and removes buildup, and honey balances moisture.
- Preparation: Mix all ingredients together until well combined.
- Application: Focus the application on the scalp, gently massaging it in before working it through the lengths.
- Timing: Leave on for 15-20 minutes.
4. The Lightweight Volumizing Mask for Fine Hair
- Ingredients: 1 egg white, 1/4 cup fresh strawberries, 1 tablespoon honey.
- Why It Works: Egg white provides protein without weight. Strawberries are rich in vitamin C, which can help with collagen production and hair strength.
- Preparation: Blend the ingredients until a smooth puree is formed.
- Application: Apply to the lengths and ends of damp hair.
- Timing: Leave on for 15 minutes.
5. The Frizz-Taming Curl-Defining Mask
- Ingredients: 1/2 ripe banana, 2 tablespoons yogurt, 1 tablespoon honey.
- Why It Works: Banana is rich in potassium and natural oils, which help soften hair and improve elasticity, reducing frizz. Yogurt and honey add moisture and shine for defined curls.
- Preparation: Blend the banana thoroughly to avoid chunks, then mix in the yogurt and honey.
- Application: Section hair and apply evenly to ensure every curl is coated.
- Timing: Leave on for 30 minutes.
6. The Deep-Conditioning Overnight Boost Mask
- Ingredients: 2 tablespoons coconut oil, 1 tablespoon aloe vera gel.
- Why It Works: This simple but powerful duo provides intense, penetrating moisture. It’s perfect for a deep treatment while you sleep.
- Preparation: Mix the melted coconut oil with the aloe vera gel.
- Application: Apply to the ends and mid-lengths of your hair. Braid your hair and cover with a silk scarf or shower cap.
- Timing: Leave on overnight and shampoo out in the morning.
Mastering the Application: Tips for Maximum Absorption
How you apply your DIY hair mask is just as important as what’s in it. Follow these tips to get the most out of your treatment.
Application Techniques
- Start with Clean, Damp Hair: Applying a mask to damp, towel-dried hair helps the ingredients absorb more effectively than on dry hair. A light shampoo beforehand removes buildup that could block penetration.
- Section Your Hair: Divide your hair into 4-6 sections. This ensures you distribute the mask evenly and don’t miss any spots.
- Focus on Problem Areas: If you have dry ends and an oily scalp, concentrate the mask on the mid-lengths and ends, avoiding the roots.
- Use a Comb: After applying, use a wide-tooth comb to gently distribute the mask from root to tip.
- Add Gentle Heat: Cover your hair with a shower cap or a warm towel. The heat opens up the hair cuticles, allowing for deeper penetration of the nourishing ingredients.
Rinsing Methods
Rinsing properly is key to avoiding greasy, weighed-down hair. Use lukewarm water, as hot water can strip moisture. Rinse until the hair feels clean and no residue remains. For oil-heavy masks, you may need to shampoo twice. A final rinse with cool water can help seal the hair cuticle, locking in moisture and adding shine.
How Often Should You Use a DIY Hair Mask?
The ideal frequency depends on your hair’s condition. Over-masking can lead to buildup or, in the case of protein masks, can make hair brittle. Here are some general guidelines for your 2026 hair care routine:
- For Dry or Damaged Hair: 1-2 times per week.
- For Oily Hair: Once every 1-2 weeks, focusing on scalp-balancing masks.
- For “Normal” or Balanced Hair: Once a week for maintenance.
- For Fine Hair: Once a week with a lightweight mask.
Listen to your hair. If it feels heavy or greasy, scale back. If it still feels dry, you might need a more frequent or richer treatment.
Storage, Shelf Life, and Keeping It Fresh
One of the biggest differences between a DIY hair mask and a commercial product is shelf life. Because your homemade mask contains fresh, preservative-free ingredients, it is highly perishable.
- Make it Fresh: The best practice is to make only enough for one application right before you plan to use it.
- Short-Term Storage: If you have leftovers, you can store them in an airtight container in the refrigerator for up to 48 hours. However, masks with ingredients like egg or avocado may oxidize and become less effective.
- Avoid Spoilage: Never leave a fresh mask at room temperature for more than an hour. If it smells off, changes color, or shows signs of mold, discard it immediately. Commercial preservatives are complex chemicals, and trying to add “natural preservatives” at home is not recommended and can be unsafe.
Common DIY Hair Mask Mistakes and How to Avoid Them
Making a DIY hair mask is easy, but a few common errors can stand between you and great results.
- Mistake 1: Not Blending Enough. Lumpy masks (especially with banana or avocado) are difficult to apply and even harder to rinse out, leaving you with flakes in your hair. Solution: Use a blender for a silky-smooth consistency.
- Mistake 2: Using Too Much Oil. While oils are fantastic moisturizers, overdoing it can leave hair a greasy, heavy mess that requires multiple washes to remove. Solution: Start with a small amount (e.g., one tablespoon) and add more only if needed.
- Mistake 3: Rinsing with Hot Water. This is especially problematic for masks containing egg, as it can scramble in your hair. Hot water also strips natural oils. Solution: Always use lukewarm or cool water to rinse.
- Mistake 4: Skipping the Patch Test. A natural ingredient doesn’t mean it’s allergen-free for you. Solution: Always perform a patch test 24 hours before a full application.
The Science Behind the Magic: Why Natural Ingredients Work
The effectiveness of a DIY hair mask isn’t just folklore; it’s rooted in the chemical composition of the ingredients. Many studies explore the link between nutrients and hair health. According to research available from the National Center for Biotechnology Information, deficiencies in certain nutrients can impact hair structure and growth.
- Fatty Acids: Ingredients like avocado, olive oil, and coconut oil are rich in monounsaturated and saturated fatty acids. These lipids help lubricate the hair shaft, increase flexibility, and reduce breakage. Coconut oil is particularly noted for its ability to penetrate the hair shaft and prevent protein loss.
- Proteins: Hair is primarily made of a protein called keratin. The proteins in eggs and yogurt can temporarily patch gaps in the hair’s cuticle, strengthening the strand and adding shine.
- Humectants: Honey and aloe vera are natural humectants. This means they attract and bind water molecules from the air, helping to hydrate the hair and keep it moisturized.
- Vitamins and Antioxidants: Ingredients like banana, avocado, and strawberries deliver vitamins A, C, and E. These antioxidants help protect the hair and scalp from oxidative stress caused by free radicals.
Frequently Asked Questions (FAQ)
Can a DIY hair mask cause an allergic reaction?
Yes. Just like food allergies, you can have a topical allergy to any natural ingredient. This is why patch testing is a non-negotiable step. If you have known food allergies, be especially cautious about using those ingredients in your mask. For more information on skin reactions, you can consult resources like the National Health Service (NHS).
Will a DIY hair mask affect my hair color?
Most moisturizing masks are color-safe. However, highly acidic ingredients like lemon juice or large amounts of apple cider vinegar could potentially lighten hair or alter toner over time with repeated use. If you have freshly colored hair, stick to simple, hydrating masks and patch test on a small, hidden strand of hair first.
Can I use a DIY hair mask with my other hair treatments?
Generally, yes. A natural DIY hair mask can complement your existing routine. Use it in place of your regular conditioner once a week. Avoid using a heavy protein mask right after a chemical protein treatment at a salon, as too much protein can lead to brittleness. When in doubt, consult your hairstylist or dermatologist.
Resources and Further Reading
- Hair Nutrition Research: For scientific articles on the link between diet, nutrition, and hair health, visit the National Center for Biotechnology Information (NCBI).
- General Health and Allergy Information: The UK’s National Health Service provides reliable, easy-to-understand health guidance.
- Essential Oils and Ingredient Safety: For information on the safety of ingredients used in cosmetics, check with the U.S. Food and Drug Administration (FDA).
- Dermatology and Skin Health: The American Academy of Dermatology Association (AAD) offers expert advice on hair and scalp conditions.