The Ultimate Guide to Crafting a DIY Hair Mask for Healthy, Glowing Hair
Welcome to the ultimate guide to creating your very own DIY hair mask right from your kitchen! Forget complicated ingredient lists and expensive treatments. The secret to vibrant, healthy hair might just be sitting in your pantry. This guide will walk you through understanding your hair’s needs, selecting the right natural ingredients, and mixing up effective treatments for any hair concern. Get ready to nourish your locks the natural way.
Why craft your own hair mask?
In a world of endless hair care products, turning to a homemade solution offers unique advantages. Crafting your own DIY hair mask is not just a trend; it is a practical and empowering approach to hair care. Here is why you should consider it:
- Total Ingredient Control: You know exactly what you are putting on your hair and scalp. This means no hidden silicones, parabens, or harsh chemicals that can cause buildup or irritation.
- Cost-Effective Beauty: High-quality hair treatments can be expensive. A DIY hair mask utilizes affordable, everyday ingredients from your kitchen, delivering fantastic results without breaking the bank.
- Customization for Your Hair: Your hair is unique. By making your own mask, you can tailor the ingredients to your specific hair type and concerns, whether you are battling dryness, oiliness, or damage.
- Fresh and Potent: Commercial products contain preservatives to extend shelf life. A fresh DIY hair mask delivers the full potency of its natural vitamins, enzymes, and nutrients directly to your hair when it needs them most.
Hair basics that decide which ingredients to pick
Before you start mixing, understanding two key aspects of your hair—structure and porosity—will revolutionize your DIY hair mask game. These factors determine how your hair absorbs and retains moisture, which dictates the ingredients it will love.
Hair structure and porosity explained simply
Hair Structure refers to the thickness of individual hair strands. It is generally categorized into three types:
- Fine Hair: Strands are thin and delicate. They are easily weighed down by heavy oils and butters, so lighter ingredients are a better choice.
- Medium Hair: This is the most common hair type. It has more body than fine hair and is not as prone to being weighed down, making it compatible with a wider range of ingredients.
- Coarse Hair: Strands are thick and strong. This hair type is often more resistant to moisture and can handle richer, heavier ingredients like shea butter and coconut oil.
Hair Porosity is all about your hair’s ability to absorb and hold onto moisture. Think of the outer layer of your hair strand (the cuticle) as being covered in tiny shingles. Porosity describes how open or closed these shingles are.
- Low Porosity: The cuticles are tightly packed and flat. This hair type resists moisture, making it hard to get wet, but it also retains moisture well once absorbed. It benefits from masks with humectants like honey and aloe vera, applied with gentle heat (like a warm towel) to help open the cuticle.
- Medium Porosity: The cuticles are slightly raised, allowing moisture to enter and exit at a balanced rate. This hair type is the easiest to manage and responds well to a variety of treatments.
- High Porosity: The cuticles are raised or even have gaps. This hair absorbs moisture quickly but also loses it just as fast, leading to frizz and dryness. It craves sealing oils and protein treatments to fill in the gaps and lock in hydration.
Pantry ingredients and what they do
Your kitchen is a treasure trove of hair-loving ingredients. Let us break down the most common components for your next DIY hair mask and what they can do for you.
Nourishing oils and when to use them
Oils are fantastic for sealing in moisture, adding shine, and nourishing the hair shaft. However, not all oils are created equal.
- Coconut Oil: This penetrating oil is great for preventing protein loss, making it ideal for high porosity or damaged hair. It can be too heavy for fine or low porosity hair.
- Olive Oil: A classic moisturizer, rich in fatty acids. It is an excellent all-rounder, particularly for dry and thick hair types.
- Avocado Oil: Packed with vitamins A, D, and E, this oil is lighter than olive oil and absorbs well, making it perfect for moisturizing dry, brittle, or medium-to-low porosity hair.
- Jojoba Oil: The molecular structure of jojoba oil is very similar to our scalp’s natural sebum. This makes it a superb choice for balancing oily scalps or providing light moisture to fine hair.
Protein sources and safe use
Protein temporarily patches gaps in the hair cuticle, strengthening the strand. But be careful—too much protein can lead to stiffness and breakage, a condition known as “protein overload.”
- Yogurt and Kefir: These are excellent sources of gentle protein and lactic acid, which helps to cleanse the scalp and add shine. They are suitable for most hair types, especially those needing a mild protein boost.
- Eggs: The yolk is rich in fats and vitamins, while the white is packed with protein. An egg-based DIY hair mask is a potent strengthening treatment, best for damaged or high porosity hair. Important: Always rinse with cool or lukewarm water to avoid cooking the egg in your hair!
Humectants, fats and fortifiers
This group of ingredients helps with hydration, softness, and overall hair health.
- Humectants: These ingredients draw moisture from the air into your hair. Honey is a natural humectant that also has antibacterial properties. Aloe Vera is incredibly hydrating and soothing for the scalp. Glycerin is a powerful humectant, but use it with caution in very dry climates, as it can pull moisture *from* your hair if there is none in the air.
- Fats: Ingredients rich in healthy fats provide deep conditioning and softness. Avocado is full of fatty acids and vitamins. Bananas are rich in potassium and natural oils, which help soften hair and protect its elasticity.
- Fortifiers: These ingredients add an extra boost. Green Tea, used as a rinse or in a mask, is full of antioxidants that can help protect hair and stimulate the scalp.
Quick DIY masks by hair profile
Ready to get started? Here are four simple, effective recipes tailored to specific hair needs. For each recipe, simply blend the ingredients until smooth.
Dry or brittle hair recipe
This hydrating DIY hair mask delivers intense moisture and softness to thirsty strands.
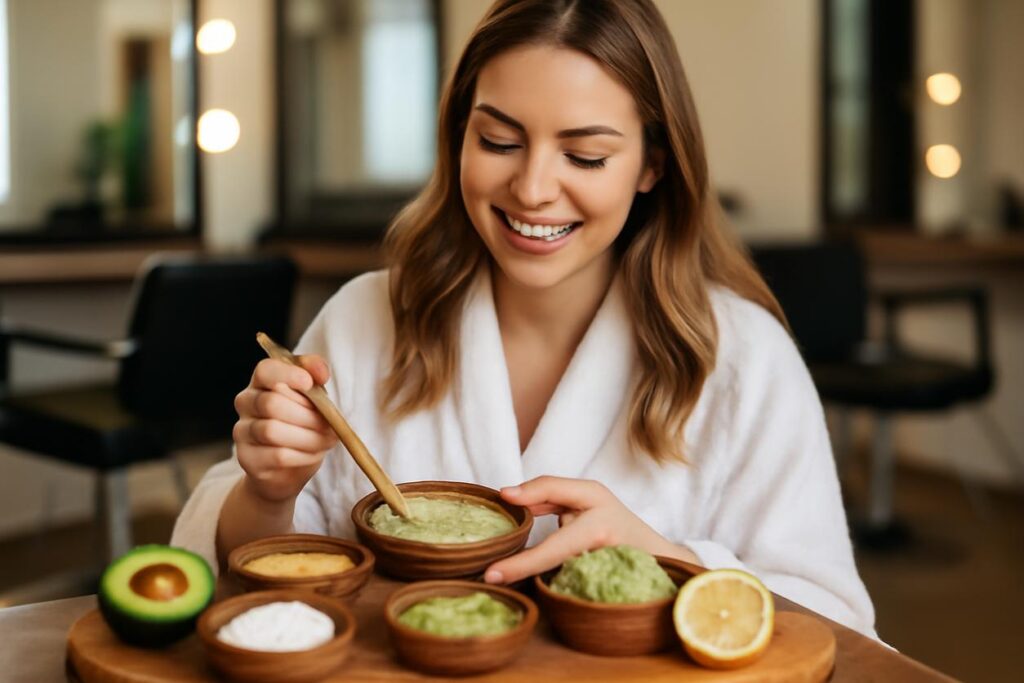
- Ingredients: 1/2 ripe avocado, 1 tablespoon olive oil, 1 tablespoon honey.
- Why it works: Avocado and olive oil provide deep conditioning fats, while honey draws in moisture for lasting hydration.
Oily scalp balancing mask
This mask clarifies the scalp without stripping the hair.
- Ingredients: 1/2 cup plain yogurt, 1 teaspoon honey, 1 teaspoon lemon juice (optional, for extra clarifying).
- Why it works: Yogurt’s lactic acid gently exfoliates the scalp to remove excess oil and buildup, while honey provides lightweight moisture.
Damaged or chemically treated hair treatment
This protein-rich DIY hair mask helps fortify weakened, porous hair.
- Ingredients: 1 egg, 1 tablespoon coconut oil, 1/2 mashed banana.
- Why it works: The egg provides protein to patch the cuticle, the banana adds moisture and elasticity, and coconut oil helps reduce further protein loss.
Curly hair moisture boost
Designed to quench thirsty curls and fight frizz without weighing them down.
- Ingredients: 2 tablespoons aloe vera gel, 1 tablespoon avocado oil, 1 teaspoon glycerin (optional, for humid climates).
- Why it works: Aloe vera provides lightweight hydration, avocado oil seals it in, and glycerin supercharges the moisture-attracting power.
How to prepare and apply for best results
Getting the most out of your DIY hair mask is all in the technique.
- Start with Clean, Damp Hair: Apply your mask after shampooing (and skipping conditioner) on towel-dried hair. Damp hair is more receptive to the mask’s nutrients.
- Protect Your Space: These masks can be messy! Drape an old towel over your shoulders and apply the mask in the bathroom.
- Section Your Hair: Divide your hair into 4-6 sections. This ensures you get an even coating from root to tip.
- Apply Thoroughly: Use your fingers or a brush to apply the mask to each section. Focus on the ends, which are usually the driest part of your hair. For scalp-focused masks, gently massage the mixture into your roots.
- Trap the Heat: Once your hair is fully coated, pile it on top of your head and cover it with a shower cap or plastic wrap. This traps your body heat, which helps the ingredients penetrate more effectively.
Timing, frequency and post mask care
Patience is a virtue, especially when it comes to hair care.
- Timing: Leave your DIY hair mask on for 20-30 minutes. Leaving it on for hours or overnight does not necessarily increase the benefits and can sometimes lead to issues like hygral fatigue (over-moisturized, weak hair).
- Frequency: For most hair types, using a mask once a week is plenty. If your hair is extremely damaged or dry, you might use one twice a week initially. If your hair is healthy, once every two weeks is sufficient.
- Rinsing: Rinse the mask out thoroughly with lukewarm or cool water. Hot water can strip moisture and, in the case of egg masks, can cook the protein.
- Post-Mask Care: Depending on the ingredients, you may or may not need to follow up with a conditioner. If your hair feels fully moisturized, you can skip it. If it feels a little stiff (especially after a protein mask), apply a light conditioner to soften it.
Common errors and how to reverse them
Even with natural ingredients, things can sometimes go awry. Here is how to fix common mishaps.
- Greasy, Weighed-Down Hair: This usually means you used too much oil or a type of oil that was too heavy for your hair. The fix: Shampoo your hair again, possibly with a clarifying shampoo, to remove the excess oil. Next time, use less oil or switch to a lighter one like jojoba or grapeseed.
- Stiff, Brittle Hair: You have likely overdone it with the protein. This is a classic sign of protein overload. The fix: Follow up immediately with a protein-free, moisture-rich deep conditioner. For your next DIY hair mask, stick to moisturizing ingredients like avocado, banana, and aloe vera.
- Bits of Food in Your Hair: This happens when ingredients are not blended smoothly. The fix: Rinse, rinse, and rinse again! A wide-tooth comb can help remove stubborn bits in the shower. To prevent this, always blend your mask until it is completely smooth and lump-free.
Storage safety and shelf life advice
Because your DIY hair mask is made from fresh food ingredients without preservatives, it has a very short shelf life. Safety comes first!
- Make Single-Use Batches: The best practice is to mix only what you need for one application.
- Refrigerate Immediately: If you have leftovers, store them in an airtight container in the refrigerator.
- Use Within 24-48 Hours: Do not keep fresh masks for more than two days. Bacteria can grow quickly, making them unsafe to use.
- When in Doubt, Throw it Out: If the mask changes color, develops a strange smell, or shows any signs of mold, discard it immediately.
Short science sidebar: what research supports
While home remedies are often passed down through generations, modern science is beginning to validate many of their benefits. A DIY hair mask can be a science-backed treatment. Research indicates that the physical and chemical properties of hair are crucial for its health and appearance. A study on hair structure and biology highlights how the cuticle’s integrity is key to preventing damage. Ingredients in a DIY hair mask can directly support this.
For example, a comprehensive review of natural oils found that certain oils, like coconut oil, can penetrate the hair shaft and reduce protein loss. This is because their fatty acid structure allows them to bind to the hair’s natural proteins. Furthermore, the role of protein in cosmetic science confirms that applying hydrolyzed proteins can temporarily mend and strengthen the hair fiber. While the proteins in eggs or yogurt are not hydrolyzed, they can form a film on the hair, providing temporary strength and shine.
Troubleshooting guide and FAQ
Q: Why did my hair feel greasy after the mask?
A: You likely used too much oil or an oil that was too heavy for your hair type. Try using half the amount next time or switching to a lighter oil like jojoba or grapeseed oil. Ensure you rinse thoroughly.
Q: Can I leave my DIY hair mask on overnight?
A: It is generally not recommended. Leaving a wet mask on for that long can lead to hygral fatigue, where the hair shaft swells excessively, weakening it over time. 20-30 minutes is the sweet spot for maximum benefits without the risks.
Q: My hair feels dry after a protein mask. What happened?
A: Your hair may be sensitive to protein, or it was already balanced and did not need the extra protein. This can cause temporary stiffness. Always follow a protein treatment with a moisturizing conditioner or focus on purely hydrating masks in the future.
Q: What is the best strategy for a DIY hair mask in 2025 and beyond?
A: The best strategy for 2025 will continue to be personalization. Use a simple base recipe and customize it. Add a few drops of rosemary oil for scalp health or a teaspoon of green tea for an antioxidant boost. Listening to your hair’s specific needs is a timeless approach.
Recipes summary table and variations
| Mask Focus | Target Hair Type | Key Ingredients | Main Benefit | Optional Variation |
|---|---|---|---|---|
| Deep Hydration | Dry or Brittle Hair | Avocado, Olive Oil, Honey | Intense Moisture | Add 1/2 mashed banana for extra potassium and softness. |
| Scalp Balancing | Oily or Flaky Scalp | Yogurt, Honey | Clarifies and Soothes | Add 2 drops of tea tree oil for its antimicrobial properties. |
| Strength and Repair | Damaged, Porous Hair | Egg, Coconut Oil, Banana | Fortifies and Restores | Swap coconut oil for olive oil if your hair is fine. |
| Curl Definition | Curly or Wavy Hair | Aloe Vera, Avocado Oil | Frizz-Free Hydration | Add 1 teaspoon of flaxseed gel for extra hold and definition. |
Further reading and references
For those interested in the science behind hair care, these resources provide in-depth information:
- Human Hair and the Impact of Cosmetic Procedures: A detailed look into the structure and biology of hair.
- Hair Cosmetics: An Overview: A scientific review covering the effects of various ingredients, including natural oils.
- Shampoos: Ingredients, Efficacy and Adverse Effects: This article touches upon the role of conditioning agents and proteins in hair care formulations.