The Ultimate Science-Backed Guide to a DIY Hair Mask
Table of Contents
- Quick overview: what a hair mask does for strands
- How to assess your hair: porosity, density and needs
- Core ingredients explained and why they work
- Five original DIY mask recipes by hair profile
- Ingredient swaps and allergy friendly substitutes
- Application step by step and timing guide
- Rinse methods and styling aftercare
- Troubleshooting common results and fixes
- Safety checklist and allergy patch testing
- How often and how to build a weekly routine
- Sources, suggested reading and experimental notes
Quick overview: what a hair mask does for strands
Welcome to the world of the DIY hair mask, a simple yet powerful tool for achieving your healthiest hair ever. Think of a hair mask as a high-potency conditioning treatment. While your daily conditioner smooths the surface of your hair for a few minutes, a hair mask is designed to penetrate deeper into the hair shaft, delivering a concentrated dose of nutrients over a longer period.
The core purpose of a hair mask is to target specific concerns that regular conditioning can’t always solve. Whether your hair is dry, damaged, frizzy, or weak, a well-formulated DIY hair mask can provide intense benefits, including:
- Deep Hydration: Replenishing lost moisture to combat dryness and brittleness.
- Damage Repair: Filling in gaps in the hair cuticle caused by heat styling, chemical treatments, or environmental stress.
- Improved Elasticity: Restoring the hair’s natural stretch and bounce, which reduces breakage.
- Enhanced Shine and Softness: Smoothing the hair cuticle for a glossy, silky finish.
- Scalp Health: Soothing irritation, reducing dandruff, and creating a healthy environment for hair growth.
Creating your own homemade hair mask puts you in complete control of the ingredients, ensuring you’re only using what your hair truly needs without any unwanted fillers or chemicals.
How to assess your hair: porosity, density and needs
Before you start mixing ingredients, understanding your unique hair profile is the key to creating an effective DIY hair mask. The three most important factors to consider are porosity, density, and your primary hair needs.
Hair Porosity: This refers to your hair’s ability to absorb and retain moisture. It’s largely determined by the state of your hair’s cuticle layer.
- Low Porosity: The cuticles are tightly packed and flat. This hair type resists moisture, so products can sit on top rather than being absorbed. It’s often shiny but can be prone to buildup.
- Normal Porosity: The cuticles are slightly raised, allowing moisture to enter and be retained easily. This hair type holds styles well and is the easiest to manage.
- High Porosity: The cuticles are widely spaced or have gaps, often due to damage. This hair absorbs moisture quickly but loses it just as fast, leading to frizz and dryness.
A simple way to test porosity is the float test. Take a clean, product-free strand of hair and drop it into a glass of water. If it floats, you likely have low porosity. If it sinks slowly, you have normal porosity. If it sinks quickly, you have high porosity.
Hair Density: This is about how many individual hair strands you have on your scalp. It’s different from the thickness of each strand. You can have fine hair that is very dense, or coarse hair that is thin. A simple assessment is to look at your scalp in the mirror. If you can easily see it, you have low density. If it’s difficult to see, you have high density.
Your Hair’s Needs: Finally, what is your main goal? Are you fighting dryness, trying to strengthen weak strands, or soothe an itchy scalp? Identifying your primary concern will help you choose the right recipe.
Core ingredients explained and why they work
The magic of a great DIY hair mask lies in its ingredients. Understanding what each component does allows you to customize recipes perfectly for your hair.
Oils: which to choose and why
Oils are fundamental for moisture and sealing. They generally fall into two categories:
- Penetrating Oils: These oils have smaller molecules that can seep into the hair shaft to moisturize from within. They are excellent for repairing and strengthening. Examples include coconut oil, olive oil, and avocado oil.
- Sealing Oils: These oils have larger molecules that coat the surface of the hair shaft. They are fantastic for locking in moisture that’s already there and for adding shine and reducing frizz. Examples include jojoba oil, argan oil, and grapeseed oil.
For a truly effective DIY hair mask, you might even use a combination: a penetrating oil for deep nourishment and a sealing oil to lock it all in.
Proteins and butters: when to use them
Proteins are the building blocks of hair. A protein treatment can help fortify hair that is weak, mushy when wet, or overly porous. Common kitchen ingredients rich in protein include Greek yogurt, eggs, and gelatin. However, be cautious of protein overload. Too much protein can make hair feel stiff and brittle. If your hair is already coarse or low porosity, use protein treatments sparingly.
Butters like shea butter and cocoa butter are heavy-duty moisturizers. They are rich in fatty acids and are brilliant for sealing and softening very dry, thick, or coarse hair. They can be too heavy for fine hair, so use them in smaller quantities if your hair is easily weighed down.
Humectants and natural hydrators
Humectants are ingredients that attract water molecules from the air and draw them into the hair shaft. They are hydration powerhouses. The most popular natural humectants for a homemade hair mask are:
- Honey: A natural humectant that also has antibacterial properties, making it great for scalp health.
- Aloe Vera Gel: Incredibly hydrating and soothing, aloe is packed with vitamins and enzymes that promote a healthy scalp and moisturized strands.
- Glycerin: A potent humectant that can be added in small amounts to boost a mask’s moisturizing power.
Five original DIY mask recipes by hair profile
Here are five simple, effective recipes to get you started. Remember to adjust quantities based on your hair length and density.
Lightweight moisture mask for fine hair
This mask hydrates without weighing down fine strands.
- 2 tablespoons aloe vera gel
- 1 tablespoon grapeseed or jojoba oil
- 1 teaspoon honey
Whisk ingredients together until smooth. The aloe and honey provide hydration while the light oil seals it in gently.
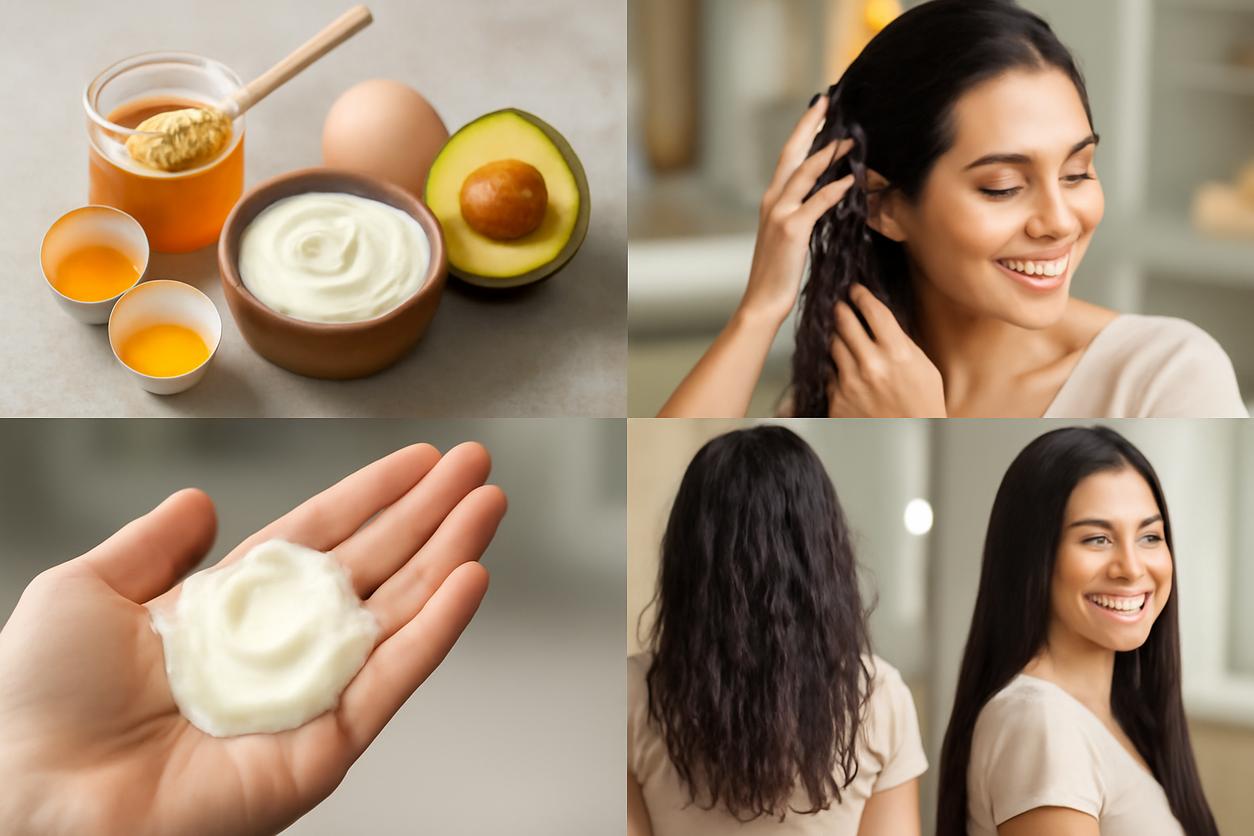
Deep nourishment mask for thick or coarse hair
A rich, creamy mask to quench thirsty, thick hair.
- 1/2 ripe avocado
- 1 tablespoon olive oil
- 1 tablespoon shea butter (melted)
Mash the avocado thoroughly and mix in the oil and melted butter until you have a lump-free paste. This DIY hair mask delivers intense moisture and fatty acids.
Protein boost for weak strands
Use this mask to temporarily patch and strengthen damaged, porous hair.
- 3 tablespoons plain Greek yogurt
- 1 tablespoon coconut oil
- 1 teaspoon honey (optional, for extra moisture)
Combine ingredients well. The lactic acid in yogurt gently cleanses while the protein strengthens the hair shaft. Use this mask no more than twice a month to avoid protein overload.
Scalp soothing mask for irritation
This mask calms an itchy, irritated scalp while gently moisturizing the hair.
- 1/4 cup finely ground oatmeal (colloidal oat is best)
- 3 tablespoons warm water or chamomile tea
- 1 tablespoon aloe vera gel
- 2 drops tea tree oil (optional, for anti-fungal properties)
Mix the oatmeal and warm liquid to form a paste. Let it sit for a few minutes, then stir in the aloe and tea tree oil. Focus application on the scalp.
Overnight repair mask safe for most types
A simple, no-fuss treatment for deep repair while you sleep.
- 2-3 tablespoons coconut oil
- 3-4 drops lavender essential oil (for a calming scent)
Warm the coconut oil between your palms and mix in the lavender oil. Apply to the ends and mid-lengths of your hair. Braid your hair loosely and cover with a silk scarf or sleep cap to protect your pillow.
Ingredient swaps and allergy friendly substitutes
The beauty of a DIY hair mask is its flexibility. If you have allergies or are missing an ingredient, simple swaps are easy.
| Original Ingredient | Good Substitutes | Notes |
|---|---|---|
| Egg (Protein) | Greek Yogurt, Avocado, Banana | Yogurt provides protein; avocado and banana provide moisture and minerals. |
| Honey (Humectant) | Maple Syrup, Aloe Vera Gel | Maple syrup is also a humectant. Aloe is more hydrating and less sticky. |
| Coconut Oil | Olive Oil, Avocado Oil | These are all penetrating oils that provide deep moisture. |
| Shea Butter | Mango Butter, Cocoa Butter | All are rich butters for intense sealing and softening. |
| Dairy Yogurt | Coconut Yogurt, Soy Yogurt | Plant-based yogurts offer a vegan protein and conditioning alternative. |
Application step by step and timing guide
Applying your homemade hair mask correctly ensures you get the maximum benefit.
- Prep Your Hair: It’s best to apply a DIY hair mask to clean, towel-dried (damp) hair. This allows the ingredients to penetrate without being blocked by dirt or product buildup.
- Section Your Hair: Divide your hair into 4-6 manageable sections. This makes it easier to get even coverage.
- Apply the Mask: Using your fingers or a brush, apply the mask from the ends upward. The ends are usually the oldest and most damaged part of your hair, so they need the most attention. Avoid applying heavy, oily masks directly to the roots if you have an oily scalp.
- Cover and Wait: Once your hair is fully saturated, twist it up and cover it with a shower cap or plastic wrap. This traps heat, which helps open the hair cuticle for better absorption.
- Set a Timer: Most moisturizing masks work well in 20-30 minutes. Protein-based masks should not be left on for longer than 30 minutes to prevent stiffness. Overnight masks are the exception.
Rinse methods and styling aftercare
How you remove the mask is just as important as how you apply it.
- Use Lukewarm Water: Hot water can strip moisture from your hair. Use lukewarm water to rinse the mask out thoroughly. It may take a few minutes to get everything out, especially with thicker masks.
- Finish with a Cool Rinse: A final rinse with cool water helps to seal the hair cuticle, locking in the nutrients from your mask and boosting shine.
- Skip the Conditioner (Usually): A good DIY hair mask is a deep conditioning treatment, so you typically won’t need to follow up with your regular conditioner.
- Be Gentle: After rinsing, gently squeeze excess water from your hair with a soft t-shirt or microfiber towel to minimize frizz and breakage. Style as usual, but consider letting your hair air-dry to appreciate the full effects.
Troubleshooting common results and fixes
Sometimes your first attempt at a DIY hair mask might not go as planned. Don’t worry, here are some common issues and how to fix them.
- My hair feels greasy or weighed down. This usually means you used too much oil or a butter that was too heavy for your hair type, or you didn’t rinse thoroughly enough. The Fix: Next time, reduce the amount of oil. To fix it now, wash your hair with a gentle clarifying shampoo.
- My hair feels dry or brittle. This is a classic sign of protein overload. Your hair didn’t need the extra protein, or you left the mask on for too long. The Fix: For the next few weeks, focus exclusively on moisture-based masks without protein (no egg or yogurt).
- I don’t see any difference. Your hair might need a more potent recipe, or you may need to apply it more consistently. The Fix: Try a different recipe that targets your concerns more directly, and make sure you’re leaving it on for the recommended time under a shower cap. Consistency is key!
Safety checklist and allergy patch testing
Even with natural ingredients, safety comes first.
- Always Patch Test: Before applying any new DIY hair mask to your entire head, perform a patch test. Apply a small amount of the mixture to the inside of your elbow or behind your ear. Wait 24 hours to check for any signs of redness, itching, or irritation.
- Use Fresh Ingredients: Use fresh, food-grade ingredients to avoid bacteria. Discard any leftover mask mixture; do not save it for later use.
- Be Cautious with Essential Oils: Essential oils are highly concentrated. Always dilute them in a carrier oil (like coconut or olive oil) and use only a few drops.
- Listen to Your Hair: Pay attention to how your hair responds. What works for someone else might not work for you. Hair care is personal! For official information on cosmetic safety, consult reliable sources like the Ingredient safety guidance from the U.S. Food and Drug Administration.
How often and how to build a weekly routine
For most hair types, using a DIY hair mask once a week is a great starting point. Severely damaged or dry hair might benefit from twice-weekly treatments initially, while oily or fine hair might only need a mask every two weeks.
Looking ahead to your 2025 hair goals, consistency is the most important strategy. Build a simple routine you can stick with. You could designate Sunday as your “hair mask day.” If your hair needs both protein and moisture, consider alternating. Use a protein mask one week and a moisture mask the next week to maintain a healthy balance. Keep track of what you use and how your hair feels to create a truly customized and effective at-home hair care plan.
Sources, suggested reading and experimental notes
The journey into creating the perfect DIY hair mask is a fun experiment. We encourage you to keep notes on the recipes and ingredients your hair loves most.
For more inspiration and a community of hair care enthusiasts, you can explore resources and recipes from other creators like Rich Hair UK. If you’re interested in the science behind how nutrition affects hair health, the National Library of Medicine offers a wealth of studies on hair nutrition research. Always prioritize your safety by cross-referencing ingredient information with official bodies such as the FDA.
Happy mixing, and here’s to your best hair yet!