Why make a homemade hair mask?
In a world of endless beauty products, turning to your kitchen for hair care might seem old-fashioned. However, creating your own DIY hair mask is a powerful, modern approach to hair health. As we explore hair care strategies for 2025 and beyond, the focus is shifting towards ingredient transparency and personalization—something a homemade mask delivers perfectly. Here’s why you should consider whipping up your own treatment.
Benefits of a DIY Hair Mask
- Total Ingredient Control: You know exactly what you’re putting on your hair and scalp. This means no hidden sulfates, parabens, silicones, or synthetic fragrances that can cause irritation or buildup.
- Cost-Effective: High-quality hair treatments can be expensive. A DIY hair mask uses affordable, everyday ingredients you likely already have in your pantry, like olive oil, honey, and avocados.
- Customized for Your Hair: Your hair is unique. A homemade hair mask allows you to tailor the ingredients to your specific needs, whether you have oily roots, dry ends, color damage, or beautiful curls.
- Fresh and Potent: Commercial products contain preservatives to extend shelf life. A fresh DIY hair mask delivers the maximum potency of its natural vitamins, enzymes, and antioxidants directly to your hair.
How hair structure and porosity influence ingredient choice
To create the perfect DIY hair mask, it helps to understand the basics of your hair. The two most important factors are hair structure and porosity. These characteristics determine how your hair absorbs and retains moisture, influencing which ingredients will give you the best results.
A Quick Look at Hair Structure
Each hair strand has three main layers:
- The Cuticle: The outermost layer, made of overlapping scales. A healthy cuticle is smooth and flat, which makes hair look shiny and feel soft.
- The Cortex: The middle layer, which provides strength, color, and texture to your hair. It’s primarily made of keratin proteins.
- The Medulla: The innermost, core layer, which is not always present, especially in fine hair.
Understanding Hair Porosity
Hair porosity refers to your hair’s ability to absorb and hold onto moisture. It’s determined by the state of your hair’s cuticle layer.
- Low Porosity: The cuticles are tightly packed and flat. This hair type is often shiny but resists moisture. It’s prone to product buildup because treatments tend to sit on top of the hair rather than penetrating it.
- Medium Porosity: The cuticles are slightly looser, allowing moisture to enter and be retained easily. This is often considered the “normal” or ideal porosity.
- High Porosity: The cuticles are raised or have gaps, often due to damage from heat styling, chemical treatments, or genetics. This hair type absorbs moisture quickly but loses it just as fast, leading to frizz and dryness.
Matching Ingredients to Your Porosity
- For Low Porosity Hair: Choose lightweight ingredients that won’t weigh your hair down. Think light oils like grapeseed or almond oil, and humectants like aloe vera and honey. Applying your mask to slightly warm, damp hair can help open the cuticles for better absorption.
- For High Porosity Hair: Your hair needs rich, nourishing ingredients to seal the cuticles and lock in moisture. Heavier oils like coconut and olive oil, butters like shea butter, and proteins like egg or yogurt are excellent choices.
Safety first: patch testing and allergy awareness
Just because an ingredient is natural doesn’t mean it’s safe for everyone. Food allergies can translate to skin and scalp reactions. Before applying any new DIY hair mask all over your head, always perform a patch test.
The Importance of a Patch Test
A patch test helps you identify potential allergic reactions or irritation before a minor issue becomes a major one. It’s a crucial step for anyone, but especially for those with sensitive skin.
How to Perform a Patch Test
- Prepare a small amount of your finished mask.
- Apply a dab of the mixture to a discreet area of skin, like behind your ear or on your inner elbow.
- Leave it on for the recommended mask duration (e.g., 20-30 minutes), or if you have sensitive skin, monitor for up to 24 hours.
- Rinse the area. If you experience any redness, itching, swelling, or irritation, do not use the mask on your scalp or hair.
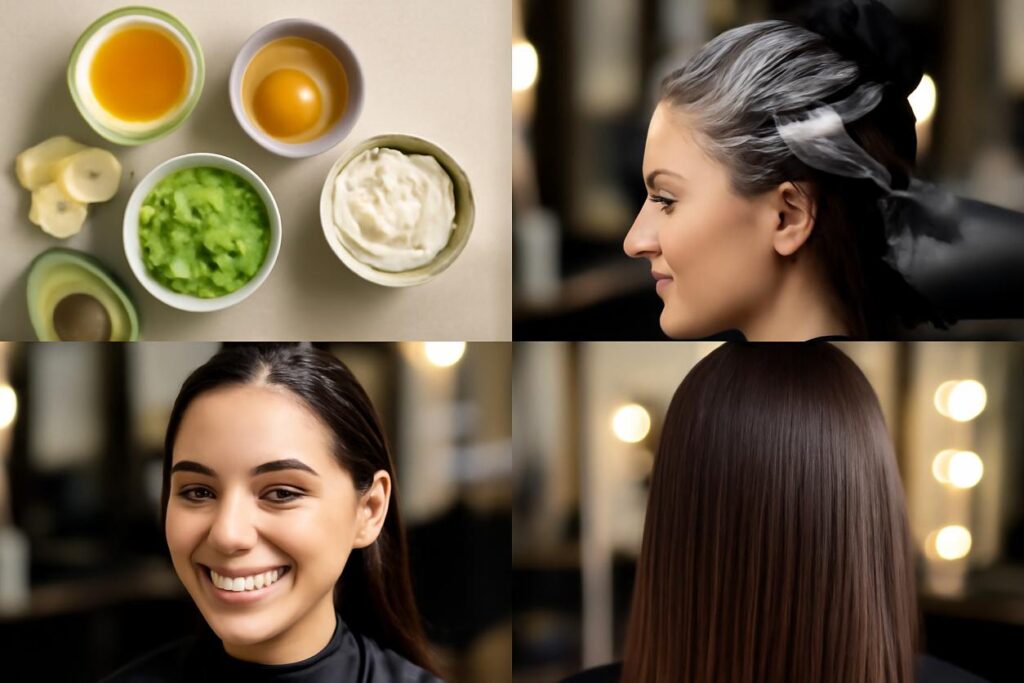
Core ingredients and what they do
Your kitchen is a treasure trove of hair-loving ingredients. Here’s a breakdown of common staples and their benefits for your next DIY hair mask.
| Ingredient | Hair Benefit | Best For |
|---|---|---|
| Avocado | Rich in biotin, potassium, and magnesium. Deeply moisturizes and helps seal cuticle cells to prevent breakage. | Dry, damaged, or frizzy hair. |
| Yogurt | Contains lactic acid to cleanse the scalp and protein to strengthen hair strands. | Oily, dull, or fine hair. |
| Honey | A natural humectant, meaning it draws moisture into the hair. It also has antibacterial properties. | Dry, damaged, or dandruff-prone scalps. |
| Coconut Oil | Penetrates the hair shaft to reduce protein loss. Provides intense moisture. | Dry, damaged, high porosity hair. (Can be too heavy for fine or low porosity hair). |
| Olive Oil | Contains oleic acid and squalene, which are excellent emollients that soften and smooth hair. | Dry, thick, or coarse hair. |
| Egg | The yolk is rich in fats and vitamins for moisture, while the white is packed with protein for strength. | Damaged, brittle, or oily hair (use whites only for oily hair). |
| Banana | High in silica, which helps synthesize collagen and can make hair stronger and thicker. Also great for moisture. | Dry, itchy scalps and weak hair. |
| Aloe Vera Gel | Contains vitamins A, C, and E. Soothes the scalp, conditions hair, and can reduce dandruff. | All hair types, especially oily or irritated scalps. |
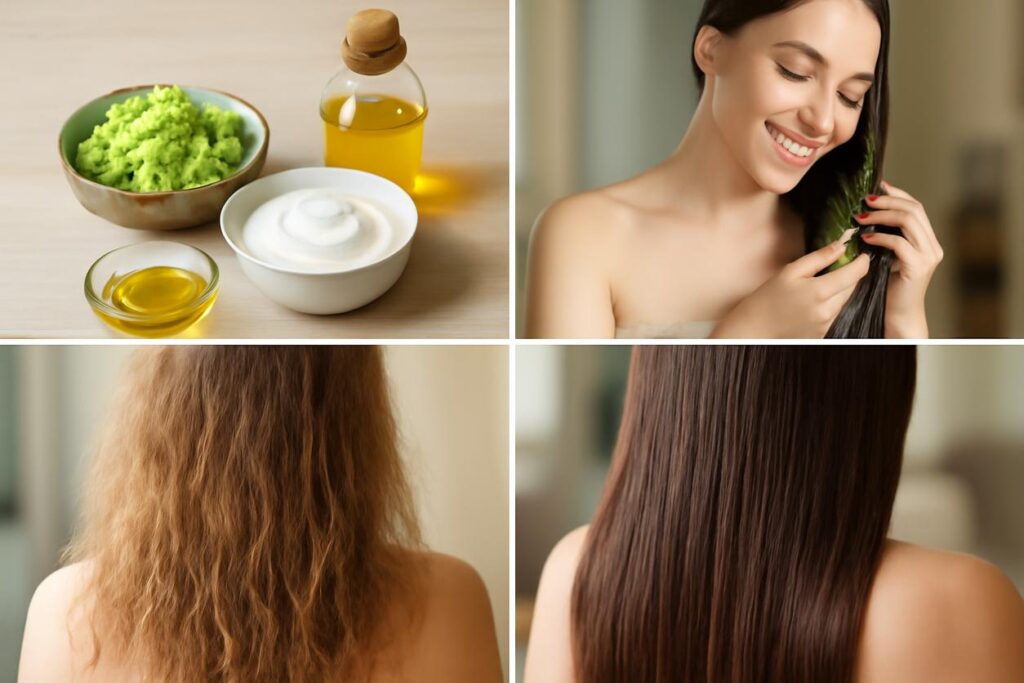
DIY recipe: masks for dry hair
The Ultimate Hydration Mask
This creamy mask is perfect for quenching thirsty, brittle strands and restoring softness and shine.
- Ingredients:
- 1/2 ripe avocado
- 1 tablespoon olive oil
- 1 tablespoon honey
- Instructions:
- Mash the avocado in a bowl until completely smooth to avoid lumps.
- Stir in the olive oil and honey until you have a consistent, creamy paste.
- Apply to clean, damp hair, focusing on the mid-lengths and ends.
- Leave on for 20-30 minutes, then rinse thoroughly with lukewarm water before shampooing and conditioning.
DIY recipe: masks for oily hair
The Scalp-Balancing Clarifying Mask
This mask helps absorb excess oil and purify the scalp without stripping your hair of its natural moisture.
- Ingredients:
- 2 tablespoons plain yogurt (full-fat or Greek)
- 1 tablespoon fresh aloe vera gel
- 1 teaspoon honey
- Instructions:
- In a small bowl, mix the yogurt, aloe vera gel, and honey until well combined.
- Apply the mixture primarily to your scalp and roots, working any remainder through the ends.
- Let it sit for 15-20 minutes.
- Rinse well with cool water and follow with a gentle shampoo.
DIY recipe: masks for damaged or color-treated hair
The Protein-Rich Repair Mask
If your hair is suffering from heat or chemical damage, this protein-packed treatment can help fortify the hair shaft and improve its elasticity.
- Ingredients:
- 1 egg
- 1 tablespoon coconut oil, melted
- 2 tablespoons plain yogurt
- Instructions:
- Whisk the egg thoroughly in a bowl.
- Stir in the melted coconut oil and yogurt until smooth.
- Apply to damp hair from root to tip.
- Leave on for 20 minutes. Important: Rinse with cool or lukewarm water only. Hot water can cook the egg in your hair.
- Shampoo and condition as usual.
DIY recipe: masks for curly and textured hair
The Frizz-Taming Definition Mask
Curls crave moisture. This rich, nourishing DIY hair mask is designed to deeply hydrate, reduce frizz, and enhance your natural curl pattern.
- Ingredients:
- 1 ripe banana
- 2 tablespoons olive oil
- 1 tablespoon honey
- Instructions:
- Blend the banana in a blender until it is completely pureed. This step is crucial to avoid banana chunks in your hair.
- Transfer the puree to a bowl and stir in the olive oil and honey.
- Apply generously to your hair in sections.
- Cover with a shower cap and leave on for 30 minutes.
- Rinse thoroughly, then proceed with your regular wash routine.
Quick 10-minute masks for busy days
No time for a full treatment? These speedy masks deliver a quick boost of moisture and shine.
Speedy Avocado and Olive Oil Blend
Mash half an avocado with a tablespoon of olive oil. Apply to ends, leave for 10 minutes, and rinse.
Quick Honey and Aloe Vera Soother
Mix equal parts honey and aloe vera gel. Apply to the scalp and hair, wait 10 minutes, and wash out.
Overnight treatments: benefits and precautions
Leaving a DIY hair mask on overnight can provide an intensive dose of hydration, which is especially beneficial for extremely dry or damaged hair.
When to Use an Overnight Mask
Overnight treatments work best with oil-based masks (like coconut or olive oil) or very simple moisturizing masks (like aloe vera). Avoid leaving masks with protein (egg, yogurt) or acidic ingredients (lemon juice) on overnight, as they can potentially cause damage or irritation with prolonged exposure.
Precautions: Protecting Your Pillow and Hair
- Apply the mask to your hair and cover it with a shower cap or wrap it in a silk or satin scarf.
- Place a towel over your pillow to protect your bedding from any potential leaks.
- In the morning, rinse the mask out thoroughly. You may need to shampoo twice to remove all the residue.
Step-by-step application and timing guide
To get the most out of your homemade hair mask, follow these simple steps for a mess-free and effective application.
- Preparation: Start with clean, towel-dried hair. Damp hair is more absorbent than dry hair. Drape an old towel around your shoulders to protect your clothes.
- Application: Section your hair into 4-6 parts. Using your fingers or a brush, apply the mask from the roots to the ends, ensuring every strand is coated. Pay special attention to the ends, which are usually the driest part.
- Waiting Time: Gently pile your hair on top of your head and cover it with a shower cap. The cap traps heat, which helps the ingredients penetrate more deeply. Leave the mask on for the recommended time, typically 20-30 minutes.
- Rinsing: Rinse the mask out thoroughly with lukewarm water. Follow up with your regular shampoo and conditioner to ensure all residue is removed and to seal the cuticle.
Ingredient swaps for common pantry items
Don’t have a specific ingredient? No problem. Many pantry staples can be substituted in your DIY hair mask recipe.
- No honey? Use maple syrup or agave nectar. They are also humectants that help with moisture retention.
- No olive oil? Swap it for another plant-based oil like almond, grapeseed, or jojoba oil.
- No avocado? Use a very ripe banana for a similar creamy, moisturizing base.
- No yogurt? You can use coconut milk or buttermilk as a substitute for a creamy, conditioning effect.
Storage, preservation and shelf-life guidance
One of the best things about a DIY hair mask is its freshness. This also means it has a very short shelf life. It’s best to make only enough for a single application. If you have leftovers, store them in an airtight container in the refrigerator for no more than 1-2 days. Discard the mask if it changes color, smell, or texture.
Troubleshooting common problems
Mask is too heavy or greasy.
You may have used too much oil or an oil that is too heavy for your hair type. Next time, reduce the amount of oil or switch to a lighter one like grapeseed or almond oil. Ensure you are shampooing thoroughly after the treatment.
Mask is too runny.
Your mixture may need a thickener. Try adding more of the base ingredient (like avocado or banana) or a tablespoon of plain yogurt to achieve a better consistency.
Difficulty rinsing out.
This is common with thick, oil-based masks or masks with ingredients like banana if not blended properly. Make sure to blend ingredients to a very smooth consistency. When rinsing, use plenty of lukewarm water and consider a double shampoo if your hair still feels coated.
FAQ
- How often should I use a DIY hair mask?
- For most hair types, once a week is a great routine. If your hair is extremely dry or damaged, you can use a hydrating mask up to twice a week. Oily hair types may prefer using a clarifying mask once every two weeks.
- Can I use a DIY hair mask on colored hair?
- Yes, but be mindful of the ingredients. Most moisturizing masks with ingredients like avocado, banana, and oils are safe for color-treated hair. Avoid highly acidic ingredients like pure lemon juice, as they may slightly lighten hair over time.
- Why does my hair feel greasy after a mask?
- This usually happens for one of three reasons: the mask contained too much oil for your hair type, you didn’t rinse it out thoroughly enough, or you skipped shampooing after the treatment. Always follow up with a good shampoo to remove all residue.
References and further reading
For more in-depth information on hair science and the properties of natural ingredients, we recommend exploring these evidence-based resources:
- PubMed: A database of biomedical literature for scientific studies on hair care and dermatology.
- NHS (National Health Service): Provides reliable health information, including advice on skin and hair conditions.
- NCBI (National Center for Biotechnology Information): Explore articles and journals on nutrition’s impact on hair health.