The Ultimate 2025 Guide to a DIY Hair Mask: Recipes for Every Hair Type
Table of Contents
- Why homemade hair masks work
- Choosing ingredients by hair concern and type
- How to prepare and test a mask safely
- Step by step application and timing
- Tailored recipes for fine hair, thick hair and curly hair
- Overnight versus short treatments
- Common mistakes and how to fix them
- Frequency, tracking results and building a routine
- Ingredient swaps for seasons and budgets
- Quick troubleshooting guide
- Frequently asked questions
- Conclusion and next steps
Welcome to the world of personalized hair care! If you are tired of searching for the perfect store-bought treatment, creating your own DIY hair mask is a rewarding and effective solution. Using simple, natural ingredients from your kitchen, you can craft a potent treatment tailored specifically to your hair’s needs. This guide will walk you through everything from choosing the right ingredients to building a sustainable hair care routine, empowering you to achieve healthier, happier hair right at home.
Why homemade hair masks work
A homemade hair mask works by delivering a concentrated dose of nutrients directly to the hair shaft and scalp. Unlike daily conditioners that offer surface-level smoothing, a mask’s ingredients are chosen for their ability to penetrate the hair’s outer layer, the cuticle, and provide deep nourishment. This process helps to repair damage, restore moisture, and improve elasticity from the inside out.
The magic lies in the ingredients. Natural foods are packed with vitamins, minerals, fatty acids, and proteins—the very building blocks of healthy hair. For example, the fatty acids in avocado and olive oil can moisturize and strengthen the hair strand, while the proteins in yogurt can temporarily fill in gaps in the cuticle, making hair feel smoother and stronger. Scientific literature available through databases like the National Center for Biotechnology Information (NCBI) often explores the properties of these natural compounds, supporting their use in cosmetic applications.
Choosing ingredients by hair concern and type
The key to a successful DIY hair mask is selecting ingredients that address your specific hair concerns. Is your hair dry, oily, brittle, or fine? Understanding the properties of different ingredients will help you customize the perfect formula.
Oils and their properties
Oils are essential for sealing in moisture and adding shine. They can be categorized into two types: moisturizing (penetrating) and sealing.
- Moisturizing Oils: These have a smaller molecular structure that can penetrate the hair shaft. Examples include coconut oil, olive oil, and avocado oil. They are excellent for repairing and moisturizing dry, damaged hair from within.
- Sealing Oils: These have larger molecules that coat the outside of the hair strand, locking in moisture and protecting it from the environment. Examples include jojoba oil, grapeseed oil, and castor oil. They are great for reducing frizz and adding shine.
Proteins and when to use them
Hair is primarily made of a protein called keratin. Chemical treatments, heat styling, and environmental stressors can break down this protein, leaving hair weak and brittle. A protein-based DIY hair mask can help fill these gaps.
- Good Protein Sources: Egg, Greek yogurt, gelatin, and avocado.
- When to Use: If your hair feels overly soft, mushy when wet, or has high elasticity (stretches a lot before breaking), it may need protein.
- A Word of Caution: Be mindful of protein overload. Too much protein can make hair stiff and brittle. It’s about finding the right protein-moisture balance. Start with a protein treatment once a month and see how your hair responds.
Hydrators and humectants
Humectants are ingredients that attract water from the atmosphere and draw it into the hair shaft, providing deep hydration. They are perfect for hair that feels dry and dehydrated.
- Effective Humectants: Honey, aloe vera gel, and glycerin.
- Sensory Note: Humectants can make a mask feel slightly sticky. Combining them with oils and a creamy base like banana or avocado creates a more manageable texture.
How to prepare and test a mask safely
Safety first! Even with natural ingredients, allergic reactions can occur. Before applying any new mixture to your entire head, perform a patch test.
- Mix a small amount of your planned DIY hair mask.
- Apply a dab to a discreet area of skin, like behind your ear or on your inner elbow.
- Leave it on for 30 minutes, or as long as you plan to leave the mask on your hair.
- Rinse it off and wait 24 hours. If you experience any redness, itching, or irritation, do not use the mask. For more on ingredient safety, you can reference the guidelines from the U.S. Food and Drug Administration (FDA) on cosmetics.
When preparing your mask, aim for a smooth, lump-free consistency similar to a thick conditioner. A blender works best to ensure ingredients like banana or avocado are fully pureed, preventing bits from getting stuck in your hair.
Step by step application and timing
Applying your homemade hair mask correctly ensures you get the maximum benefits.
- Step 1: Prep your hair. Start with clean, damp hair. Towel-dry it until it’s no longer dripping. This allows the mask to penetrate more effectively than it would on dry hair.
- Step 2: Section your hair. Divide your hair into 4-6 manageable sections. This helps ensure even distribution from root to tip.
- Step 3: Apply the mask. Using your fingers or a brush, apply the mask generously to each section, focusing on the mid-lengths and ends where hair is typically the most damaged. If you have a dry scalp, you can massage it in there as well.
- Step 4: Cover and wait. Pile your hair on top of your head and cover it with a shower cap or plastic wrap. This traps heat, which helps open the hair cuticle and allows the ingredients to penetrate deeper. Leave the mask on for at least 20-30 minutes.
- Step 5: Rinse thoroughly. Rinse the mask out with lukewarm water. You may need to shampoo lightly to remove any oily residue, followed by your regular conditioner to seal the cuticle.
Tailored recipes for fine hair, thick hair and curly hair
Not all hair is the same. Here are three starter recipes you can adapt.
DIY Hair Mask for Fine Hair (Lightweight Volume)
Fine hair can be easily weighed down. This mask uses lightweight ingredients to strengthen and add moisture without sacrificing volume.
- Ingredients: 1 egg white, 2 tablespoons aloe vera gel, 1 teaspoon jojoba oil.
- Directions: Whisk the egg white until frothy, then gently mix in the aloe vera and jojoba oil. Apply to damp hair for 20 minutes before rinsing with cool water.
- Sensory Note: This mixture will be thin and gel-like. It provides a clean, fresh feeling after rinsing.
DIY Hair Mask for Thick Hair (Deep Hydration)
Thick or coarse hair craves rich, emollient ingredients to combat dryness and frizz.
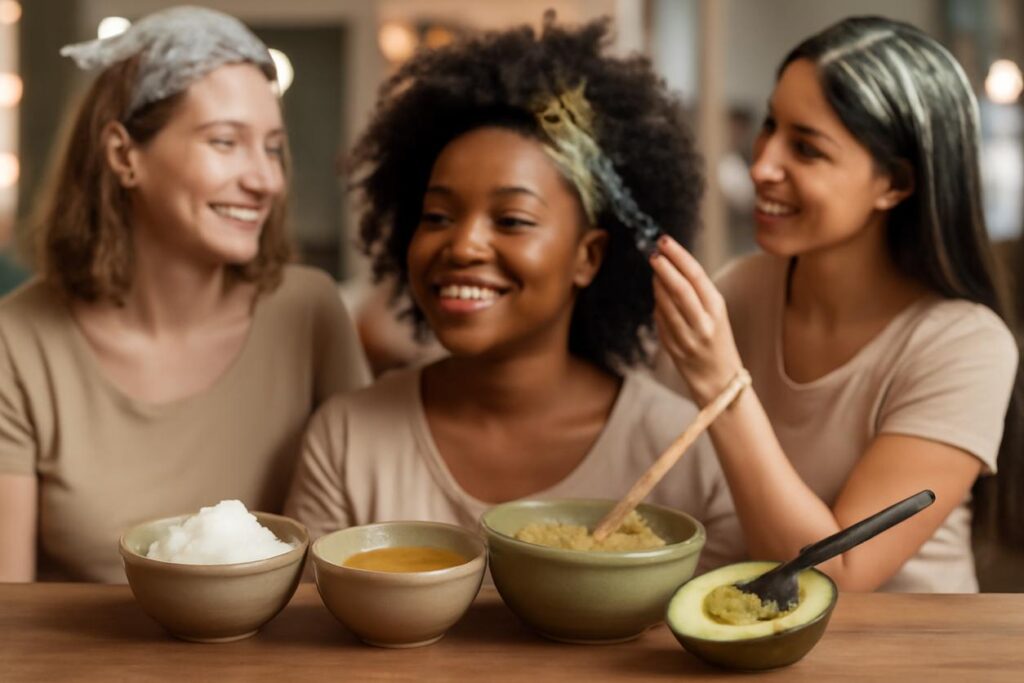
- Ingredients: Half a ripe avocado, 2 tablespoons olive oil, 1 tablespoon honey.
- Directions: Blend all ingredients until completely smooth. Apply to sections of damp hair, paying special attention to the ends. Leave on for 30-45 minutes.
- Sensory Note: This mask is thick, creamy, and has an earthy scent. It should feel deeply conditioning.
DIY Hair Mask for Curly Hair (Moisture and Definition)
Curly hair needs a balance of moisture and slip to enhance its natural pattern and prevent breakage.
- Ingredients: Half a cup of full-fat Greek yogurt, 1 ripe banana, 2 tablespoons coconut oil.
- Directions: Blend until there are absolutely no lumps. A smooth consistency is crucial to avoid banana bits in your curls. Apply and leave on for 30 minutes.
- Sensory Note: A rich, smoothie-like texture that provides excellent slip for detangling.
Overnight versus short treatments
Should you sleep in your mask? It depends on the ingredients and your hair type.
- Short Treatments (20-60 minutes): Ideal for most masks, especially those containing protein (like egg or yogurt) or potentially irritating ingredients. This is enough time for the nutrients to penetrate without causing issues.
- Overnight Treatments: Best for deeply hydrating, protein-free masks. A simple mask of coconut or olive oil can be left on overnight for intense moisture. Always wear a shower cap and place a towel over your pillow to prevent messes. Avoid leaving masks with fresh fruit (like banana) or eggs overnight as they can spoil.
Common mistakes and how to fix them
- Mistake: Hair feels greasy after. You likely used too much oil or didn’t rinse thoroughly. Fix: Use a clarifying shampoo or an apple cider vinegar rinse (1 part ACV to 4 parts water) to remove buildup. Use less oil next time.
- Mistake: Hair feels dry and brittle. This is a classic sign of protein overload. Fix: Follow up with a moisturizing, protein-free mask (like an avocado and honey mask) and avoid protein treatments for a few weeks.
- Mistake: The mask is lumpy and hard to wash out. Your ingredients weren’t blended well enough. Fix: Use a blender for the smoothest consistency. If you have bits left after rinsing, a fine-toothed comb can help remove them while your hair is coated in conditioner.
Frequency, tracking results and building a routine
Consistency is key. For most hair types, using a DIY hair mask once a week is a great starting point. However, very damaged hair might benefit from twice-weekly treatments, while oily hair may only need one every two weeks.
Consider keeping a simple hair journal. Note the ingredients you used, how long you left the mask on, and how your hair felt afterward. Over time, you’ll discover the perfect custom blends and frequency for your hair. Remember that healthy hair also starts from within, which involves good overall health and nutrition, a topic covered by organizations like the World Health Organization (WHO).
Ingredient swaps for seasons and budgets
You don’t need expensive or exotic ingredients to make a great homemade hair mask. Your kitchen is full of possibilities!
- Seasonal Swaps: In the summer, you might prefer lighter masks with aloe vera and mint for a cooling effect. In the winter, when hair is drier, opt for richer ingredients like shea butter or pumpkin puree.
- Budget-Friendly Swaps: No argan oil? No problem. Sunflower or grapeseed oil are excellent, affordable alternatives. Instead of fresh avocado, you can use avocado oil for a similar dose of fatty acids.
Quick troubleshooting guide
| If your hair feels… | It might need… | Try a mask with… |
|---|---|---|
| Dry and straw-like | Moisture | Avocado, banana, honey, olive oil |
| Mushy and overly soft | Protein | Greek yogurt, egg, gelatin |
| Dull and lifeless | Shine and clarification | Apple cider vinegar, aloe vera |
| Weighed down and oily | Lighter ingredients | Egg whites, clay, jojoba oil |
Frequently asked questions
Can I use a DIY hair mask on color-treated hair?
Yes, but be cautious. Some ingredients, like lemon juice or strong vinegars, can strip color. Stick to gentle, moisturizing ingredients like avocado, banana, and coconut oil. Always do a strand test on a small, hidden section of hair first.
How should I store my homemade hair mask?
Because they are made with fresh ingredients, these masks are perishable. It is best to make only what you need for a single application. If you have leftovers, store them in an airtight container in the refrigerator for no more than 2-3 days.
Can I use rotten fruit?
No. While it is tempting to use an overripe banana, avoid using any food that is moldy or has gone bad. Your hair and scalp deserve fresh, high-quality nutrients.
Conclusion and next steps
Creating your own DIY hair mask is an empowering step towards understanding and nurturing your hair. By listening to your hair’s needs and experimenting with simple, natural ingredients, you can develop a personalized routine that delivers incredible results. Start with one of the recipes above, pay attention to how your hair responds, and don’t be afraid to adjust the ingredients. Your journey to healthier, more radiant hair begins now!