Quick overview: What a DIY hair mask does
A DIY hair mask is a homemade conditioning treatment designed to nourish, repair, and revitalise your hair using natural ingredients from your kitchen. Unlike commercial products, a DIY hair mask gives you complete control over what goes onto your hair and scalp. You can tailor each recipe to target specific concerns like dryness, damage, or an oily scalp, all without synthetic chemicals or high price tags.
The primary goal of a homemade hair mask is to deliver a concentrated dose of nutrients directly to the hair shaft and scalp. Depending on the ingredients, it can provide deep hydration, restore protein, add shine, reduce frizz, or soothe irritation. Think of it as a super-powered conditioner that you leave on for an extended period, allowing the beneficial components to penetrate deeply and work their magic. It’s an affordable and effective way to elevate your haircare routine.
How to choose ingredients by hair goal
The secret to a successful DIY hair mask lies in selecting the right ingredients for your unique hair needs. Mixing and matching items from your pantry can address everything from brittle strands to an itchy scalp. Here’s how to choose your components based on your hair goals.
Hydration ingredients for thirsty hair
If your hair feels dry, brittle, or frizzy, it’s crying out for moisture. Hydrating ingredients are rich in fatty acids, vitamins, and natural sugars (humectants) that draw moisture into the hair shaft and seal it in.
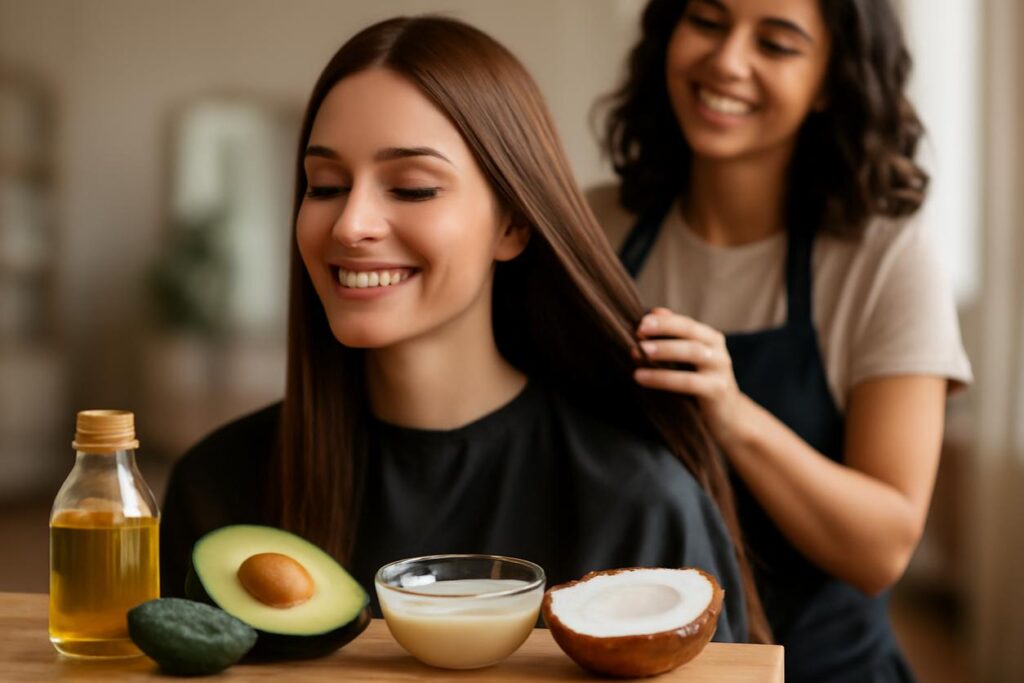
- Avocado: Packed with monounsaturated fats, oleic acid, and biotin, avocado penetrates the hair shaft to moisturise and strengthen from within.
- Banana: Rich in potassium, natural oils, and vitamins, banana helps soften hair, protect its natural elasticity, and prevent split ends and breakage.
* Honey: As a natural humectant, honey attracts and retains moisture. Its antibacterial properties also make it great for scalp health.
* Olive Oil or Coconut Oil: These oils are excellent emollients, meaning they smooth the hair cuticle, reduce frizz, and create a protective barrier to lock in hydration.
Protein and strengthening options for brittle strands
Hair that is limp, overly stretchy when wet, or prone to snapping may lack protein. Your hair is primarily made of a protein called keratin, and these ingredients help replenish its structure, improving strength and elasticity.
- Egg: The yolk is rich in fats and vitamins for moisture, while the white is packed with protein. An egg-based DIY hair mask is a classic treatment for rebuilding damaged hair.
- Greek Yogurt: This contains lactic acid, which cleanses the scalp, and a high concentration of protein to fortify the hair strands.
- Gelatin: Unflavoured gelatin powder contains hydrolyzed protein that can bind to the hair, temporarily filling in gaps in the cuticle and adding strength.
Soothing and balancing choices for sensitive scalps
An irritated, itchy, or oily scalp can throw your entire hair health off balance. These ingredients help calm inflammation, gently cleanse, and regulate oil production without stripping natural moisture.
- Aloe Vera Gel: Known for its soothing properties, aloe vera contains proteolytic enzymes that can help repair dead skin cells on the scalp. It’s also a great lightweight moisturiser.
- Green Tea: Rich in antioxidants and nutrients, brewed and cooled green tea can stimulate hair follicles and soothe an irritated scalp. Its tannins can also help regulate sebum (oil) production.
- Oatmeal: Colloidal oatmeal (finely ground oats) is incredibly soothing for itchy and inflamed skin, making it a perfect base for a calming scalp mask.
Recipes by hair type and concern
Ready to get started? These simple, two-ingredient recipes are perfect for beginners. Always use fresh ingredients and blend them until smooth to avoid chunks in your hair. Adjust quantities based on your hair length and thickness.
Deep moisture mask for dry or frizzy hair
This rich and creamy homemade hair mask is a saviour for parched strands, leaving them soft, shiny, and manageable.
- Ingredients: 1/2 ripe avocado and 2 tablespoons of olive oil.
- Instructions: Mash the avocado until completely smooth, ensuring no lumps remain. Stir in the olive oil until you have a consistent, creamy paste.
Lightweight clarifying mask for oily roots
This mask helps absorb excess oil and gently cleanse the scalp without causing dryness, making it an ideal DIY hair mask for those with greasy roots and dry ends.
- * Ingredients: 1/4 cup plain Greek yogurt and 1 tablespoon of lemon juice.
* Instructions: Mix the Greek yogurt and lemon juice together thoroughly. The lactic acid in the yogurt and citric acid in the lemon work to gently exfoliate the scalp and dissolve excess sebum.
Repairing mask for split ends and damage-prone hair
Give your weak, damaged hair a boost of strength with this protein-packed treatment. It helps fortify the hair cuticle to reduce breakage.
- Ingredients: 1 whole egg and 3 tablespoons of coconut oil (melted).
- Instructions: Whisk the egg until it’s frothy. Slowly drizzle in the melted (but not hot) coconut oil while whisking continuously to create an emulsified, mayonnaise-like texture.
Step-by-step prep and application technique
Applying your DIY hair mask correctly is just as important as the recipe itself. Follow these steps for a mess-free and effective treatment.
- Prepare Your Hair: Start with clean, damp hair. Shampoo your hair as usual and gently towel-dry it until it’s no longer dripping. This allows the mask to penetrate more effectively without sliding off.
- Protect Your Space: Drape an old towel over your shoulders to protect your clothes. Applying the mask in the bathroom is ideal for easy cleanup.
- Section Your Hair: Divide your hair into 4-6 manageable sections and secure them with clips. This ensures you can apply the mask evenly from root to tip.
- Apply the Mask: Using your fingers or a clean application brush, work the mask through your hair, section by section. For moisture or repair masks, focus on the mid-lengths and ends. For scalp-focused masks, gently massage the mixture into your roots.
- Let It Absorb: Once your hair is fully saturated, twist it up and cover it with a shower cap or plastic wrap. This traps heat from your scalp, which helps open the hair cuticle and allows the ingredients to penetrate deeper.
- Rinse Thoroughly: After the recommended time, rinse the mask out completely with lukewarm water. Using water that is too hot can cook ingredients like egg, making them difficult to remove. You may want to follow with a light conditioner to seal the cuticle, but this is often not necessary.
Timing and frequency cheat sheet
How long should you leave your DIY hair mask on, and how often should you use it? It depends on your hair’s needs and the ingredients you choose. Overusing protein masks, for example, can lead to stiffness.
| Hair Goal or Type | Key Ingredients | Application Time | Frequency |
|---|---|---|---|
| Deep Hydration (Dry/Frizzy Hair) | Avocado, Banana, Honey, Oils | 20-30 minutes | Once a week |
| Strengthening (Damaged Hair) | Egg, Yogurt, Gelatin | 15-20 minutes | Every 2 weeks |
| Scalp Soothing (Itchy/Irritated) | Aloe Vera, Oatmeal, Green Tea | 15-20 minutes | As needed, up to once a week |
| Clarifying (Oily Hair) | Yogurt, Lemon, Green Tea | 10-15 minutes | Every 1-2 weeks |
Storing mixtures and safe ingredient swaps
Because a DIY hair mask is made from fresh food ingredients, it has a very short shelf life. It’s best to make only what you need for a single application. Natural ingredients can spoil quickly and grow bacteria, so never store leftover mixtures for more than 24 hours in the refrigerator in an airtight container.
If you’re missing an ingredient, here are some safe swaps:
- No Avocado? Use a ripe banana for a similar creamy, moisturising effect.
- No Greek Yogurt? You can use coconut cream or sour cream for a protein and fat boost.
- Out of Olive Oil? Swap it for another hair-friendly oil like coconut, almond, or jojoba oil.
- Allergic to Eggs? Use Greek yogurt or a blended mix of banana and avocado for a protein-free binding and conditioning mask.
Safety First: Always perform a patch test on a small area of your skin (like behind your ear or on your inner elbow) 24 hours before applying a new mask to your entire head. This helps check for any potential allergic reactions to the ingredients.
Troubleshooting: reactions, buildup, and texture issues
Sometimes, your DIY hair mask experience might not go as planned. Here’s how to handle common issues.
- Hair Feels Greasy or Weighed Down: This often happens if you used too much oil or didn’t rinse thoroughly enough. Use lukewarm water and be patient with rinsing. If your hair is still greasy, a very light shampoo on the roots can help. In the future, use less oil in your recipe.
- Hair Feels Stiff or Brittle: This is a sign of “protein overload.” You’ve used a strengthening mask too often or on hair that didn’t need it. Counteract this by using a moisture-focused DIY hair mask next time and reducing the frequency of your protein treatments.
- Scalp Itchiness or Reaction: If you experience any irritation, rinse the mask out immediately with cool water. This could be an allergic reaction. Always perform a patch test before trying a new recipe.
- Bits of Food Stuck in Hair: This is a blending issue! Ensure your mask is blended to a completely smooth, lump-free consistency before application. A fine-mesh sieve can help remove seeds or fibres from mixtures like banana or avocado.
Quick at-home tests to identify hair needs
Not sure if your hair needs moisture or protein? These simple tests, which are key components of haircare strategies for 2025 and beyond, can give you a clue.
The Strand Stretch Test:
Take a single strand of clean, wet hair. Gently stretch it.
- If it stretches significantly and then bounces back, your moisture-protein balance is good.
- If it stretches but doesn’t bounce back (or feels mushy), it likely needs protein.
- If it barely stretches and snaps easily, it’s likely very dry and needs moisture.
The Porosity Test:
Drop a clean, dry strand of hair into a glass of water.
- If it floats on top, you have low porosity hair. It has a hard time absorbing moisture, so use masks with heat (a warm towel or shower cap) to help ingredients penetrate.
- If it sinks slowly, you have normal porosity hair. Your hair absorbs moisture well.
- If it sinks quickly, you have high porosity hair. It absorbs moisture easily but loses it just as fast. A DIY hair mask with sealing oils (like olive or coconut oil) is beneficial.
Frequently asked questions
- Can I use a DIY hair mask on coloured hair?
- Yes, but be cautious with acidic ingredients like lemon juice or apple cider vinegar, which can potentially lighten or alter colour over time. Stick to hydrating and gentle masks with ingredients like avocado, banana, and aloe vera.
- How often should I use a homemade hair mask?
- This depends on your hair type and the mask’s ingredients. A deeply hydrating mask can be used weekly, while a protein-heavy mask is best used every 2-4 weeks to avoid overload. Refer to the timing chart above for guidance.
- Should I apply the mask to wet or dry hair?
- Applying a DIY hair mask to clean, damp (towel-dried) hair is generally best. This allows for better absorption without the mask being diluted by excess water or blocked by dirt and product buildup.
- Do these masks really work?
- Absolutely! While they don’t offer the same long-term results as chemically formulated products, they provide a fantastic, immediate boost of moisture, protein, and nutrients. Consistency is key to seeing the benefits.
Further resources and suggested reading
Creating your own DIY hair mask is an empowering step towards understanding and nurturing your hair with simple, natural ingredients. By identifying your hair’s specific needs and choosing the right components, you can whip up effective treatments right in your kitchen. Remember to have fun with the process and listen to what your hair tells you.
For more insights into professional-grade haircare and understanding hair health on a deeper level, exploring resources from established experts can be incredibly beneficial. For additional tips on maintaining healthy hair, you can look into resources like Rich Hair UK, which provides expert advice on various hair care topics.