Introduction — Why making hair masks at home works
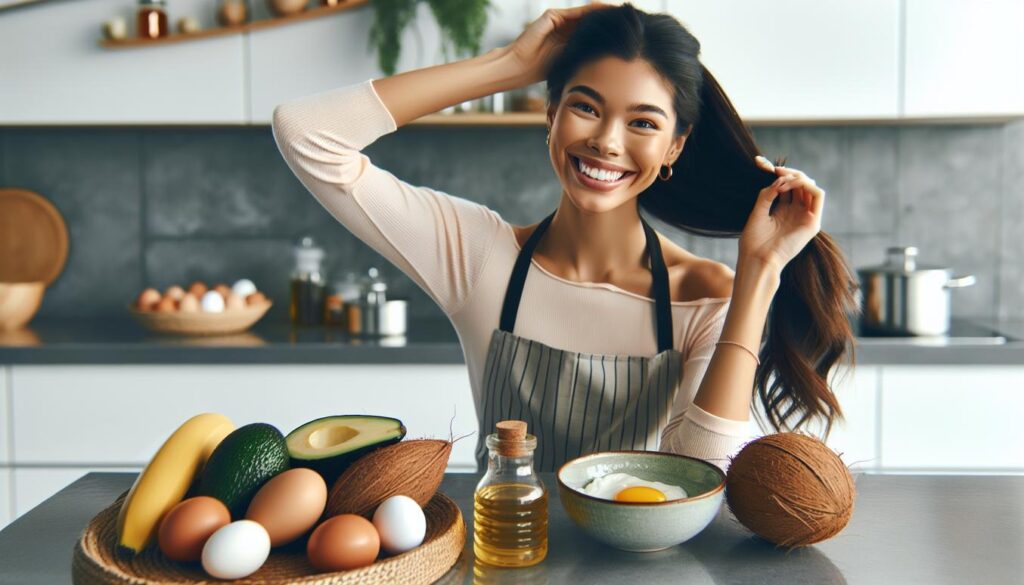
Are you looking for luscious, healthy hair without the salon price tag? The secret to transforming your tresses might already be sitting in your kitchen pantry. Creating a DIY hair mask is a simple, cost-effective, and powerful way to give your hair a concentrated dose of nutrients. Unlike many store-bought products that can contain synthetic fragrances and preservatives, making your own mask gives you complete control over what you put on your hair and scalp.
The beauty of a DIY hair mask lies in its simplicity and customizability. Whether your hair is dry and brittle, fine and limp, or curly and craving moisture, you can select natural ingredients to target your specific concerns. This guide will walk you through the science of pantry-based ingredients, provide you with easy-to-follow recipes, and teach you the best techniques for application, ensuring you get brilliant results every time. Get ready to unlock the potential of wholesome ingredients for your best hair ever.
How to choose ingredients by hair type
The first step to a successful DIY hair mask is understanding what your hair truly needs. Different hair types have unique requirements for moisture, protein, and nutrients. Choosing the right ingredients is the key to creating a treatment that works with your hair, not against it. Below, we break down the best pantry staples for each hair concern.
For fine or limp hair
The goal for fine hair is to add hydration and strength without weighing it down. Heavy oils and butters can leave fine strands looking flat and greasy. Instead, opt for lightweight ingredients.
- Aloe Vera: A lightweight hydrator that moisturizes without adding weight.
- Egg Whites: Provide a gentle protein boost that can help strengthen fine strands.
- Bentonite or Kaolin Clay: These clays can absorb excess oil from the scalp and roots, adding volume and lift.
- Lightweight Oils: Grapeseed, almond, or jojoba oil are excellent choices that provide nourishment without being overly heavy.
For curly and coiled hair
Curly hair textures are often prone to dryness and frizz because the natural oils from the scalp have a harder time traveling down the hair shaft. The focus here is on deep moisture and definition.
- Avocado: Packed with fatty acids, vitamins, and minerals, avocado is a powerhouse moisturizer.
- Banana: Rich in potassium and natural oils, bananas improve elasticity and prevent split ends.
- Honey or Agave Nectar: These are natural humectants, which means they draw moisture from the air into your hair, providing lasting hydration.
- Shea Butter: A rich emollient that seals in moisture and defines curl patterns. Melt it slightly before mixing.
For dry or damaged hair
Hair that is dry, damaged, or chemically treated needs intensive repair and hydration. Your DIY hair mask should focus on ingredients that can penetrate the hair shaft and replenish lost protein and moisture.
- Coconut Oil: One of the few oils proven to penetrate the hair shaft, it helps reduce protein loss. You can explore coconut oil research to learn more about its benefits.
- Olive Oil: Rich in fatty acids, it smooths the outer cuticle and imparts shine.
- Whole Egg: The yolk is rich in fats and vitamins for moisture, while the white provides protein for strength.
- Honey: Its restorative properties help heal and moisturize damaged hair. The benefits of honey are well-documented for both skin and hair.
For oily scalp and roots
An oily scalp is caused by overactive sebaceous glands. The right DIY hair mask can help balance oil production and clarify the scalp without stripping the hair of its natural moisture.
- Yogurt: The lactic acid in plain yogurt helps to gently cleanse the scalp and regulate sebum.
- Apple Cider Vinegar (ACV): When diluted, ACV can help balance the scalp’s pH and remove product buildup. Use sparingly.
- Oatmeal: Soothes the scalp and absorbs excess oil. Use finely ground oats for easier rinsing.
- Lemon Juice: Its acidic nature helps control oil, but it should always be diluted as it can be lightening and drying.
Pantry recipes with exact measurements and timing
Ready to start mixing? These four simple recipes use common kitchen ingredients to create a powerful DIY hair mask. Always use a non-metallic bowl and spoon for mixing, especially when using ingredients like clay or eggs.
Coconut and honey shine mask for dry hair
This mask is a super-hydrator, perfect for bringing life and shine back to dull, dry hair.
- Ingredients: 2 tablespoons of virgin coconut oil, 1 tablespoon of raw honey.
- Instructions: If your coconut oil is solid, gently warm it until it becomes liquid. Stir in the honey until the mixture is smooth.
- Application: Apply to damp hair, focusing on the mid-lengths and ends. Leave on for 20-30 minutes. Rinse thoroughly and follow with your regular shampoo and conditioner.
Yogurt and aloe soothing mask for sensitive scalps
If your scalp is itchy or irritated, this cooling and soothing mask provides instant relief while gently cleansing.
- Ingredients: 3 tablespoons of plain, unsweetened yogurt, 2 tablespoons of pure aloe vera gel.
- Instructions: Combine the yogurt and aloe vera in a bowl and mix until you have a consistent, smooth paste.
- Application: Apply directly to the scalp, massaging gently. Work any remaining mask through the lengths of your hair. Leave on for 15-20 minutes before rinsing with cool water.
Egg and olive oil protein boost for damaged strands
For hair that feels weak or overly porous, this mask provides a much-needed dose of protein to help rebuild its structure. It’s important to understand your hair’s protein needs; for more information, review this protein treatment guidance.
- Ingredients: 1 whole egg, 2 tablespoons of extra virgin olive oil.
- Instructions: Whisk the egg thoroughly in a bowl. Slowly drizzle in the olive oil while continuing to whisk until the mixture is emulsified and creamy.
- Application: Apply to damp hair from root to tip. Let it sit for 20 minutes. Crucial tip: Rinse with cool or lukewarm water. Hot water can cook the egg in your hair, making it difficult to remove.
Oat and banana moisture mask for general hydration
This is a great all-rounder mask for anyone looking to boost moisture and softness without complicated ingredients.
- Ingredients: 1 ripe banana, 2 tablespoons of rolled oats (blended into a fine powder), 1 tablespoon of water or milk.
- Instructions: Mash the banana in a bowl until completely smooth with no lumps. Stir in the oat powder and add the liquid to create a spreadable paste.
- Application: Apply to hair, ensuring all strands are coated. Leave on for 25-30 minutes. Rinsing this one may take extra time, so be patient.
Application technique step by step
How you apply your DIY hair mask is just as important as the ingredients you use. Follow these steps for a mess-free and effective treatment.
- Prepare Your Hair: Start with clean, towel-dried hair. It should be damp, not dripping wet. This allows the ingredients to penetrate more effectively.
- Section Your Hair: Divide your hair into four or more manageable sections. Using clips can make this process easier.
- Apply the Mask: Using your fingers or a clean application brush, apply the mask starting from the ends and working your way up. The ends are usually the oldest and most damaged part of your hair, so they often need the most attention.
- Distribute Evenly: Once applied, use a wide-tooth comb to gently distribute the mask through your hair, ensuring every strand is coated.
- Let it Penetrate: Pile your hair on top of your head and cover it with a shower cap or plastic wrap. This traps heat from your scalp, which helps open the hair cuticle and allows the ingredients to absorb more deeply.
- Rinse Thoroughly: After the recommended time, rinse the mask out completely with lukewarm water. Depending on the ingredients, you may need to follow up with shampoo, but always finish with a conditioner to seal the hair cuticle and lock in the benefits.
How often to use masks and a maintenance plan
Consistency is the key to seeing lasting results from your DIY hair mask routine. However, over-masking can also be a problem, so finding the right balance is essential.
- For most hair types: Using a hair mask once a week is a great starting point.
- For very dry or damaged hair: You may benefit from masking up to twice a week until you see an improvement.
- For oily or fine hair: Once every one to two weeks is often sufficient. Focus the application on the ends to avoid weighing down the roots.
A successful maintenance plan for 2025 and beyond is about listening to your hair. Pay attention to how it feels after a treatment. Is it soft and manageable, or does it feel weighed down? Adjust your frequency and ingredients based on these observations. A consistent routine will yield far better results than sporadic, intensive treatments.
Safety, allergy testing and safe substitutions
Even though the ingredients are natural, allergic reactions are still possible. Safety should always be your top priority when creating any DIY hair mask.
Always perform a patch test. Before applying a new mixture to your entire head, test a small amount on a discreet area of skin, like your inner arm or behind your ear. Wait 24 hours to ensure there is no redness, itching, or irritation. Also, be sure to use fresh ingredients to avoid applying spoiled food to your hair and scalp.
Don’t have a specific ingredient? No problem. Here are some easy and safe substitutions:
- Oil Swap: If a recipe calls for coconut oil but you find it too heavy, you can substitute it with a lighter oil like jojoba, grapeseed, or almond oil. Avocado oil is a great alternative for olive oil.
- Vegan Egg Substitute: For protein, a mashed banana or a few tablespoons of pureed avocado can provide a similar creamy consistency to an egg.
- Humectant Swap: If you don’t have honey, you can use an equal amount of agave nectar or maple syrup as a substitute to draw in moisture.
Troubleshooting common outcomes
Sometimes your first attempt at a DIY hair mask doesn’t go exactly as planned. Here’s how to troubleshoot some common issues.
- My hair feels greasy or weighed down. This usually means you either used too much oil, the oil was too heavy for your hair type, or you didn’t rinse thoroughly. Next time, reduce the amount of oil or switch to a lighter one. A gentle clarifying shampoo can help remove the excess residue.
- My hair feels stiff and brittle. This is a classic sign of “protein overload.” Your hair may have received too much protein and not enough moisture, causing it to become rigid. Alternate your protein-based mask with a purely moisturizing one (like the oat and banana recipe) to restore balance.
- I don’t see a difference. Hair health is a journey, not a sprint. It may take several applications to see noticeable results. Make sure you’re leaving the mask on for the recommended time and using a shower cap to improve absorption.
Frequently asked questions
Can I apply a DIY hair mask to dry hair?
Yes, you can. Applying masks to dry hair, especially oil-based ones, can be an effective pre-shampoo treatment. However, damp hair is more porous, which can help the ingredients absorb better. Experiment to see what works best for you.
Should I shampoo after a DIY hair mask?
It depends on the ingredients. For masks containing heavy oils, eggs, or yogurt, you will likely need to shampoo to remove all the residue. For lighter, water-soluble masks with ingredients like aloe vera or honey, a thorough rinse with water followed by a conditioner might be all you need.
Can I store my leftover DIY hair mask?
It is best to make a fresh batch for each use. Because these masks are made with fresh food ingredients and lack preservatives, they can spoil very quickly and grow bacteria, even in the refrigerator.
Final routine and next steps
Incorporating a weekly DIY hair mask into your hair care routine is a simple, rewarding act of self-care. By understanding your hair’s needs and choosing the right ingredients from your pantry, you can achieve strong, shiny, and healthy hair naturally. Start with one of the recipes in this guide and don’t be afraid to experiment with different combinations as you learn what your hair loves.
Your hair journey is unique. For more advanced tips on hair science and care, exploring resources like the Rich Hair UK blog can provide deeper insights. Now go ahead, raid your kitchen, and treat your hair to the natural goodness it deserves. Happy masking!