What a DIY Hair Mask Actually Does for Your Hair
Ever wonder what the buzz is all about with a DIY hair mask? Think of it as a supercharged conditioner that you create right in your kitchen. Unlike a daily conditioner that primarily works on the surface of your hair, a hair mask is designed with concentrated ingredients meant to sit on your hair for a longer period—typically 15 to 30 minutes. This extended time allows the nourishing components to penetrate the hair shaft more deeply.
A good homemade hair mask can deliver targeted benefits. Depending on the ingredients, it can provide intense moisture, repair damage by temporarily filling in gaps in the hair cuticle, add shine, reduce frizz, or even clarify your scalp. The beauty of a DIY hair mask is its customizability; you control exactly what goes into it, avoiding synthetic chemicals and tailoring the recipe to your hair’s specific needs. It’s an affordable and natural way to give your hair a potent dose of treatment right at home.
How to Choose Ingredients Based on Your Hair Type
The secret to a successful DIY hair mask lies in choosing the right ingredients for your unique hair type. Using a heavy, oil-based mask on fine, oily hair can leave it looking flat and greasy, while a light, clarifying mask won’t do much for coarse, dry hair. Let’s break down how to identify your hair’s needs and pick your pantry power players.
Identifying Dry and Damaged Hair
Does your hair feel rough, look dull, frizz up easily, or have visible split ends? These are classic signs of dry and damaged hair. This hair type is thirsty for moisture and needs ingredients that hydrate and seal the cuticle.
- What it needs: Intense hydration, nourishment, and sealing properties.
- Best ingredients:
- Emollients (Fats and Oils): Avocado, olive oil, coconut oil, and shea butter. These ingredients are rich in fatty acids that smooth the hair cuticle and lock in moisture.
- Humectants (Moisture Attractors): Honey and agave nectar. They draw moisture from the air into your hair strands.
- Conditioning Agents: Yogurt and banana. They are packed with vitamins and fats that soften and add shine.
Identifying Oily or Fine Hair
If your hair gets greasy quickly at the roots, lacks volume, and feels weighed down by products, you likely have oily or fine hair. Your goal is to clarify the scalp and add nourishment without adding weight.
- What it needs: Gentle cleansing, balancing, and lightweight conditioning.
- Best ingredients:
- Astringents and Clarifiers: Apple cider vinegar and lemon juice. They help remove product buildup and balance the scalp’s pH. Use them diluted.
- Absorbents: Bentonite or kaolin clay. These can absorb excess oil from the scalp and hair without stripping it completely.
- Lightweight Protein: Egg whites. They can help strengthen fine hair strands without the heaviness of oils.
Identifying Curly or Textured Hair
Curly, coily, and textured hair types are often prone to dryness and frizz because the natural oils from the scalp have a harder time traveling down the hair shaft. The main goals are deep hydration, frizz control, and enhancing your natural curl pattern.
- What it needs: Deep moisture, slip for detangling, and ingredients that promote curl definition.
- Best ingredients:
- Rich Moisturizers: Shea butter, mango butter, and castor oil. These heavier ingredients provide the intense moisture this hair type craves.
- Humectants: Aloe vera gel and honey. They hydrate the hair and help curls clump together beautifully.
- Vitamins and Minerals: Banana and sweet potato puree. They are full of nutrients and provide excellent slip, making detangling a breeze.
Safety First: Allergy Checks and Application Rules
Before you apply any new DIY hair mask to your entire head, safety is paramount. Just because an ingredient is natural doesn’t mean it can’t cause an allergic reaction or irritation. Always perform a patch test first.
How to a Patch Test:
- Mix a small amount of your complete hair mask recipe.
- Apply a dab of the mixture to a discreet area of your skin, like behind your ear or on your inner elbow.
- Leave it on for 30 minutes, or for as long as you would leave the mask on your hair.
- Rinse it off and wait 24 hours. If you experience any redness, itching, or irritation, do not use the mask.
Application Best Practices:
- Start with clean, damp hair. Applying a mask to clean hair ensures there’s no product buildup blocking the ingredients from penetrating. Towel-dry your hair until it’s damp, not dripping wet.
- Protect your clothes. Drape an old towel around your shoulders to catch any drips.
- Section your hair. Divide your hair into 4-6 sections. This makes it easier to apply the mask evenly from root to tip.
- Focus on the ends. Your ends are the oldest and usually the most damaged part of your hair, so they need the most attention. For oily hair types, you may want to avoid applying rich masks directly to your scalp.
- Cover and wait. Once applied, pile your hair on top of your head, and cover it with a shower cap or plastic wrap. This traps heat, which helps open the hair cuticle and allows the mask to penetrate more effectively.
Quick Recipes for Common Goals
Ready to get mixing? Here are four simple, effective DIY hair mask recipes tailored to specific hair concerns. Remember to patch test first!
Moisture Boost Mask for Dry Hair
This creamy mask is a hydration powerhouse for thirsty, brittle strands.
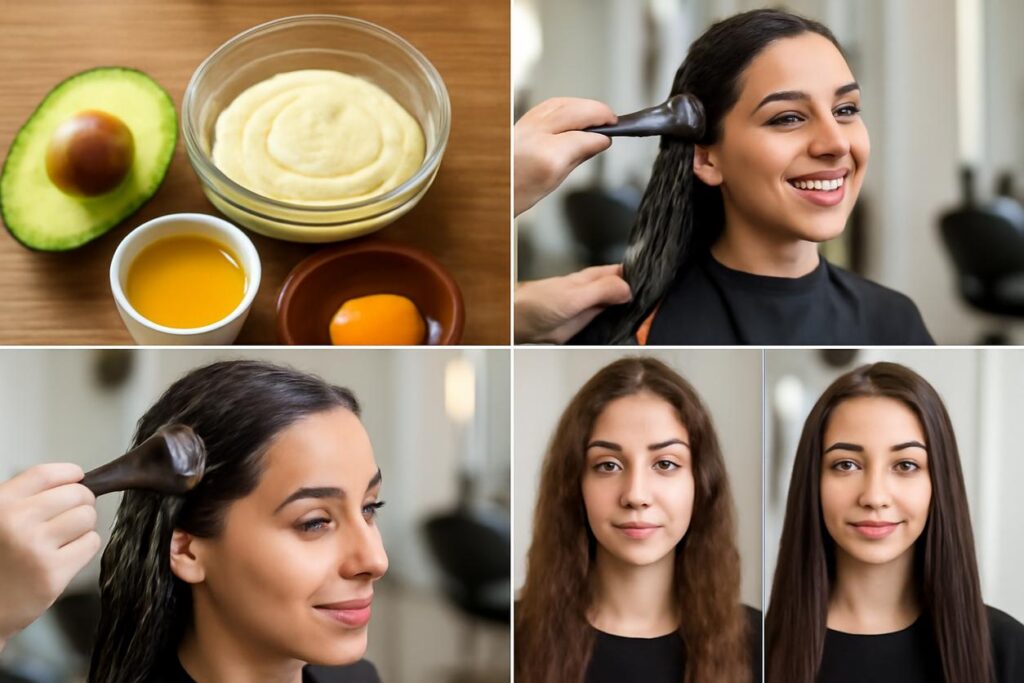
- Ingredients: 1/2 ripe avocado, 2 tablespoons of olive oil, 1 tablespoon of honey.
- Instructions:
- Mash the avocado in a bowl until it’s completely smooth and free of lumps.
- Stir in the olive oil and honey until you have a creamy, consistent paste.
- Apply to damp hair, focusing on the mid-lengths and ends.
- Leave on for 20-30 minutes, then rinse thoroughly with lukewarm water before shampooing and conditioning as usual.
- Quick Evidence Note: Avocados are rich in oleic acid and monounsaturated fats, which can penetrate the hair shaft to moisturize and strengthen it from the inside out.
Strength and Protein Mask for Brittle Hair
If your hair is feeling weak and prone to breakage, this protein-rich mask can help temporarily fortify it.
- Ingredients: 1 egg, 3 tablespoons of plain, full-fat yogurt.
- Instructions:
- Whisk the egg and yogurt together in a bowl until you have a smooth, liquid consistency.
- Apply the mixture to your hair, from roots to ends.
- Let it sit for 15-20 minutes. Important: Do not use hot water to rinse, as it can cook the egg in your hair. Use cool or lukewarm water.
- Follow up with your regular shampoo and conditioner.
- Quick Evidence Note: Egg yolks are full of proteins and biotin, key components of hair structure, while yogurt’s lactic acid helps to gently cleanse the scalp.
Light Clarifying Mask for Oily Hair
This mask helps absorb excess oil and remove buildup without stripping your hair’s natural moisture.
- Ingredients: 2 tablespoons of bentonite clay, 1 tablespoon of apple cider vinegar, 3-4 tablespoons of water.
- Instructions:
- In a non-metal bowl (clay can react with metal), combine the bentonite clay and apple cider vinegar. It will fizz.
- Slowly add water and mix with a non-metal spoon until you get a smooth, yogurt-like consistency.
- Apply primarily to your scalp and roots, extending it down the hair shafts if needed.
- Leave on for 10-15 minutes, but do not let it dry completely.
- Rinse very thoroughly with warm water, then shampoo and condition.
- Quick Evidence Note: Bentonite clay has a negative electrical charge that helps it bind to and remove positively charged product buildup and toxins from the hair and scalp.
Curl Definition and Hydration Mask for Textured Hair
Perfect for bringing bounce, definition, and moisture back to curly and coily hair.
- Ingredients: 1 ripe banana, 2 tablespoons of aloe vera gel, 1 tablespoon of honey.
- Instructions:
- Blend the banana, aloe vera gel, and honey in a blender until completely smooth. Ensuring there are no banana chunks is key to easy rinsing!
- Apply the smooth mixture to damp, sectioned hair.
- Cover with a shower cap and leave on for 30 minutes.
- Rinse thoroughly, then proceed with your normal wash day routine.
- Quick Evidence Note: Bananas are rich in potassium and silica, which can help soften hair and improve elasticity, while aloe vera is an excellent humectant for hydration. For more inspiration check out this guide on a DIY hair mask.
How Often to Use a Mask and Signs of Overuse
More is not always better when it comes to hair masks. For most hair types, using a deep conditioning DIY hair mask once a week is a great starting point. However, you need to listen to your hair. Overuse can lead to two main problems:
- Protein Overload: If you use protein-heavy masks (like those with egg or yogurt) too often, your hair can become stiff, brittle, and prone to snapping. It feels dry and straw-like despite being treated. If this happens, switch to purely moisturizing masks for a few weeks.
- Hygral Fatigue: This occurs when the hair cuticle is constantly swollen with water from excessive deep conditioning, causing it to become weak, mushy, and overly elastic. If your hair feels limp and struggles to hold a style, you may be over-moisturizing. Cut back on your masking frequency.
Ingredient Swaps and Pantry-Friendly Alternatives
Don’t have a specific ingredient on hand? No problem. Most DIY hair mask recipes are flexible. Here are some easy swaps you can make with common pantry items.
| Instead of… | You can use… | Best for… |
|---|---|---|
| Olive Oil | Coconut Oil, Almond Oil, or Jojoba Oil | Moisture and shine |
| Honey | Agave Nectar or Maple Syrup | Attracting moisture (humectant) |
| Avocado | Banana (blended well!) | Rich moisture and vitamins |
| Plain Yogurt | Coconut Cream or Sour Cream | Lactic acid and fat content for softness |
| Apple Cider Vinegar | Diluted Lemon Juice | Clarifying and adding shine |
Simple Routine to Layer with Shampoo and Conditioner
To get the most out of your homemade hair mask, it’s important to use it correctly within your wash day routine. The right order ensures your hair is primed to absorb the nutrients and that the benefits are sealed in.
Here is the most effective order for your hair care in 2025 and beyond:
- Shampoo First: Always start by washing your hair with a gentle shampoo. This removes dirt, oil, and product buildup, opening up the hair’s cuticle. This step is crucial for allowing the mask’s ingredients to penetrate effectively.
- Apply Your DIY Hair Mask: After rinsing out your shampoo, gently squeeze the excess water from your hair. Apply your chosen mask evenly, focusing on the areas that need it most. Let it sit for the recommended time (usually 15-30 minutes).
- Rinse and Condition: Thoroughly rinse the mask out with lukewarm water. Follow up with your regular conditioner. The conditioner’s job is to close the hair cuticle, which helps to seal in all the nourishing ingredients from your mask and leaves your hair feeling smooth and protected.
Troubleshooting Common Problems
Sometimes, your first attempt at a DIY hair mask might not go perfectly. Here are solutions to common issues:
- “My hair feels greasy or weighed down.” You likely used ingredients that were too heavy for your hair type, or you used too much oil. Next time, try a lighter oil (like grapeseed or jojoba), use less of it, or focus the application only on your ends, avoiding the scalp.
- “The mask was a nightmare to wash out.” This often happens with ingredients like banana or avocado that haven’t been blended smoothly enough. Always use a blender to ensure a completely lump-free consistency. Rinsing with conditioner can also help break down oils and make rinsing easier.
- “I didn’t see any difference.” Hair health is a long-term game. While a mask can provide an immediate boost in softness or shine, consistent use is key to seeing lasting results. Also, ensure you’re leaving the mask on for the recommended time on clean, damp hair to allow for proper absorption.
Short DIY Mask Plan for Busy Weeks
Don’t have 30 minutes to spare? You can still give your hair a quick treat. Try a “micro-mask” that only takes 5-10 minutes.
Quick Honey and Aloe Rinse: Mix two tablespoons of aloe vera gel with one tablespoon of honey and a quarter cup of warm water in a spray bottle. After shampooing, spray the mixture all over your hair, let it sit for 5 minutes while you continue your shower, and then rinse and condition. It’s a fast way to add a touch of moisture and shine without the long wait time.
Further Reading and References
Creating your own DIY hair mask is a rewarding journey into natural hair care. By understanding your hair type and the properties of different ingredients, you can craft personalized treatments that work. Remember that a healthy diet is also fundamental to hair health. Nutrients from food build the foundation for strong, vibrant hair from the inside out.
For more information on the science behind hair care ingredients and nutrition, explore these resources: