Why homemade hair masks work
Welcome to the world of the DIY hair mask! Moving away from store-bought treatments filled with complex chemicals, a homemade hair mask offers a simple, affordable, and incredibly effective way to nourish your locks. By using fresh, natural ingredients straight from your kitchen, you have complete control over what you put on your hair. This means no hidden silicones, parabens, or sulfates—just pure, concentrated nutrients.
The magic of a DIY hair mask lies in its simplicity and freshness. Ingredients like avocado, eggs, and olive oil deliver vitamins, fats, and proteins directly to the hair shaft. Unlike mass-produced products that sit on shelves, your homemade creation is made right when you need it, ensuring maximum potency. This direct nourishment can help moisturize dry strands, strengthen brittle hair, calm frizz, and add a brilliant shine, all without breaking the bank. Creating your own mask is a journey back to basics, connecting you with the powerful benefits of natural ingredients for healthier hair.
How to determine your hair type and needs
Before you start mixing, the most crucial step is understanding your hair. The perfect DIY hair mask is one that is tailored to your specific needs. Here’s how to identify your hair type and what it’s craving:
- Dry or Damaged Hair: Does your hair feel rough, brittle, or look dull? Is it prone to split ends and breakage? Your hair is thirsty for moisture and strengthening proteins. Look for ingredients rich in healthy fats and vitamins.
- Fine or Oily Hair: Does your hair get greasy quickly, especially at the roots? Does it lack volume and feel weighed down easily? Your hair needs a lightweight, clarifying mask that strengthens without adding heaviness. Avoid heavy oils and butters.
- Curly or Textured Hair: Is your hair coily, kinky, or wavy? Is it prone to frizz and dryness? Your hair requires deep hydration and emollients to enhance your curl pattern, lock in moisture, and fight frizz.
- Normal or Combination Hair: If your hair is generally well-behaved with slightly oily roots and drier ends, you need a balancing mask. The goal is to maintain moisture and health without causing oiliness or weighing it down.
A simple strand test can also reveal your hair’s porosity—its ability to absorb and retain moisture. Place a clean strand of hair in a glass of water. If it sinks quickly, you have high porosity (and likely need more protein and moisture). If it floats, you have low porosity and should opt for lighter ingredients.
Safety first: patch tests and allergy notes
Even natural ingredients can cause allergic reactions. Before slathering your freshly made DIY hair mask all over your scalp and hair, it is essential to perform a patch test. This simple step can save you from potential irritation, redness, or an itchy scalp.
How to Perform a Patch Test:
- Prepare a small amount of your hair mask mixture.
- Apply a dab of the mask to a discreet area of your skin, such as behind your ear or on your inner elbow.
- Leave it on for the recommended time of the mask (usually 20-30 minutes), or for up to 24 hours if you have sensitive skin.
- Rinse the area and monitor it for any signs of reaction like redness, itching, or swelling.
If you experience any irritation, do not use the mask. If you have known food allergies (like to eggs, dairy, or nuts), be extra cautious and avoid using those ingredients in your hair treatments. Always listen to your body and prioritize safety.
Core ingredients explained and their benefits
The beauty of a DIY hair mask is that your kitchen is already stocked with powerful ingredients. Understanding what each one does will help you become a master mixer.
Oils: what each oil contributes
Oils are fantastic for sealing in moisture and adding shine. They act as lubricants, reducing friction and preventing breakage.
- Coconut Oil: Famous for its ability to penetrate the hair shaft, it prevents protein loss and provides deep moisture. Best for dry, damaged, or thick hair.
- Olive Oil: A wonderful emollient that softens hair and adds a healthy sheen. Rich in vitamin E, it helps fight damage. Great for most hair types, especially dry and coarse hair.
- Avocado Oil: A lighter oil packed with biotin and other B-vitamins, it helps moisturize and strengthen hair without being overly greasy. Ideal for fine to medium hair.
Proteins and dairy alternatives
Hair is primarily made of protein (keratin). A protein-rich DIY hair mask can help repair damage and strengthen strands.
- Eggs: The yolk is rich in fats and vitamins for moisturizing, while the white is packed with protein for strengthening. Use the whole egg for normal hair, just whites for oily hair, and just yolks for dry hair.
- Yogurt: Full of protein and lactic acid, yogurt moisturizes, cleanses the scalp, and can help fight dandruff. Plain, full-fat Greek yogurt is best.
- Avocado: A vegan-friendly alternative, avocado provides healthy fats, potassium, and amino acids to moisturize and fortify hair.
Humectants and emollients
Humectants draw moisture from the air into your hair, while emollients smooth the hair cuticle.
- Honey: A natural humectant, honey attracts and locks in moisture. It also has antibacterial properties, making it great for scalp health.
- Aloe Vera: Packed with vitamins and enzymes, aloe vera hydrates the hair, soothes the scalp, and can help reduce dandruff.
- Banana: Rich in potassium and natural oils, bananas improve elasticity, prevent split ends, and make hair soft and shiny.
Five starter DIY masks by hair type (step-by-step)
Here are five simple, effective recipes to get you started. For best results, apply to clean, damp hair.
Mask for dry or coarse hair
This ultra-hydrating DIY hair mask restores moisture and softness to thirsty hair.
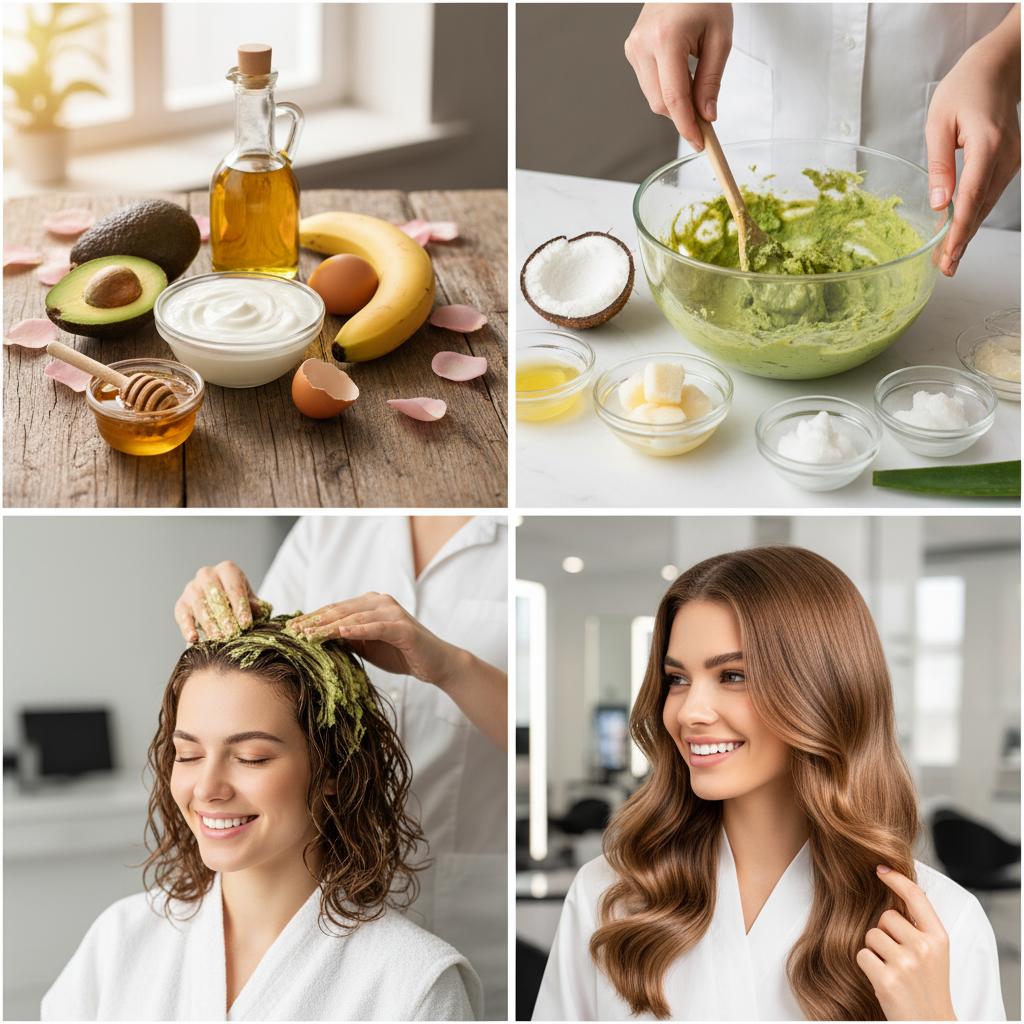
- Ingredients: 1/2 ripe avocado, 1 tablespoon olive oil, 1 tablespoon honey.
- Instructions: Mash the avocado until completely smooth. Stir in the olive oil and honey until you have a creamy paste. Apply from roots to ends, focusing on the dryest parts. Leave on for 20-30 minutes before rinsing thoroughly with cool water.
- Why it works: Avocado and olive oil provide deep moisture with healthy fats, while honey draws in hydration.
Mask for fine or oily hair
A lightweight mask that strengthens and adds volume without weighing hair down.
- Ingredients: 1 egg white, 1 tablespoon lemon juice, 1 teaspoon honey.
- Instructions: Whisk the egg white until frothy. Mix in the lemon juice and honey. Apply mainly to the roots and scalp, working lightly through the ends. Leave on for 15-20 minutes. Rinse with cool water to avoid cooking the egg.
- Why it works: Egg white provides protein for strength, while lemon juice helps clarify excess oil from the scalp.
Mask for curly or textured hair
This recipe defines curls, fights frizz, and provides intense moisture.
- Ingredients: 1/2 ripe banana, 2 tablespoons plain yogurt, 1 tablespoon coconut oil.
- Instructions: Blend all ingredients until perfectly smooth to avoid banana chunks in your hair. Apply generously to your hair, ensuring every curl is coated. Let it sit for 30 minutes, then rinse well.
- Why it works: Banana provides elasticity, yogurt offers protein and moisture, and coconut oil seals it all in.
Overnight repair mask routine
For severely damaged hair, an overnight treatment can work wonders. This is an intensive DIY hair mask routine.
- Ingredients: 2 tablespoons aloe vera gel, 1 tablespoon coconut oil.
- Instructions: Mix the aloe vera gel and melted coconut oil. Apply to damp hair, focusing on the ends. Braid your hair or put it in a bun and cover with a shower cap or silk scarf to protect your pillow. In the morning, rinse thoroughly and shampoo as usual.
- Why it works: The extended time allows the moisturizing properties of aloe and coconut oil to penetrate deeply, repairing and softening the hair shaft.
How to customize recipes and swap ingredients
The best part of a DIY hair mask is its versatility. Don’t have an ingredient? No problem! Here are some easy swaps:
- No Avocado? Use a banana or 1/4 cup of full-fat coconut milk for a similar creamy, moisturizing effect.
- Vegan? Swap eggs for 2 tablespoons of mashed banana or avocado. Replace yogurt with coconut cream or a plant-based yogurt.
- No Honey? Use maple syrup or agave nectar as a humectant to draw in moisture.
- Want to boost it? Add a few drops of essential oil like lavender for scalp health or rosemary for potential growth benefits. Always mix essential oils with a carrier oil.
Application method, timing and rinsing tips
Proper application ensures you get the most out of your homemade hair mask.
- Start with Clean, Damp Hair: Shampoo your hair first to remove product buildup, allowing the mask to penetrate better. Gently towel-dry until it’s damp, not dripping.
- Section Your Hair: Divide your hair into 4-6 sections. This makes it easier to apply the mask evenly and ensure every strand is covered.
- Apply from Ends to Roots: Start applying the mask to your ends, which are usually the driest part of your hair, and work your way up toward the scalp. If you have an oily scalp, apply the mask from the mid-lengths down.
- Cover and Wait: Once applied, pile your hair on top of your head and cover it with a shower cap. The heat trapped inside helps the ingredients penetrate more deeply. Leave the mask on for 20-30 minutes (or as directed in the recipe).
- Rinse Thoroughly: Rinse the mask out with lukewarm or cool water. Hot water can strip moisture and, in the case of egg-based masks, can cook the egg in your hair. Rinse until your hair feels clean and free of residue. You may need to follow up with a light conditioner to seal the cuticle.
Common mistakes and how to fix them
Making a DIY hair mask is easy, but a few common slip-ups can happen.
- Mistake 1: Not Blending Smoothly. Finding bits of banana or avocado in your hair for days is no fun. Fix: Use a blender for ingredients like banana and avocado to ensure a completely smooth, lump-free consistency.
- Mistake 2: Using Too Much Oil. This can leave your hair feeling greasy and weighed down, even after washing. Fix: Start with a small amount of oil and add more if needed. If you overdo it, you may need to shampoo twice to remove the excess.
- Mistake 3: Rinsing with Hot Water. This is especially problematic for masks containing egg. Fix: Always use cool or lukewarm water to rinse. It helps seal the hair cuticle and prevents ingredients from “cooking.”
Aftercare: maintenance tips and simple weekly plan
To maintain your healthy, shiny hair, consistency is key. A healthy diet also plays a huge role in hair health, providing the internal building blocks for strong hair. For more on this, see this hair nutrition overview.
Simple Weekly Plan for 2025 and Beyond:
- Day 1: Apply your chosen DIY hair mask. Let your hair air dry if possible to minimize heat damage.
- Days 2-4: Enjoy your soft, nourished hair. Use a gentle shampoo and conditioner as needed. Avoid over-washing, which can strip natural oils.
- Day 5 or 6: As your hair starts to need a refresh, consider a light scalp massage with a drop of oil to stimulate blood flow.
- Day 7: It’s mask day again! Repeat the cycle.
This simple schedule ensures your hair gets a regular dose of nutrients, keeping it in top condition. For more details on the connection between nutrients and hair, you can explore in-depth nutrient and hair research.
Troubleshooting chart: results and adjustments
Sometimes your hair’s reaction can be a surprise. Use this chart to adjust your DIY hair mask recipe for better results next time.
| If Your Hair Feels… | Possible Cause | Next Time, Try… |
|---|---|---|
| Greasy or Weighed Down | Too much oil or butter; mask was too heavy for your hair type. | Using less oil, swapping heavy oils (like olive) for lighter ones (like avocado), or focusing the mask only on your ends. |
| Stiff or Brittle | Too much protein (protein overload). | Switching to a protein-free, moisture-focused mask (like one with aloe and honey) and using protein masks less frequently. |
| Still Dry or Frizzy | Not enough moisture; mask wasn’t left on long enough. | Adding more moisturizing ingredients like honey or avocado, and leaving the mask on for a longer duration under a shower cap. |
| Exactly the Same | Ingredients may not suit your hair’s porosity; buildup is preventing absorption. | Clarifying your hair before the mask, or trying different ingredients. Low porosity hair may need a little heat (like a warm towel) to help the mask penetrate. |
General hair care practices are also important for overall hair health. The World Health Organization offers general guidance that can complement your hair care routine.
Printable recipe card and maintenance checklist
Here is a simple template you can copy to create your own personalized DIY hair mask recipe cards and a weekly checklist to stay on track.
My Go-To DIY Hair Mask Recipe
- Hair Goal: (e.g., Moisture, Strength, Frizz Control)
- Base Ingredient: (e.g., 1/2 Avocado)
- Oil Ingredient: (e.g., 1 tbsp Olive Oil)
- Humectant/Extra: (e.g., 1 tbsp Honey)
- Mixing Instructions: Blend all ingredients until smooth.
- Application Time: 20-30 minutes.
- Rinsing Method: Cool water, follow with conditioner.
Weekly Hair Maintenance Checklist
- Sunday: Deep condition with a DIY hair mask.
- Monday: Gentle styling, minimal heat.
- Tuesday: Scalp massage before bed.
- Wednesday: Wash day (if needed).
- Thursday: Protective style (e.g., braid or bun).
- Friday: Let hair rest.
- Saturday: Prep for mask day tomorrow.