The Ultimate Guide to a DIY Hair Mask: Recipes and Tips for 2025
Introduction: The Power and Limits of a DIY Hair Mask
Welcome to the world of homemade hair care, where your kitchen pantry holds the key to shinier, softer, and more manageable hair. A DIY hair mask is a conditioning treatment made from natural, everyday ingredients. It’s an accessible, affordable, and fun way to give your hair a boost of nourishment without leaving your home. These masks can deliver impressive results, from deep hydration to frizz control, by coating the hair shaft with beneficial ingredients.
However, it’s important to have realistic expectations. A DIY hair mask can improve hair’s appearance and feel, but it cannot permanently repair structural damage like split ends (only a trim can do that) or fundamentally change your hair’s texture. Think of it as a powerful conditioning supplement to your regular routine, offering a temporary but wonderful enhancement. The efficacy of many natural ingredients is supported by a growing body of research, which you can explore through resources like this overview of natural remedies.
Understanding Your Hair: A Quick Science Lesson
To understand how a homemade hair treatment works, let’s quickly look at hair structure. Each strand of hair has three main layers:
- The Cuticle: The outermost, protective layer, made of overlapping scales like shingles on a roof. When these scales lie flat, hair looks shiny and smooth. When they are raised, hair can appear dull, frizzy, and tangled.
- The Cortex: The middle layer, which provides strength, color, and texture to your hair.
- The Medulla: The innermost core, which isn’t always present, especially in fine hair.
A DIY hair mask primarily works on the cuticle. Ingredients like oils, fats, and acids help to smooth down and seal these scales, locking in moisture and creating a reflective surface that we perceive as shine. Protein-based ingredients can temporarily fill in gaps in the cuticle, adding a feeling of strength.
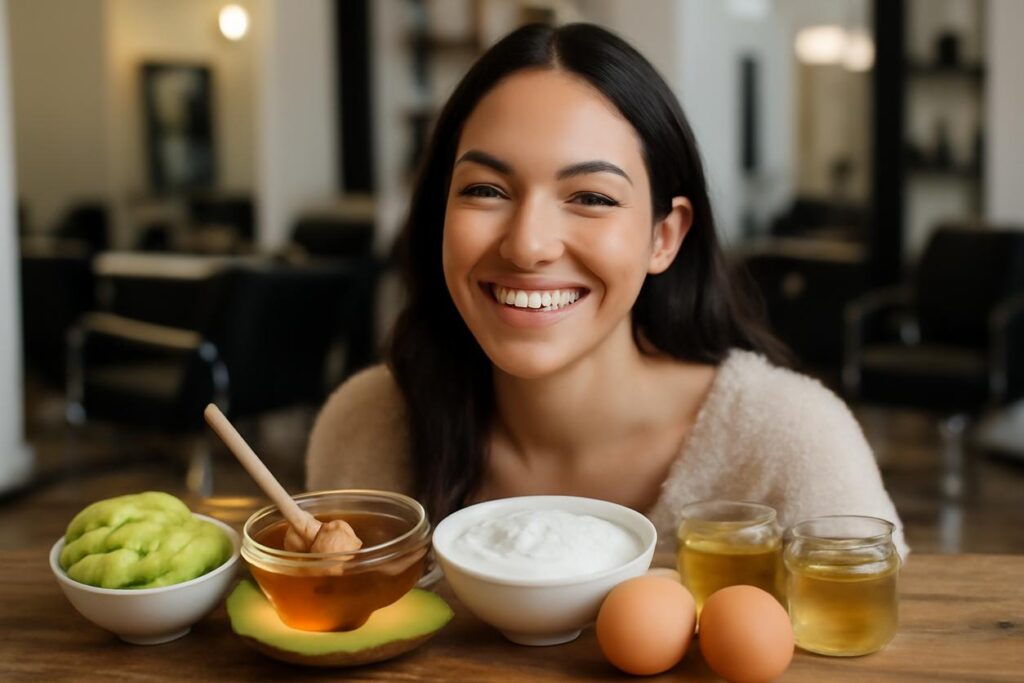
The Building Blocks: DIY Hair Mask Ingredient Categories
Your kitchen is full of ingredients that fall into a few key haircare categories. Knowing what each one does will empower you to create the perfect DIY hair mask for your specific needs.
Oils (Emollients and Sealants)
Oils are fantastic for locking in moisture and adding softness. They form a protective barrier around the hair strand, preventing water from escaping.
- Best for: Dry, brittle, or coarse hair.
- Examples: Coconut oil, olive oil, argan oil, jojoba oil, avocado oil.
Humectants (Moisture Magnets)
Humectants are ingredients that attract water from the atmosphere and draw it into the hair shaft. They are excellent for boosting hydration.
- Best for: Dehydrated, dull, or low-porosity hair.
- Examples: Honey, aloe vera gel, glycerin, agave nectar.
Proteins (Temporary Strengtheners)
Hair is primarily made of a protein called keratin. Protein-rich ingredients can temporarily patch up weak spots in the hair’s cuticle, adding strength and elasticity. Be careful, as too much protein can cause hair to feel stiff.
- Best for: Damaged, color-treated, or high-porosity hair.
- Examples: Egg (the whole egg offers fat and protein), Greek yogurt, mayonnaise.
Fats and Acids (Cuticle Smoothers)
Ingredients rich in fatty acids help smooth the hair cuticle, reducing frizz and boosting shine. Mild acids can also help flatten the cuticle and clarify the scalp.
- Best for: Frizzy, tangled, or dull hair.
- Examples: Avocado, banana, mayonnaise, apple cider vinegar (diluted).
Match Your Ingredients to Your Hair Goals
Use this table to quickly find the right ingredients for your next DIY hair mask.
| Hair Goal | Best Ingredients | Why It Works |
|---|---|---|
| Intense Hydration | Avocado, Banana, Honey, Aloe Vera | These combine fats (avocado, banana) and humectants (honey, aloe) to draw in and seal moisture. |
| Damage Repair | Egg, Greek Yogurt, Olive Oil | Protein (egg, yogurt) temporarily strengthens, while oil (olive) adds flexibility and seals the cuticle. |
| Frizz Control | Banana, Avocado, Mayonnaise | Rich in fats and oils, these ingredients smooth the cuticle, preventing humidity from causing frizz. |
| Shine and Volume | Apple Cider Vinegar (rinse), Yogurt | ACV clarifies and seals the cuticle for shine. Yogurt’s lactic acid gently exfoliates without weighing hair down. |
Five Signature DIY Hair Mask Recipes for 2025
Here are five simple, effective recipes to get you started. Always use fresh ingredients for the best results.
For Intense Hydration: The Avocado and Honey Mask
- Ingredients: 1 ripe avocado, 2 tablespoons honey, 1 tablespoon olive oil.
- Instructions: Mash the avocado until completely smooth. Stir in the honey and olive oil until you have a creamy paste.
- Application Time: 20-30 minutes.
For Strengthening and Repair: The Egg and Olive Oil Mask
- Ingredients: 1 whole egg, 3 tablespoons olive oil.
- Instructions: Whisk the egg thoroughly, then slowly whisk in the olive oil until the mixture is emulsified and consistent.
- Application Time: 15-20 minutes. Important: Rinse with cool water to prevent the egg from scrambling.
For Taming Frizz: The Banana and Yogurt Mask
- Ingredients: 1 ripe banana, 2 tablespoons plain Greek yogurt, 1 tablespoon honey.
- Instructions: Blend the banana until it is completely pureed (no chunks!). Mix in the yogurt and honey.
- Application Time: 20 minutes.
For a Scalp Refresh: The Aloe Vera and Mint Mask
- Ingredients: 3 tablespoons pure aloe vera gel, 1 tablespoon jojoba oil, 2-3 drops of peppermint essential oil.
- Instructions: Combine all ingredients in a small bowl and mix well.
- Application Time: 15 minutes. Focus the application on the scalp.
For Boosting Shine: The Apple Cider Vinegar and Honey Rinse
While not a traditional mask, this rinse is an excellent finisher for sealing the cuticle.
- Ingredients: 2 tablespoons apple cider vinegar, 1 tablespoon honey, 1 cup of water.
- Instructions: Mix all ingredients until the honey dissolves.
- Application: After shampooing and conditioning, pour the rinse over your hair. Let it sit for 1-2 minutes, then rinse lightly with cool water.
How to Apply Your DIY Hair Mask Like a Pro
Proper application ensures you get the most out of your homemade hair mask.
- Preparation: Gather your fresh ingredients, a non-metallic bowl, and a whisk or fork. Drape a towel over your shoulders to protect your clothes.
- Hair Prep: It’s best to apply a DIY hair mask to clean, damp hair. Shampoo your hair as usual, gently towel-dry it until it’s no longer dripping, and then comb through any tangles.
- Application: Divide your hair into 4-6 sections. Apply the mask with your fingers or a brush, starting from the mid-lengths and working your way down to the ends. Apply any remaining mask to the rest of your hair, avoiding the scalp if you have oily roots.
- The Wait: Pile your hair on top of your head and cover it with a shower cap or plastic wrap. This traps heat, which helps the ingredients penetrate more effectively.
Timing, Frequency, and Routine Integration
Consistency is key for seeing results from any hair treatment.
- How long to leave it on: Most masks work well within 15-30 minutes. Leaving them on for hours (or overnight) doesn’t usually add significant benefits and can sometimes lead to issues like hygral fatigue (damage from over-moisturizing).
- How often to use: For most hair types, using a DIY hair mask once a week is a great starting point. If your hair is extremely dry or damaged, you might try twice a week initially.
- Where it fits in your routine: The standard order is: Shampoo -> DIY Hair Mask -> Conditioner. Shampooing cleanses the hair, the mask deeply nourishes, and the conditioner seals the cuticle to lock in the benefits.
Safety First: Allergy Checks and Scalp Sensitivity
Even natural ingredients can cause reactions. The American Academy of Dermatology provides excellent guidance on hair care and safety.
- Perform a patch test: Before applying a new mixture all over your hair and scalp, always perform a patch test. Apply a small amount of the mask to a discreet area of skin, like behind your ear or on your inner elbow. Wait 24 hours to check for any signs of redness, itching, or irritation.
- Listen to your scalp: If your scalp starts to itch or burn while the mask is on, rinse it out immediately.
- Avoid known allergens: If you have a known food allergy, do not apply that ingredient to your hair or scalp.
The Aftercare: Rinsing and Styling
How you remove the mask is just as important as how you apply it.
- Rinsing Technique: Rinse the mask out thoroughly using lukewarm water. Hot water can strip moisture, while cool water helps seal the cuticle. Be patient, as some ingredients (like banana or avocado) can be stubborn to remove.
- Post-Mask Conditioning: Following up with a light conditioner is generally a good idea. It helps to fully close the hair cuticle and detangle your strands, locking in all the goodness from your mask.
- Styling: After rinsing, gently squeeze excess water from your hair and style as usual. Try to let your hair air-dry the first time to fully appreciate the softness and shine from your treatment.
Troubleshooting Common DIY Hair Mask Issues
- “My hair feels greasy or weighed down.” You may have used too much oil for your hair type, or you didn’t rinse thoroughly enough. Next time, use less oil and focus the application on your ends.
- “My hair feels stiff or brittle.” This is a classic sign of protein overload. Your hair has too much protein and not enough moisture. Skip protein-heavy ingredients like egg and yogurt for a few weeks and focus on hydrating masks with honey or aloe vera.
- “I don’t see any difference.” Results can be subtle at first. Ensure your ingredients are fresh and give it time. Try a different recipe next week—your hair might respond better to a different combination.
Customizing Your Mask: Variations for Different Hair Types
A great DIY hair mask can be easily adapted.
- For Curly Hair: Focus on moisture. Add more humectants like aloe vera or a little glycerin to your masks. Avocado and banana are your best friends.
- For Fine Hair: Avoid heavy oils like coconut or olive oil. Opt for lighter options like jojoba or grapeseed oil, and use them sparingly. Focus on clarifying ingredients like yogurt or a diluted ACV rinse.
- For Color-Treated Hair: Your hair craves moisture and gentle protein. Yogurt, avocado, and argan oil are excellent choices. Avoid highly acidic ingredients like pure lemon juice, which could potentially affect your color.
- For Thinning Hair: Focus on scalp health. A mask with aloe vera, a few drops of peppermint or rosemary essential oil, and a light carrier oil like jojoba can be soothing and stimulating for the scalp.
Storing Mixes and Quick Single-Serve Options
Because they are made with fresh, preservative-free food ingredients, DIY hair mask recipes are meant for single, immediate use. They can spoil quickly and harbor bacteria if left out or refrigerated for too long. Always make a fresh batch for each application.
For a quick fix, simply mashing half a banana or avocado and applying it to your ends for 15 minutes can work wonders when you’re short on time.
Frequently Asked Questions (FAQ)
- Can I sleep with a DIY hair mask on?
- It’s generally not recommended for water-based masks (containing yogurt, aloe, etc.) as it can lead to scalp issues or hygral fatigue. Oil-based treatments (like a pure coconut oil pre-shampoo treatment) are a safer bet for overnight use on the hair lengths, but protect your pillowcase!
- Can I use a DIY hair mask on my scalp?
- It depends on the ingredients and your scalp type. If you have a dry scalp, a hydrating mask with aloe can be beneficial. If you have an oily scalp, avoid applying rich oils and butters directly to your roots. The science behind hair nutrition often starts at the scalp, so a healthy scalp is crucial.
- Why does my hair smell after an egg mask?
- You probably used water that was too warm when rinsing. Hot water can slightly “cook” the egg protein, creating a lingering smell. Always rinse egg-based masks with cool or lukewarm water only.
Conclusion: Your 30-Day DIY Hair Mask Challenge
Embracing the DIY hair mask is about more than just hair care; it’s a practice of self-care and a fun experiment in your own home. By understanding your hair’s needs and the properties of simple pantry ingredients, you can create personalized treatments that deliver visible results. Consistency is your most powerful tool.
Ready to get started? Try this simple 30-day plan:
- Week 1: Use the Intense Hydration mask to boost moisture.
- Week 2: Use the Strengthening and Repair mask to fortify your strands.
- Week 3: Go back to the Intense Hydration mask or try the Frizz Control mask.
- Week 4: Finish with the Shine-Boosting rinse after your regular conditioning.
After a month, you’ll have a much better understanding of what your hair loves and can continue to experiment with confidence. Happy masking!