Table of Contents
- Introduction — What a homemade mask can realistically do
- How natural ingredients interact with hair structure
- Quick self-check — porosity, elasticity and oil balance
- Key ingredient families explained
- Kitchen swaps and measurement safety
- Five targeted recipes with timing and swaps
- How to apply masks and rinse protocols
- Frequency, layering with existing routine and timing tips
- Safety, allergy checks and patch testing
- Troubleshooting common outcomes
- Short FAQ
- References and concise science notes
- About Rich Hair UK
Introduction — What a homemade mask can realistically do
Welcome to the ultimate guide to creating your own effective DIY hair mask right from your kitchen. Moving into 2025 and beyond, the trend of using simple, accessible ingredients for haircare is more than just a passing phase; it’s about empowerment, sustainability, and truly understanding what you’re putting on your hair. A homemade hair mask offers a fantastic way to give your hair a boost of moisture, shine, and softness without the complex ingredient lists and high price tags of many commercial products.
But let’s set some realistic expectations. A DIY hair mask is a master of temporary, surface-level conditioning. It can deeply moisturise, reduce frizz, enhance shine, and soothe an irritated scalp. What it cannot do is permanently repair split ends (only a trim can do that) or alter your hair’s fundamental structure. Think of it as a supercharged conditioning treatment that provides immediate, noticeable benefits using the goodness of nature.
How natural ingredients interact with hair structure
To understand why a DIY hair mask works, it helps to know a little about your hair’s structure. Each hair strand consists of three layers:
- The Cuticle: The outermost layer, made of overlapping scales. A smooth, closed cuticle results in shiny, smooth hair. Damage and dryness cause these scales to lift, leading to frizz and dullness.
- The Cortex: The middle layer, which provides strength, elasticity, and colour.
- The Medulla: The innermost core, which isn’t always present, especially in fine hair.
Natural ingredients work in two main ways. Some, like coconut oil, have small molecules that can penetrate past the cuticle into the cortex to provide moisture from within. Others, like certain proteins or thick butters, have larger molecules that coat the hair shaft, smoothing the cuticle, filling in minor gaps, and providing a protective barrier. A well-formulated homemade mask often uses a combination of both for maximum benefit.
Quick self-check — porosity, elasticity and oil balance
Before you start mixing, a quick self-assessment will help you choose the best ingredients for your hair. This is the key to creating a truly personalised DIY hair mask.
- Porosity Test (How well hair absorbs moisture): Take a clean, product-free strand of hair and spray it with water.
- Low Porosity: Water beads up on the hair. Your cuticles are tightly packed. You need lightweight ingredients that won’t just sit on top.
- High Porosity: Hair absorbs the water quickly. Your cuticles are raised. You need richer oils and proteins to seal in moisture and fill gaps.
- Elasticity Test (A sign of protein balance): Gently take a single wet strand of hair and stretch it slightly.
- Healthy Elasticity: The hair stretches and bounces back to its original length. Your protein-moisture balance is good.
- Low Elasticity: The hair stretches but doesn’t return, or snaps immediately. This often indicates a need for a gentle protein treatment.
- Oil Balance Check (Scalp health): How does your scalp feel the day after washing?
- Oily Scalp: Your scalp feels greasy and hair looks limp. You may benefit from clarifying ingredients.
- Dry Scalp: Your scalp feels tight, itchy, or flaky. You need soothing, hydrating ingredients applied directly to the scalp.
Key ingredient families explained
Your kitchen pantry is a treasure trove of haircare ingredients. Here’s a breakdown of the main players you’ll be using in your DIY hair mask recipes.
Oils and lipids — when to choose them
Oils are the foundation of many masks, brilliant for sealing in moisture, adding shine, and taming frizz. They are particularly beneficial for dry, thick, or high-porosity hair.
- Penetrating Oils: Coconut oil and babassu oil have smaller molecules that can enter the hair shaft to moisturise from within.
- Sealing Oils: Olive oil, avocado oil, and jojoba oil have larger molecules. They are excellent for coating the hair strand, smoothing the cuticle, and locking in hydration applied from other ingredients.
Proteins and strengtheners — gentle options
Proteins temporarily patch up weak spots in the hair’s cuticle, adding structure and strength. They are best for high-porosity, fine, or damaged hair that shows low elasticity.
- Yogurt/Kefir: Contains lactic acid for gentle exfoliation and proteins for strengthening.
- Egg: The yolk is rich in fats and vitamins, while the white is packed with protein. Use the whole egg for normal hair, just the white for oily hair, and just the yolk for dry hair.
- Rice Water: The starchy water left after rinsing rice contains inositol, which can penetrate and strengthen hair.
A word of caution: Be gentle with protein. Too much can lead to “protein overload,” making hair feel stiff and brittle. Use these treatments no more than once every few weeks.
Humectants and hydrators — how they work
Humectants are ingredients that pull moisture from the atmosphere into your hair. They are a must-have for adding pure hydration to any hair type, especially curly or low-porosity hair.
- Honey/Agave Nectar: Natural humectants that also have antibacterial properties, making them great for scalp health.
- Aloe Vera Gel: Packed with vitamins, enzymes, and moisture. It’s incredibly soothing for the scalp and lightweight enough for fine hair.
- Banana: Rich in potassium, silica, and natural oils, which help soften hair and improve elasticity.
Acids and clarifiers — safe usage
Acidic ingredients help to remove product buildup and seal the hair cuticle flat, which dramatically increases shine. They are best for those with oily scalps or dull hair.
- Apple Cider Vinegar (ACV): Helps clarify and restore the scalp’s pH balance. Always dilute it heavily (e.g., 1 part ACV to 4 parts water) and use it primarily as a final rinse.
- Lemon Juice: Similar to ACV but can have a slight lightening effect over time, especially on lighter hair. Dilution is also essential.
Kitchen swaps and measurement safety
Don’t have a specific ingredient? No problem. The beauty of a DIY hair mask is its flexibility. Always use clean bowls and utensils to avoid introducing bacteria into your mixture.
| If you need… | And you don’t have… | You can swap it with… |
|---|---|---|
| A creamy base | Avocado or Banana | Plain full-fat yogurt or coconut cream |
| A sealing oil | Olive Oil | Avocado oil, grapeseed oil, or melted shea butter |
| A humectant | Honey | Agave nectar, pure maple syrup, or vegetable glycerin |
| A gentle protein | Yogurt | An egg yolk or kefir |
Five targeted recipes with timing and swaps
Here are five simple, effective recipes to get you started. Blend all ingredients until smooth to avoid lumps in your hair!
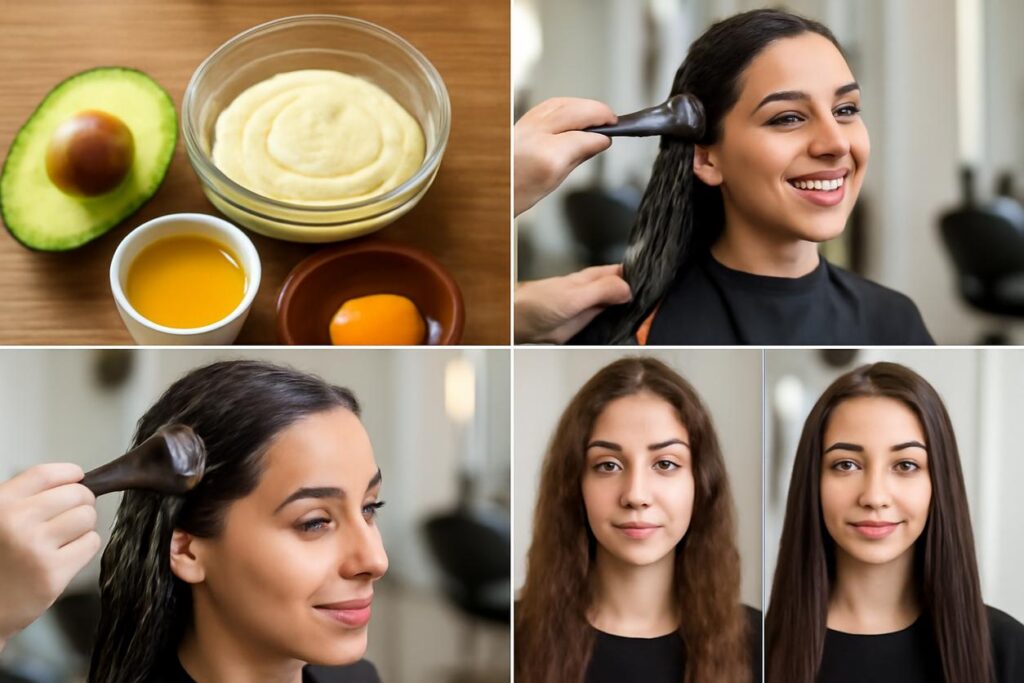
Repair blend for dry, brittle hair
This mask is a rich, moisturising treatment designed to soften and add flexibility to thirsty hair.
- Ingredients: 1/2 ripe avocado, 1 tablespoon olive oil, 1 tablespoon honey.
- Instructions: Mash the avocado until completely smooth. Stir in the olive oil and honey until you have a consistent paste.
- Timing: Apply to hair and leave for 20-30 minutes.
- Pantry Swaps: Use a banana instead of avocado, or agave nectar instead of honey.
Lightweight mask for fine or limp hair
This mask adds strength and shine without weighing down fine strands.
- Ingredients: 3 tablespoons plain yogurt, 1 egg white, 1 teaspoon lemon juice.
- Instructions: Whisk the egg white until slightly frothy. Gently fold in the yogurt and lemon juice.
- Timing: Apply to hair and leave for 15-20 minutes. Do not let it dry completely.
- Pantry Swaps: Use rice water as the base instead of yogurt for an even lighter feel.
Scalp-soothing mask for irritation or flakiness
A calming treatment to soothe an itchy, dry scalp.
- Ingredients: 1/4 cup cooked, cooled oatmeal (blended with a little water to make a paste), 2 tablespoons aloe vera gel, 2 drops of tea tree essential oil.
- Instructions: Combine the blended oatmeal paste with the aloe vera gel and tea tree oil. Mix well.
- Timing: Focus the application on the scalp, massaging gently. Leave for 20 minutes before rinsing.
- Pantry Swaps: Don’t have tea tree oil? A few drops of peppermint oil can also feel soothing.
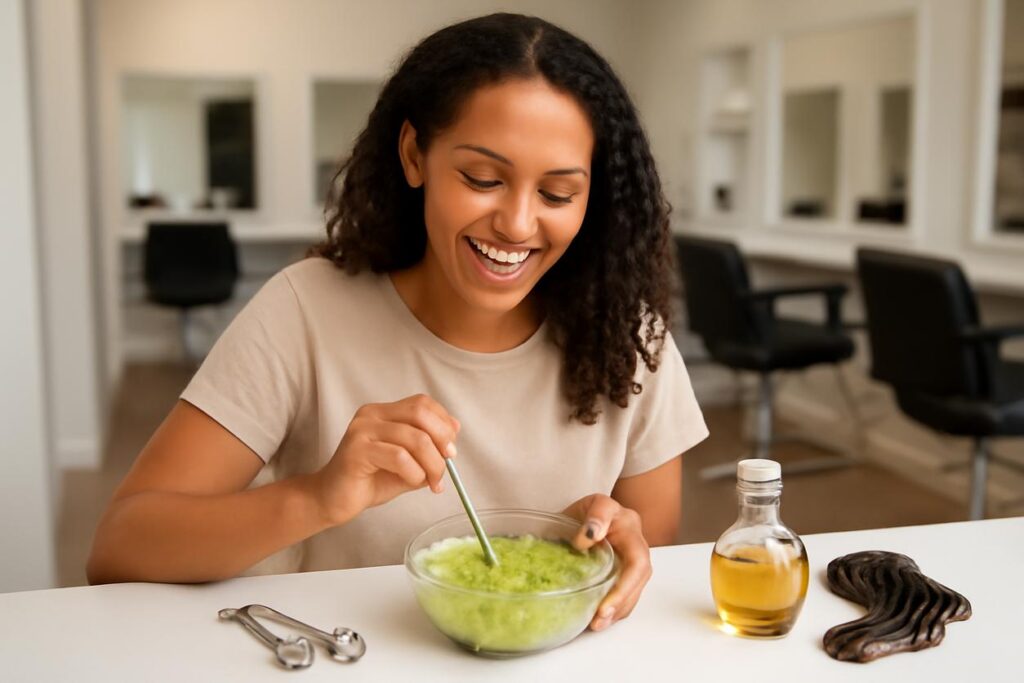
Hydration boost for curly textures
Curls need moisture to thrive. This mask provides intense hydration to enhance curl patterns and reduce frizz.
- Ingredients: 1/2 ripe banana, 2 tablespoons coconut oil (melted), 1 tablespoon honey.
- Instructions: Blend the banana thoroughly to eliminate all lumps. Mix in the melted coconut oil and honey.
- Timing: Leave on for 30 minutes under a shower cap to trap heat and aid absorption.
- Pantry Swaps: Use avocado instead of banana for a creamier texture.
Overnight gentle nourishment method
For a low-effort, high-reward treatment, this simple overnight DIY hair mask works wonders without causing protein overload.
- Ingredients: 3 tablespoons pure aloe vera gel, 1 teaspoon argan or jojoba oil.
- Instructions: Whisk the aloe vera gel and oil together. The mixture will be light.
- Timing: Apply sparingly to the lengths and ends of your hair, braid it loosely, and cover with a silk scarf or bonnet to protect your pillow. Rinse out in the morning.
- Pantry Swaps: Grapeseed oil is another lightweight option.
How to apply masks and rinse protocols
Getting the application right is just as important as the recipe itself.
- Start with clean, damp hair. Shampoo your hair first to remove buildup, which allows the ingredients to penetrate more effectively. Gently towel-dry until it’s damp, not dripping.
- Section your hair. Divide your hair into 4-6 sections to ensure even coverage.
- Apply the mask. Using your fingers, apply the DIY hair mask from the mid-lengths to the ends, as this is typically the oldest and driest part of your hair. Apply to the roots only if the recipe is targeted for the scalp.
- Cover and wait. Tuck your hair into a shower cap or wrap it in a warm towel. This traps heat from your scalp, helping to open the hair cuticles for better absorption.
- Rinse thoroughly. Use lukewarm water to rinse the mask out completely. This can take a few minutes, so be patient.
- Follow with conditioner. A quick rinse-out conditioner will help seal the hair cuticle, locking in all the benefits of your mask and leaving your hair extra smooth.
Frequency, layering with existing routine and timing tips
Consistency is key, but overdoing it can be counterproductive. For most hair types, using a DIY hair mask once a week is a great routine. If your hair is extremely dry or damaged, you might start with twice a week and taper off as its condition improves. If your hair is fine or gets weighed down easily, once every two weeks may be sufficient.
Simply swap out your regular conditioner for a mask on your chosen treatment day. Listen to your hair—it will tell you what it needs.
Safety, allergy checks and patch testing
Your safety is paramount. Just because an ingredient is natural doesn’t mean it can’t cause a reaction.
Before applying any new mixture to your entire head, perform a patch test. Apply a small amount of the mask to a discreet area of skin, like behind your ear or on your inner elbow. Wait 24 hours to check for any signs of redness, itching, or irritation. Additionally, if you have known food allergies, do not apply those ingredients to your hair or scalp.
Troubleshooting common outcomes
- My hair feels greasy or heavy. You likely used too much oil for your hair type, or you didn’t rinse thoroughly enough. Next time, reduce the amount of oil or add a diluted apple cider vinegar rinse at the very end of your wash routine.
- My hair feels stiff and brittle. This is a classic sign of protein overload. Your hair has too much protein and not enough moisture. Take a break from masks containing egg, yogurt, or rice water and focus solely on hydrating masks with ingredients like aloe, honey, and oils for a few weeks.
- I don’t see any difference. Haircare is a long game. You may need a few consistent applications to see a change. It’s also possible the recipe wasn’t quite right for your hair’s porosity or needs. Try a different recipe next time based on your self-check results.
Short FAQ
Can I use a DIY hair mask on colour-treated hair?
Yes, most moisturising masks are perfectly safe and beneficial for coloured hair. However, be cautious with clarifying or acidic ingredients like lemon juice, as they may slightly affect your colour over time.
How long does a homemade hair mask last?
Because they are made from fresh ingredients without preservatives, you should use your mask immediately. Do not store leftovers, as they can spoil quickly and grow bacteria.
Is it okay to sleep with a DIY hair mask in my hair?
It depends on the ingredients. Gentle, hydrating masks like the aloe vera and oil recipe are suitable for overnight use. Avoid sleeping in masks that contain protein (like egg or yogurt) or acids (like lemon juice), as prolonged exposure can cause damage or irritation.
References and concise science notes
We believe in evidence-informed care. Here’s a little of the science behind why these kitchen ingredients work:
- Avocado Oil: Rich in monounsaturated fats, particularly oleic acid, which allows it to penetrate the hair shaft and provide deep moisture rather than just coating the surface.
- Coconut Oil: A 2003 study in the Journal of Cosmetic Science found that coconut oil was able to reduce protein loss for both undamaged and damaged hair when used as a pre-wash or post-wash treatment. This is attributed to its principal fatty acid, lauric acid, which has a high affinity for hair proteins and a low molecular weight.
- Honey: A natural emollient and humectant, meaning it softens and attracts moisture. Its composition of sugars, enzymes, and minerals makes it a powerful conditioning agent.
About Rich Hair UK
At Rich Hair UK, our mission is to demystify haircare through clear, practical, and science-backed education. We focus on helping you understand the unique needs of your hair so you can make informed choices, whether you’re mixing up a treatment in your kitchen or selecting products for your routine. We are dedicated to providing resources that empower you to achieve your healthiest hair ever.