The Ultimate Guide to a DIY Hair Mask: 10 Recipes for Healthy, Happy Hair
Table of Contents
- What a Hair Mask Can Actually Do for Your Hair
- A Quick Primer on Hair Structure and Common Concerns
- How to Check Your Hair Porosity at Home
- Ingredients Decoded: Proteins, Humectants, and Oils
- Safety First: Allergy Checks and Dilution Guidelines
- Core Pantry Ingredients and Best Substitutes
- 10 Curated DIY Hair Mask Recipes for Every Hair Type
- Step-by-Step Application for Best Absorption
- Rinse Methods, Drying Tips, and Post-Mask Styling
- How Often to Use a DIY Hair Mask by Hair Goal
- Troubleshooting: Buildup, Greasiness, and Dull Results
- Storing Mixtures and Shelf Life Guidance
- Eating for Stronger Hair: Pairing Masks with Nutrition
- Frequently Asked Questions
- Summary and Next Steps for Consistent Results
What a Hair Mask Can Actually Do for Your Hair
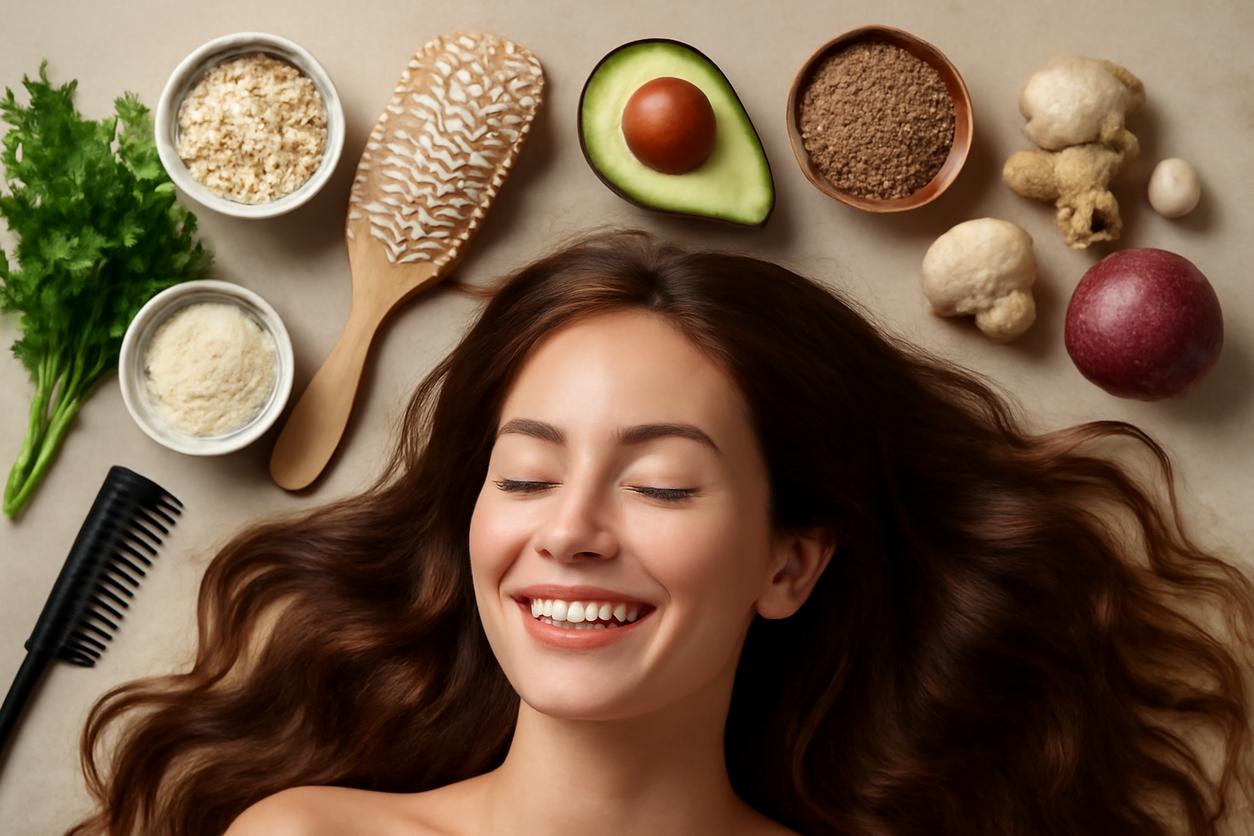
Welcome to the world of at-home hair care! If you’ve ever felt your hair was looking a little dull, feeling dry, or just not cooperating, a DIY hair mask might be the perfect solution. Unlike a daily conditioner that works on the surface, a hair mask is an intensive treatment designed to penetrate deeper into the hair shaft. Think of it as a supercharged facial, but for your locks. By using potent ingredients straight from your kitchen, you can target specific concerns like frizz, breakage, and lack of moisture. The best part? A homemade hair mask is affordable, customizable, and free from the synthetic chemicals often found in commercial products. It’s all about giving your hair a concentrated dose of nutrients to restore its health, shine, and manageability.
A Quick Primer on Hair Structure and Common Concerns
To understand why a DIY hair mask works, it helps to know a little about your hair’s structure. Each strand of hair is made of three layers. The outer layer, the cuticle, looks like overlapping shingles on a roof. When these shingles lie flat, your hair is smooth and shiny. When they’re raised, it can look frizzy and dull. The middle layer, the cortex, provides strength, color, and texture. The innermost layer is the medulla. For more detail, you can explore the science of hair structure.
Common hair concerns are often related to the condition of the cuticle and cortex:
- Dryness: Lack of moisture in the hair shaft, often due to a damaged cuticle that can’t hold hydration.
- Frizz: Raised cuticles that absorb moisture from the air, causing the hair shaft to swell unevenly.
- Breakage: A weakened cortex, often from chemical treatments, heat styling, or a lack of protein, leading to split ends and snapping.
- Dullness: Product buildup or raised cuticles that prevent light from reflecting off the hair surface.
A well-formulated DIY hair mask can help address these issues by smoothing the cuticle, infusing the cortex with moisture and protein, and clarifying buildup.
How to Check Your Hair Porosity at Home
Hair porosity is your hair’s ability to absorb and retain moisture. Knowing your porosity is key to choosing the right ingredients for your homemade hair mask. Here’s a simple test:
- Take a clean, dry strand of your hair (from your brush is fine).
- Drop it into a glass of room-temperature water.
- Watch what it does for a couple of minutes.
- Low Porosity: The strand floats at the top. Your hair cuticles are tightly packed, making it hard for moisture to get in. You’ll need lightweight ingredients that won’t just sit on top.
- Medium (Normal) Porosity: The strand floats in the middle of the glass. Your cuticles are looser, allowing moisture to enter and stay in easily. Most ingredients work well for you.
- High Porosity: The strand sinks to the bottom quickly. Your cuticles have gaps, so your hair absorbs moisture fast but loses it just as quickly. You need richer, sealing ingredients to lock hydration in.
Ingredients Decoded: Proteins, Humectants, and Oils
Crafting the perfect DIY hair mask is like being a chef for your hair. The three main ingredient groups you’ll work with are proteins, humectants, and oils.
- Proteins: These are the building blocks of hair. A protein treatment helps to fill in the gaps in a damaged cuticle and strengthen the cortex, reducing breakage. Great sources include eggs, Greek yogurt, and gelatin. Be careful not to overdo it, as too much protein can make hair feel stiff.
- Humectants: These ingredients are moisture magnets. They attract water from the air and draw it into the hair shaft. This is essential for tackling dryness and improving elasticity. Common humectants are honey, aloe vera gel, and glycerin.
- Oils (Emollients and Sealants): These ingredients soften the hair and create a protective barrier to lock in the moisture that humectants attract. They smooth the cuticle, reduce frizz, and add shine. Examples include coconut oil, olive oil, avocado oil, and jojoba oil. The type of oil you choose can depend on your hair’s porosity. For general hair care basics, understanding this balance is crucial.
Safety First: Allergy Checks and Dilution Guidelines
Even natural ingredients can cause reactions. Before you apply any new DIY hair mask to your entire head, it is crucial to perform a patch test.
To do this, apply a small amount of the mixture to a discreet area of your skin, like behind your ear or on your inner elbow. Wait 24 hours to see if any irritation, redness, or itching occurs. If you have known food allergies, avoid using those ingredients in your masks entirely.
If you choose to add essential oils for fragrance or added benefits (like tea tree for dandruff), always dilute them in a carrier oil (like coconut or olive oil). A good rule of thumb is 2-3 drops of essential oil per tablespoon of carrier oil. Research confirms that using natural oils can be safe and beneficial when used correctly.
Core Pantry Ingredients and Best Substitutes
You don’t need to go on a special shopping trip to create an effective homemade hair mask. Many of the best ingredients are likely already in your kitchen. Here’s a quick guide to common ingredients and easy swaps:
| Ingredient | Primary Benefit | Best For | Easy Substitute |
|---|---|---|---|
| Avocado | Moisture and Fats | Dry, High Porosity Hair | Banana or Mayonnaise |
| Greek Yogurt | Protein and Lactic Acid | Weak, Brittle Hair | Egg or Sour Cream |
| Honey | Humectant (Moisture) | All Hair Types, especially Dry | Maple Syrup or Aloe Vera Gel |
| Coconut Oil | Sealing and Penetrating | Medium to High Porosity Hair | Olive Oil or Jojoba Oil |
| Apple Cider Vinegar | Clarifying and Shine | Oily Hair, Buildup | Lemon Juice (diluted) |
| Egg | Protein and Vitamins | Damaged, Fine Hair | Greek Yogurt |
10 Curated DIY Hair Mask Recipes for Every Hair Type
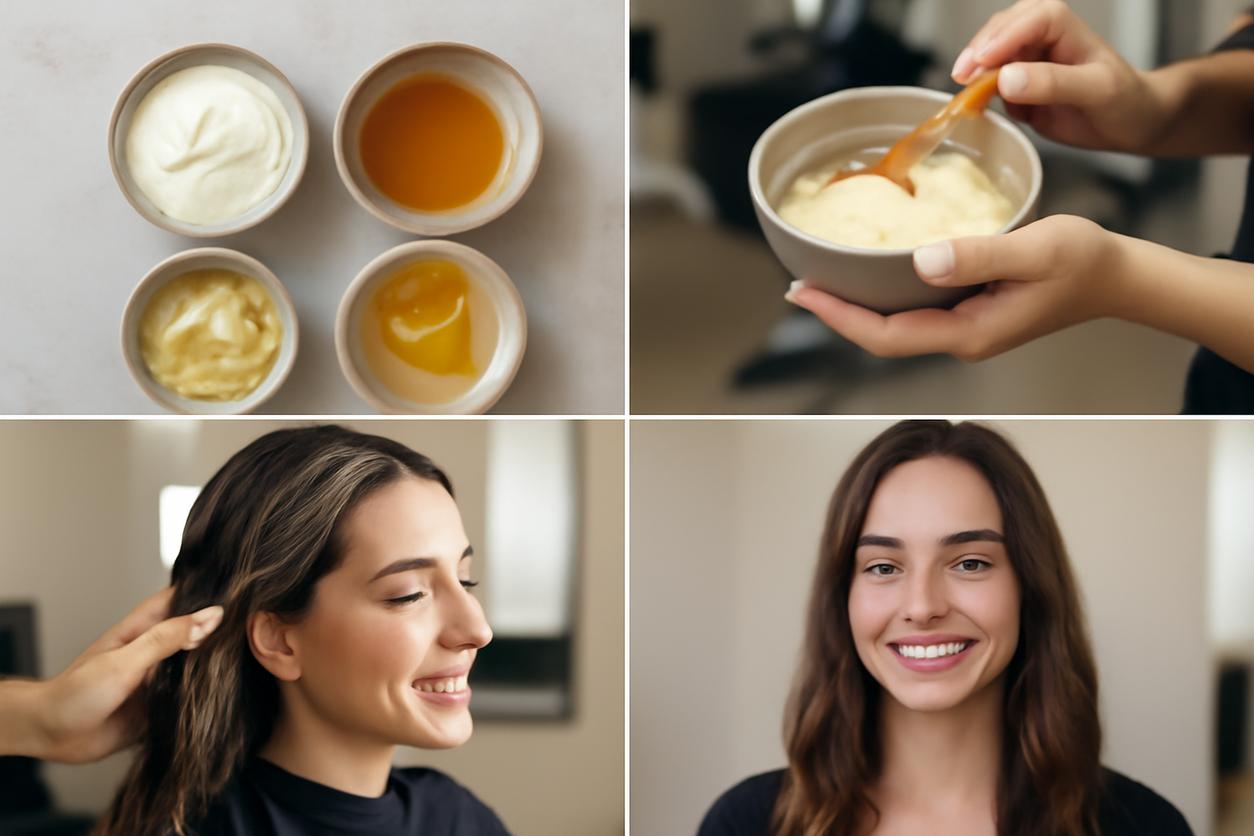
Here are ten easy-to-make recipes. Always use fresh ingredients and mix until smooth to avoid clumps.
- Deep Moisture Mask (for High Porosity/Dry Hair): Mash half a ripe avocado, 1 tablespoon of olive oil, and 1 tablespoon of honey. Apply for 20-30 minutes.
- Strengthening Protein Mask (for Damaged Hair): Whisk 1 egg with 2 tablespoons of plain Greek yogurt. Leave on for 20 minutes. *Do not use hot water to rinse, as it can cook the egg.*
- Lightweight Hydration Mask (for Low Porosity/Fine Hair): Mix 2 tablespoons of aloe vera gel with 1 tablespoon of jojoba or grapeseed oil. Apply for 15-20 minutes.
- Frizz-Taming Smoothie Mask: Blend half a ripe banana with 1 tablespoon of yogurt and 1 tablespoon of honey. Apply for 25 minutes.
- Shine-Boosting Rinse Mask: Mix 2 tablespoons of apple cider vinegar with 1 cup of cool water. After shampooing and conditioning, pour this mixture over your hair as a final rinse. Do not rinse out.
- Soothing Scalp Mask (for Itchiness/Dandruff): Combine 2 tablespoons of oatmeal (blended into a powder), 2 tablespoons of warm water, and 3 drops of tea tree oil. Apply to the scalp for 15 minutes.
- The All-Rounder Mask (for Normal Hair): Mix 2 tablespoons of coconut oil, 1 tablespoon of honey, and 1 tablespoon of aloe vera gel. Apply for 30 minutes.
- Clarifying Buildup-Buster Mask: Combine 2 tablespoons of bentonite clay with 3 tablespoons of apple cider vinegar to form a paste. Apply to scalp and hair for 15 minutes.
- Growth-Stimulating Mask: Mix 1 tablespoon of castor oil with 1 tablespoon of coconut oil and 3 drops of rosemary essential oil. Massage into the scalp and leave on for at least 30 minutes.
- Color-Treated Hair Reviver: Mash a handful of strawberries (for antioxidants) with 1 tablespoon of mayonnaise (for fats and protein). Apply for 20 minutes. This is a great DIY hair mask for maintaining vibrancy.
Step-by-Step Application for Best Absorption
To get the most out of your DIY hair mask, application is everything. Follow these steps for salon-worthy results at home:
- Start with Clean, Damp Hair: Shampoo your hair to remove any product buildup, which can block the mask’s nutrients. Gently towel-dry until it’s damp, not dripping wet.
- Section Your Hair: Divide your hair into 4-6 manageable sections. This ensures you coat every strand evenly.
- Apply from Ends to Roots: Since your ends are the oldest and most damaged part of your hair, start applying the mask there and work your way up. If you have an oily scalp, concentrate the mask on the mid-lengths and ends.
- Comb Through: Use a wide-tooth comb or your fingers to gently distribute the mask through each section.
- Wrap it Up: Cover your hair with a shower cap or a warm towel. The heat will help open up your hair’s cuticles, allowing the ingredients to penetrate more deeply.
- Wait it Out: Let the mask sit for the recommended time in the recipe, typically 15-30 minutes.
Rinse Methods, Drying Tips, and Post-Mask Styling
Once your treatment time is up, it’s time to rinse. Use lukewarm or cool water—hot water can strip away the moisture you just added and may raise the cuticle again. Rinse thoroughly until your hair feels clean and free of residue. For very thick or oily masks, you might need to use a gentle, sulfate-free shampoo to remove all the product.
After rinsing, gently squeeze the excess water from your hair with your hands. Avoid rubbing vigorously with a towel, which can cause frizz and breakage. Instead, use a soft cotton t-shirt or a microfiber towel to blot your hair dry. Style as usual, but you may find you need less styling product, as your hair will be naturally softer and more manageable.
How Often to Use a DIY Hair Mask by Hair Goal
Consistency is key, but overdoing it can lead to problems. Here is a general guide for using a homemade hair mask, which you can adjust based on your hair’s response.
- For Deep Moisture (Dry, Damaged Hair): Use a hydrating mask once a week.
- For Protein Strengthening (Brittle, Weak Hair): Use a protein-based mask once or twice a month. Overuse can cause protein overload, making hair feel stiff and brittle.
- For Scalp Health (Oily, Flaky Scalp): Use a clarifying or soothing scalp mask every 1-2 weeks.
- For General Maintenance (Normal Hair): Use an all-rounder mask every 2 weeks to maintain health and shine.
Troubleshooting: Buildup, Greasiness, and Dull Results
Sometimes, your DIY hair mask experiment might not go as planned. Here’s how to fix common issues:
- Hair Feels Greasy or Weighed Down: You may have used too much oil or a type that’s too heavy for your hair. Try using less oil next time or switching to a lighter one like jojoba or grapeseed oil. Ensure you are rinsing thoroughly.
- Hair Feels Stiff or Straw-Like: This is a classic sign of protein overload. Your hair has a delicate moisture-protein balance. Cut back on protein masks and focus on purely hydrating ones (with ingredients like aloe, honey, or avocado) for a few weeks.
- No Noticeable Difference: Your hair might have low porosity, meaning the ingredients are having a hard time getting in. Try applying your mask and then using a steamer or wrapping a warm, damp towel around your head to help the cuticle open up.
Storing Mixtures and Shelf Life Guidance
Because your DIY hair mask is made with fresh food ingredients, it does not have the preservatives of store-bought products. It is always best to make a fresh batch for each use. If you make too much, you can store the leftovers in an airtight container in the refrigerator for up to 2-3 days. However, masks with ingredients like egg or avocado are best used immediately as they can spoil quickly. Never use a mixture that smells off or has changed color.
Eating for Stronger Hair: Pairing Masks with Simple Nutrition Tips
Topical treatments are fantastic, but true hair health starts from within. What you eat directly impacts the strength and growth of your hair. To support your DIY hair mask routine, consider incorporating hair-friendly nutrients into your diet. For official guidance on a healthy lifestyle that supports your whole body, including your hair, you can reference the NHS hair guidance.
- Protein: Since hair is made of protein, ensure you’re eating enough lean meat, fish, beans, and nuts.
- Iron: Iron deficiency can be linked to hair loss. Good sources include spinach, lentils, and red meat.
- Biotin: This B-vitamin is famous for its role in hair health. Find it in eggs, almonds, and sweet potatoes.
- Healthy Fats: Omega-3 fatty acids, found in salmon, avocados, and walnuts, help keep your scalp and hair hydrated.
Frequently Asked Questions
Can I leave a DIY hair mask on overnight?
It depends on the ingredients. Oil-based masks (like pure coconut or olive oil) can be left on overnight for a deep conditioning treatment. However, masks containing protein (like egg or yogurt) or acidic ingredients (like apple cider vinegar) should not be left on for more than 30 minutes, as they can cause damage or irritation if left on too long.
Should I apply a DIY hair mask to wet or dry hair?
Damp, towel-dried hair is ideal. Dry hair can have product buildup that blocks absorption, while overly wet hair can dilute the mask. Damp hair is clean and has open cuticles ready to soak up the nutrients.
Why is my homemade hair mask so messy?
Messiness is a common challenge! To manage it, apply your mask in the bathroom, wear an old t-shirt, and always use a shower cap to contain the mixture while it sits. Blending your ingredients until they are very smooth also helps prevent dripping.
Summary and Next Steps for Consistent Results
Creating your own DIY hair mask is a simple, effective, and rewarding way to take control of your hair health. By understanding your hair’s porosity and its need for moisture, protein, and sealing oils, you can mix and match pantry ingredients to create the perfect treatment. Remember to patch test, apply to clean and damp hair, and stay consistent with your routine.
Starting in 2025 and beyond, make it your goal to incorporate a weekly or bi-weekly masking session into your self-care routine. Your hair will thank you with improved strength, shine, and manageability. Happy mixing!