Unlock the secrets to fabulous hair right from the comfort of your home! Mastering a few core DIY hair styling techniques can save you time and money, all while giving you the confidence to switch up your look whenever you please. Whether you have five minutes or a whole evening, this guide is packed with practical, step-by-step methods tailored for every hair type. We will focus on reproducible styles using minimal tools, so you can achieve salon-worthy results without the salon price tag. Let’s get started on your journey to becoming your own best stylist.
Quick start – tools, prep and safety
Before diving into specific DIY hair styling techniques, a solid foundation is crucial. Having the right tools and prepping your hair properly not only makes styling easier but also protects your hair’s health.
Essential Tools and Prep Work
You don’t need a professional kit to get started. Many effective tools are likely already in your home. Here is a basic list:
- A good quality brush and comb: A wide-tooth comb for detangling wet hair and a paddle brush for smoothing dry hair.
- Hair ties and pins: A mix of elastics, bobby pins, and U-pins will cover most updos and styles.
- A microfibre towel or old t-shirt: These are much gentler on your hair than a traditional terrycloth towel and significantly reduce frizz.
- Sectioning clips: Essential for managing your hair while you blow-dry or style.
- Heat tools (optional): A blow dryer with adjustable heat and speed settings, a curling iron, or a flat iron. For more information, explore this guide to styling tools basics.
Always start with clean, conditioned hair. After washing, gently squeeze out excess water and blot your hair with a microfibre towel. Never rub vigorously, as this roughs up the hair cuticle and causes frizz.
Styling Safety First
Protecting your hair is non-negotiable, especially when using heat. Heat damage is cumulative and can lead to dryness, breakage, and split ends. Remember these key safety tips:
- Always use a heat protectant: Apply it to damp hair before any heat styling. This creates a barrier between your hair and the high temperatures. Understanding how they work is key; learn more with this article on heat protectors explained.
- Use the right temperature: You rarely need the highest heat setting. Fine hair requires lower temperatures, while thicker, coarser hair can handle a bit more heat.
- Keep the tool moving: Never let a hot tool sit on one section of hair for more than a few seconds.
- Clean your tools: Product buildup on hot tools can burn, causing damage to your hair. Wipe them down regularly (when cool and unplugged, of course).
Heat free shaping methods for all hair types
One of the best approaches to DIY hair styling techniques involves ditching the heat altogether. Heat-free methods are fantastic for improving hair health and are surprisingly effective at creating beautiful waves and curls.
- Braid Waves: The simplest way to get waves. On damp hair, create one or more braids. A single, loose braid will give you soft, beachy waves, while multiple tight braids will result in a crimped texture. Let your hair air-dry completely before taking them out.
- Sock Bun Curls: Create a doughnut shape from an old sock by cutting off the toe and rolling it up. Put your damp hair into a high ponytail, pull the ends through the sock doughnut, and then roll it down, tucking your hair around it as you go. Secure it at the base and leave it in for several hours or overnight.
- Headband Curls: Place an elastic headband over your head (hippie style). Take small sections of damp hair, starting from the front, and wrap them up and around the headband until all your hair is tucked in. This creates beautiful, uniform curls.
Blow dry basics and shaping for straight hair
A great blowout is a foundational skill. It creates a smooth, voluminous base for any style. The key is to work in manageable sections and direct the airflow correctly.
The Perfect At-Home Blowout
- Prep is key: After applying a heat protectant and a root-lifting mousse to damp hair, rough-dry your hair with your fingers until it is about 80% dry. This cuts down on total heat exposure.
- Section your hair: Use clips to divide your hair into at least four sections. Working with smaller, manageable sections gives you more control and a smoother result.
- Use a nozzle: Always attach the concentrator nozzle to your blow dryer. It focuses the airflow, allowing for precision and reducing frizz.
- Brush technique: Take a round brush and place it at the roots of a section. Aim the blow dryer’s nozzle downward along the hair shaft as you pull the brush through to the ends. This smooths the cuticle and creates shine.
- Set with cool air: Once a section is dry, switch to the cool shot button for a few seconds. This “sets” the style, helping it last longer.
Enhancing waves and texture without damage
If you have naturally wavy hair, your goal is to enhance your pattern without creating frizz. This often means hands-off drying and using the right tools.
Embrace Your Natural Texture
- Plopping: This is a game-changer for wavy hair. After applying your styling products to wet hair, lay a t-shirt or microfibre towel on a flat surface. Flip your hair forward onto the center of the towel, then fold the sides over and twist to create a secure turban. Leave it on for 20-30 minutes. Plopping helps curls form without gravity stretching them out.
- Diffusing: If you must use a blow dryer, a diffuser attachment is your best friend. It disperses the air to gently dry your waves without disturbing their pattern. Use low heat and low speed. Gently cup sections of your hair in the diffuser and hold it near your scalp.
- Scrunch, Don’t Rub: When your hair is drying, gently scrunch sections toward the scalp to encourage wave formation. Avoid touching it too much once it’s dry to prevent frizz.
Curly hair styling that preserves bounce and definition
Styling curly hair is all about moisture, definition, and minimal manipulation. The right DIY hair styling techniques will help your curls clump together beautifully and reduce frizz.
Define and Protect Your Curls
- Apply products to soaking wet hair: For best results, apply your leave-in conditioner, curl cream, and gel in the shower when your hair is still very wet. This helps lock in moisture and encourages defined curl clumps.
- Finger Coiling: For extra definition, take small sections of hair and wrap them around your finger from root to tip. This helps train your curls into a perfect spiral.
- The Pineapple: To protect your curls while you sleep, loosely gather your hair at the very top of your head and secure it with a scrunchie. Your hair should look like a pineapple. This prevents your curls from getting crushed and frizzy overnight.
Easy updos and braid variations for everyday wear
Mastering a few quick and easy updos can elevate your look in minutes. These styles are perfect for busy mornings or for second-day hair.
- The Perfect Messy Bun: Gather your hair into a high ponytail. On the last pull-through of the elastic, only pull the hair halfway to create a loop. Wrap the remaining ends around the base and secure with bobby pins. Gently pull on the bun to loosen it for that “effortlessly chic” look.
- The Sleek Low Ponytail: For a more polished look, brush your hair back into a low ponytail at the nape of your neck. To tame flyaways, spray a little hairspray onto a clean toothbrush and gently brush them down.
- The Simple Crown Braid: Part your hair down the middle and create two pigtail braids. Bring one braid up and over the top of your head, securing it with bobby pins. Do the same with the other braid, tucking its end underneath the first one.
Overnight routines for ready to wear morning hair
Imagine waking up with your hair already styled. With the right overnight prep, this can be your reality. These time-saving strategies are a core part of effective DIY hair styling techniques.
Many of the heat-free methods mentioned earlier, such as braiding, sock buns, and headband curls, are perfect for setting overnight. The key is to ensure your hair is just slightly damp, not soaking wet, before you start. Sleeping on a silk or satin pillowcase is also highly recommended. It reduces friction, which in turn minimizes frizz and breakage, preserving your style for the morning. For more ideas, check out these overnight styling options.
Finishing touches and long lasting hold without stiffness
The final step in any hairstyle is locking it in place without making it feel crunchy or stiff. Modern styling focuses on flexible hold and natural movement.
- DIY Sea Salt Spray: For a light, texturizing hold, mix a cup of warm water with a teaspoon of sea salt and a touch of leave-in conditioner in a spray bottle. Mist it over your hair for beachy texture.
- A Light Hairspray Mist: When using hairspray, hold the can at least 12 inches from your head and spray a light, even mist rather than concentrating on one spot.
- Shine with Oil: To add shine and tame any last-minute flyaways, rub a single drop of hair oil between your palms and lightly smooth it over the surface of your hair, avoiding the roots.
Troubleshooting common styling problems and fixes
Even with the best techniques, things can go wrong. Here is how to fix some of the most common styling frustrations.
| Problem | Common Cause | Quick Fix |
|---|---|---|
| Frizz and Flyaways | Dryness, humidity, too much friction. | Use a microfibre towel, sleep on a silk pillowcase, apply a small amount of serum or oil to dry hair. |
| Limp or Flat Hair | Over-conditioning, heavy products, product buildup. | Use a clarifying shampoo once a week, apply conditioner only to the ends, blow-dry hair upside down for root lift. |
| Style Won’t Hold | Hair is too clean or fine. | Style on second-day hair. Use a mousse or texturizing spray for grip before you begin. |
Ingredient guide – kitchen staples that help hair
Your kitchen can be a treasure trove of hair-loving ingredients. Healthy hair starts from within, so consider these hair nutrition tips for long-term health. For a quick boost, a topical treatment can work wonders.
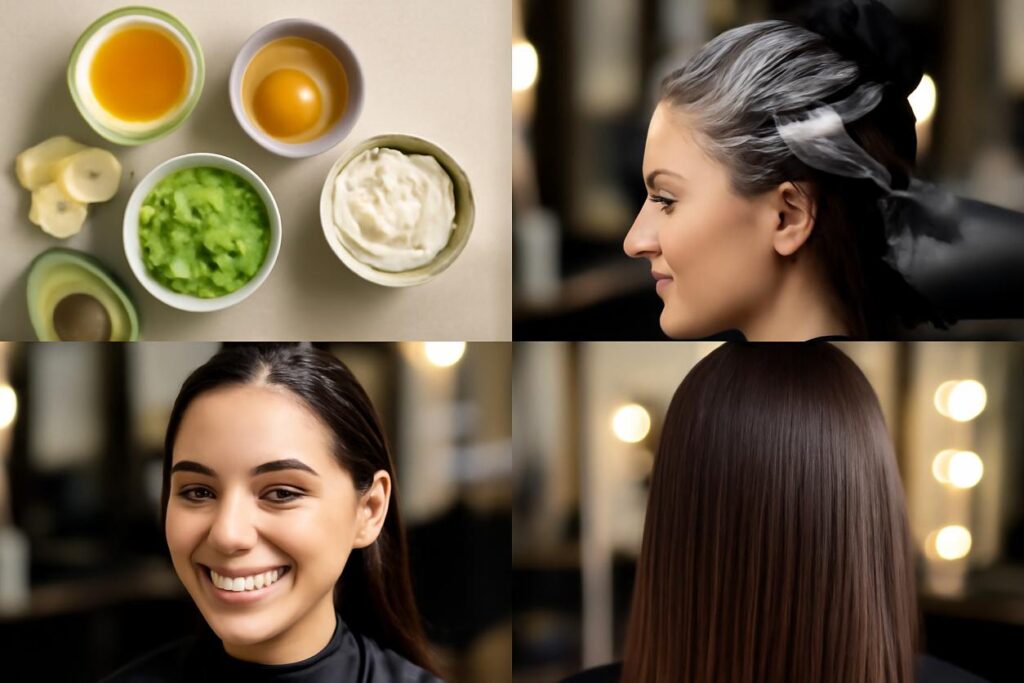
- Coconut or Olive Oil: Excellent for deep conditioning. Gently warm the oil, apply it to your hair, and leave it on for 30 minutes before shampooing.
- Avocado: Rich in fatty acids and vitamins, mashed avocado makes a deeply moisturizing mask for dry or damaged hair.
- Apple Cider Vinegar: Dilute one part ACV with five parts water for a final rinse after shampooing. It clarifies buildup and seals the hair cuticle for extra shine.
These ingredients are a great starting point for creating your own treatments. For more recipes and ideas, explore this guide to a DIY hair mask.
When to see a professional stylist
DIY hair styling techniques are empowering, but there are times when a professional’s touch is necessary. You should always visit a salon for:
- Haircuts: A good haircut is the foundation of any style. Leave significant trims and shaping to the experts.
- Chemical Services: Any coloring, highlighting, perming, or chemical straightening should be done by a trained professional to avoid severe damage.
- Serious Hair Health Concerns: If you’re experiencing significant hair loss or scalp issues, consult a professional stylist or a dermatologist.
Quick styling routines by time budget – 5, 10, 20 minutes
We don’t always have a lot of time. Here is how you can achieve a great look based on the minutes you have to spare. These 2025-ready strategies prioritize speed and impact.
5-Minute Styles
- Polished Top Knot: Flip your head over, gather hair into a high ponytail, twist the tail, and wrap it around the base, securing with pins.
- Accessorized Ponytail: A simple ponytail can be elevated with a stylish scrunchie, ribbon, or scarf tied around the base.
10-Minute Styles
- Half-Up Twist: Take a section of hair from each side of your face, twist them back, and pin them together at the back of your head.
- Refreshed Overnight Waves: If you slept in braids, take them out and mist your hair with a texturizing spray, scrunching to revive the shape.
20-Minute Styles
- Quick Front Blowout: If you don’t have time for a full blowout, just style the front sections and fringe that frame your face. It gives the illusion of a full, fresh style.
- Defined Curls Takedown: Take down your overnight pineapple or braids, spritz your curls with a water/leave-in conditioner mix, and gently reshape any unruly sections with your fingers.
By incorporating these DIY hair styling techniques into your routine, you can create a wide range of beautiful looks. The most important thing is to have fun, practice, and get to know your unique hair type. With a little patience, you’ll be styling your hair like a pro in no time.