Table of Contents
- Introduction: What Protective Hairstyles Are and Why They Matter
- Assessing Your Hair Type and Goals
- Preparing Hair: Cleansing, Moisturizing and Pre-styling
- Styling Methods for Low Manipulation
- Step by Step: Braids and Twists
- Step by Step: Buns, Updos and Faux Loc Alternatives
- Simple Quick Protective Looks for Busy Days
- Nighttime Routines and Seasonal Adjustments
- Products and Tools That Support Protective Styling
- Common Mistakes and How to Avoid Them
- Transitioning Between Styles Safely
- Recovery and When to Give Hair a Break
- Visual Gallery: A Guide to Protective Styles
- Conclusion: Building a Sustainable Routine
- Frequently Asked Questions
Introduction: What Protective Hairstyles Are and Why They Matter
Welcome to the ultimate guide to protective hairstyles, your key to unlocking long-term hair health and achieving your length goals. But what exactly are they? A protective hairstyle is any style that tucks away the ends of your hair, protecting them from damage caused by manipulation, environmental factors like wind and sun, and friction from clothing. By minimizing daily handling, these styles help reduce breakage and split ends, which is crucial for length retention.
The primary benefit of incorporating protective hairstyles into your routine is creating an optimal environment for your hair to thrive. It’s not about magic growth, but about preserving the length you already have. This low-manipulation approach allows your hair to rest, retain moisture, and grow stronger over time. Whether you have wavy, curly, or coily hair, mastering protective styling is a game-changer for your natural hair journey. For a deeper dive, explore this comprehensive Protective Hairstyles Guide.
Assessing Your Hair Type and Goals
Understanding Your Hair’s Needs
Before you begin, it’s essential to understand your hair’s unique characteristics. Key factors include:
- Hair Texture: Is your hair fine, medium, or coarse? Fine hair can be weighed down easily, while coarse hair may require heavier products.
- Hair Porosity: This refers to your hair’s ability to absorb and retain moisture. Low porosity hair has tightly packed cuticles and resists moisture, while high porosity hair absorbs it quickly but can also lose it just as fast.
- Hair Density: This is about how many hair strands you have on your head (low, medium, or high). Density will influence the size and number of braids or twists you can create.
Knowing these details will help you choose the right protective hairstyles and products, ensuring you provide what your hair truly needs.
Setting Clear Hair Goals
What do you want to achieve with protective styling? Your goals will shape your routine. Common objectives include:
- Maximizing Length Retention: The primary goal for many, focusing on styles that keep ends completely tucked away.
- Reducing Breakage and Split Ends: If your hair is fragile, your focus will be on low-tension styles that don’t pull on the scalp or strands.
- Increasing Thickness and Fullness: This involves promoting overall scalp health and minimizing thinning from tension.
- Simplifying Your Daily Routine: For those with busy lifestyles, long-term protective styles can save significant time.
Remember that healthy hair starts from within. Supporting your goals with a balanced diet is crucial. You can learn more from these Hair Nutrition Resources.
Preparing Hair: Cleansing, Moisturizing and Pre-styling
The Foundation: A Clean and Hydrated Canvas
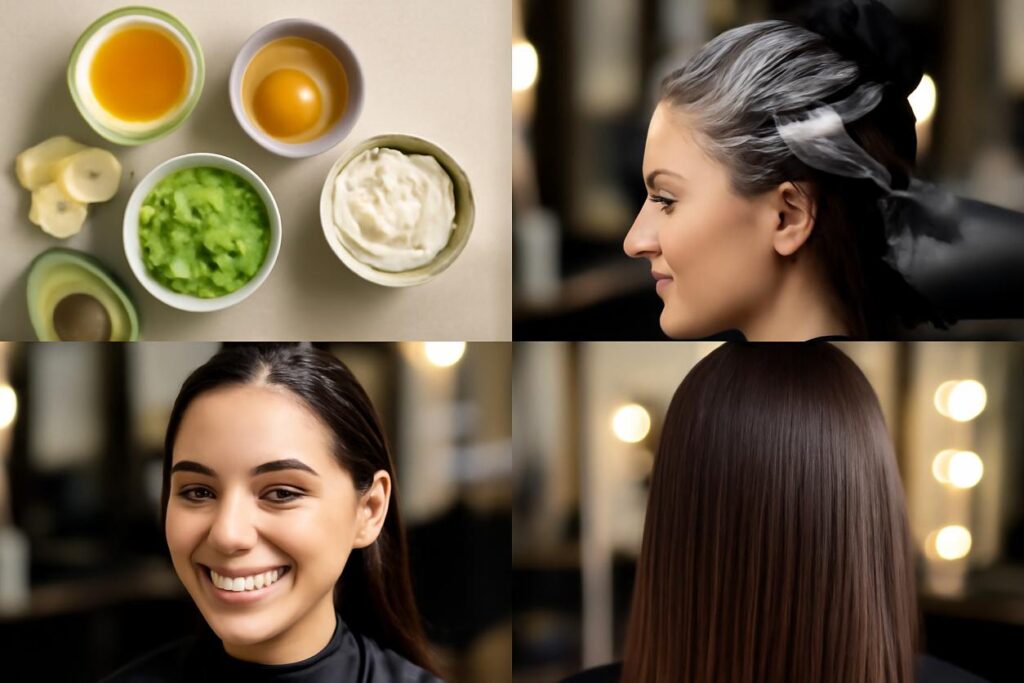
Never install protective hairstyles on dirty or dry hair. A proper prep day is non-negotiable for success. Start with a thorough cleanse using a sulfate-free shampoo to remove buildup without stripping natural oils. Follow up with a deep conditioning treatment to infuse your strands with intense moisture and nutrients. This step fortifies your hair, making it more pliable and resilient for styling.
Moisture Layering: The LOC/LCO Method
Sealing in moisture is the most critical part of preparation. The LOC (Liquid, Oil, Cream) or LCO (Liquid, Cream, Oil) method is perfect for this.
- Liquid: Start with water or a water-based leave-in conditioner to hydrate the hair.
- Oil: Apply a light layer of penetrating oil to seal in the liquid.
- Cream: Finish with a moisturizing cream or butter to lock everything in and provide a soft hold.
Experiment to see which order (LOC or LCO) your hair prefers. This layering technique ensures your hair stays moisturized for days, even weeks, while in a style.
Stretching Your Hair for Styling
Working with stretched hair makes styling easier, reduces tangles, and minimizes breakage. Avoid direct high heat. Instead, opt for low-manipulation stretching methods like:
- Banding: Section your damp hair and place hair ties down the length of each section to gently stretch it as it dries.
- African Threading: Wrap thread around sections of hair from root to tip to achieve a fully stretched, blow-out look without heat.
- Tension Blow-Drying: Use a blow dryer on a low heat setting with a comb attachment, holding the ends of your hair taut to stretch it as you dry.
Styling Methods for Low Manipulation
The core principle of effective protective styling is low manipulation. This means touching your hair as little as possible. The best styles are those that not only tuck away your ends but also place minimal stress on your scalp and edges. Avoid styles that pull too tightly or require constant re-styling. A good protective style should be comfortable enough to wear for an extended period without causing pain or tension headaches. The goal is to set it and forget it—with proper maintenance, of course.
Step by Step: Braids and Twists
Creating Classic Box Braids (Your Own Hair)
These are a foundational protective style that doesn’t require extensions.
- Section: Create clean, even parts using a rat-tail comb. The size of the section will determine the size of your braid. A medium size is often best to avoid too much tension.
- Moisturize: Apply a small amount of cream or gel to the section for hold and added moisture.
- Braid: Divide the section into three equal strands. Begin braiding by crossing the right strand over the middle, then the left strand over the new middle. Continue this pattern down to the ends.
- Seal: Gently twirl the ends of the braid around your finger to encourage them to stay sealed.
Mastering Two-Strand Twists
Twists are generally gentler on the hair than braids and are a fantastic protective option.
- Section and Moisturize: Just like with braids, start with a clean, moisturized section of hair.
- Divide: Split the section into two equal strands.
- Twist: Tightly twist each of the two strands individually around themselves in the same direction (e.g., to the right). Then, wrap those two twisted strands around each other in the opposite direction (e.g., to the left). This “twist and wrap” method creates a more defined and lasting twist.
- Seal the Ends: Coil the ends of the twist around your finger with a bit of gel or cream to prevent unraveling.
Step by Step: Buns, Updos and Faux Loc Alternatives
The Perfect Low-Tension Bun
A bun is a quick and elegant protective style, but it must be done correctly to prevent breakage.
- Gather Gently: Instead of pulling your hair back tightly, smooth it back with your hands. Use a soft hair tie without a metal clasp.
- Secure Loosely: Secure your hair into a loose ponytail at your desired position (low, mid, or high). Do not wrap the tie too many times.
- Tuck the Ends: Twist or braid the ponytail, then wrap it around the base to form a bun. Tuck the ends securely under the bun using hairpins, ensuring they are completely protected.
Effortless Crown Braids and Twists
A crown braid or twist keeps all your hair up and away, making it one of the ultimate protective hairstyles.
- Part and Braid/Twist: Part your hair down the middle into two large sections. Create a large two-strand twist or a three-strand braid on each side.
- Wrap and Pin: Take one braid/twist and lay it across the top of your head like a headband, securing it with bobby pins.
- Complete the Crown: Take the second braid/twist and wrap it behind the first one, tucking the end underneath and pinning it securely. Adjust for comfort and shape.
Simple Quick Protective Looks for Busy Days
Not all protective hairstyles need to take hours. For busy days, try these simple yet effective options:
- The High Puff (Modified): Gather your hair into a high puff, but instead of leaving the ends out, tuck them into the base of the puff to protect them.
- Halo Twist: A simplified version of the crown twist. Start a flat twist above one ear and continue it around your entire hairline, picking up hair as you go, until you reach your starting point. Tuck the end and pin it.
- Rolled and Tucked Updo: Secure your hair in a low, loose ponytail. Create a small opening above the hair tie, and “flip” the ponytail through it. Continue tucking and rolling the ends into that pocket until all your hair is secured.
Nighttime Routines and Seasonal Adjustments
Protecting Your Style While You Sleep
Your nighttime routine is just as important as your styling technique. Friction from cotton pillowcases can cause frizz, dryness, and breakage. Protect your hair by:
- Using a Satin or Silk Bonnet/Scarf: These materials reduce friction, helping your style last longer and retaining moisture.
- Sleeping on a Satin or Silk Pillowcase: This is a great backup for nights when your bonnet or scarf might slip off.
For more detailed information, check out these Night Care Tips.
Seasonal Care for Protective Hairstyles in 2025 and Beyond
Your hair’s needs change with the seasons. Adjust your maintenance routine for optimal health.
- Winter/Colder Months: The air is dry, so focus on moisture. Use heavier creams and butters. Refresh your style with a light moisturizing mist every few days. Cleanse less frequently to avoid stripping oils.
- Summer/Warmer Months: Focus on scalp health and protecting your hair from the sun. Cleanse more often to remove sweat and buildup. Use lighter, water-based moisturizers. Consider styles that allow for more scalp breathability.
Products and Tools That Support Protective Styling
Essential Toolkit
Having the right tools makes all the difference. You don’t need a lot, just the right things.
- Water-Based Leave-In Conditioner: For the hydration (L) step.
- Natural Oils: Such as jojoba, grapeseed, or almond oil for sealing.
- Moisturizing Cream or Butter: To lock in moisture (the C step).
- Wide-Tooth Comb: For gentle detangling on wash day.
- Rat-Tail Comb: For creating precise parts.
- Satin/Silk Scarf or Bonnet: For nighttime protection.
- Gentle Hair Ties and Bobby Pins: To secure styles without snagging or pulling.
Common Mistakes and How to Avoid Them
Even with the best intentions, mistakes can happen. Here’s how to avoid common pitfalls associated with protective hairstyles.
| Common Mistake | Why It’s Harmful | How to Avoid It |
|---|---|---|
| Styling Too Tightly | Causes tension on the scalp, leading to traction alopecia (hair loss), breakage, and headaches. | Ensure your style is firm but comfortable. If you feel any pain or see bumps on your scalp, it’s too tight. |
| Neglecting Your Scalp | Product buildup, sweat, and dead skin can clog follicles and hinder growth. | Cleanse your scalp regularly with a gentle, diluted shampoo or an applicator bottle. Use a light oil to soothe itchiness. |
| Leaving Styles In Too Long | Can lead to severe matting, tangling, and moisture loss as the initial hydration wears off. | A general rule is to not leave a style in for more than 4-6 weeks. Listen to your hair; if it feels dry or your scalp is itchy, it’s time to take it down. |
| Skipping Prep or Takedown Care | Installing on dry hair or rushing the takedown process causes massive, avoidable breakage. | Always start with clean, moisturized hair. Be extremely patient during takedown, using oil or conditioner to add slip. |
Transitioning Between Styles Safely
The takedown process is where much of the damage can occur if you’re not careful. To transition safely, saturate your hair with a mix of water, conditioner, and oil to provide slip. Work in small sections, gently unraveling your style with your fingers first before using any tools. Once the style is out, detangle from ends to roots with a wide-tooth comb. This is the perfect time for a pre-shampoo treatment or a clarifying wash, followed by a restorative deep conditioner to replenish your hair before its break or the next style.
Recovery and When to Give Hair a Break
Your hair needs to breathe. As beneficial as protective hairstyles are, it’s crucial to give your hair a break in between installations. A good rule of thumb is to let your hair rest for at least one week between long-term styles. During this break, focus on deep conditioning treatments, scalp massages, and wearing your hair in very loose, low-manipulation styles like a loose puff or simply out. Signs your hair needs a break include scalp tenderness, an increase in shedding, or hair that feels unusually dry and brittle.
Visual Gallery: A Guide to Protective Styles
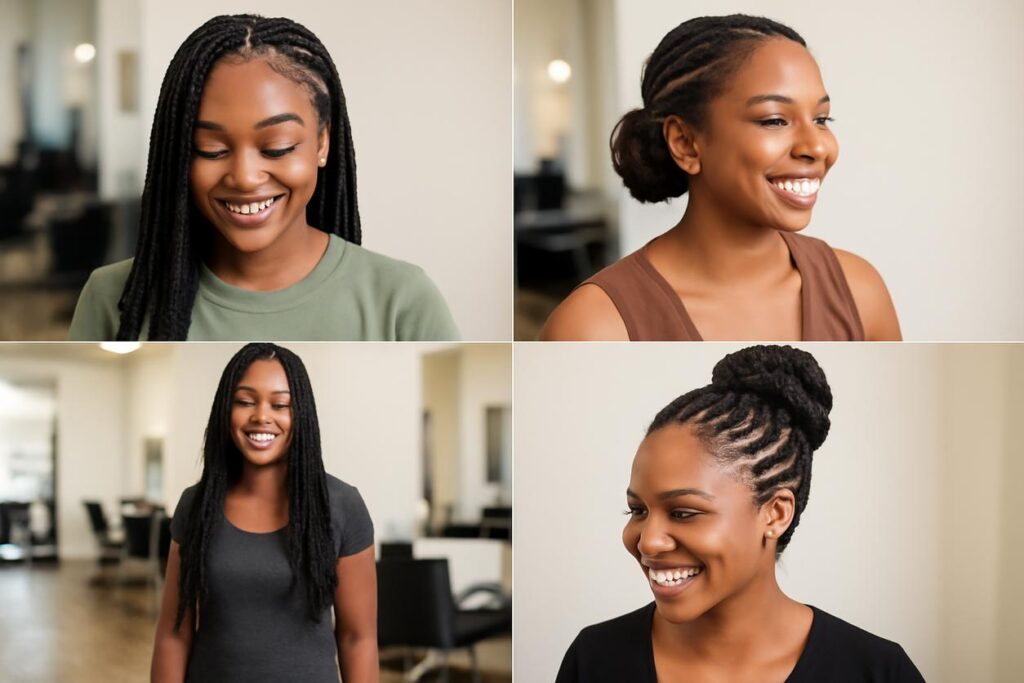
Since a picture is worth a thousand words, here are text descriptions to help you visualize some popular protective hairstyles:
- Two-Strand Twists: Imagine numerous, rope-like twists created from two sections of hair, hanging freely. They can be small or large, offering a textured and voluminous look that moves beautifully.
- Box Braids (No Extensions): Picture sharp, square-shaped parts across the scalp, with each section of hair neatly plaited into a classic three-strand braid. The overall look is uniform and sleek.
- Crown Braid: Envision a single, large braid wrapped beautifully around the head like a halo or crown. It’s an elegant updo that keeps all hair and ends completely tucked away.
- Low Bun: A simple, classic style. The hair is smoothed back and gathered at the nape of the neck, then twisted or coiled into a neat, compact circle, with all ends securely hidden within the bun.
Conclusion: Building a Sustainable Routine
Incorporating protective hairstyles into your hair care regimen is a powerful strategy for health and growth. The key to success is not just the style itself, but the entire process: proper preparation, gentle installation, consistent maintenance, and a careful takedown. By understanding your hair’s unique needs and avoiding common mistakes, you can build a sustainable routine that promotes strong, healthy hair. Listen to your hair, be patient with the process, and enjoy the journey to achieving your goals.
Frequently Asked Questions
How long should I keep a protective hairstyle in?
The ideal duration is between two and six weeks. Any longer can lead to product buildup, scalp issues, and matted hair. Listen to your hair; if it starts to feel dry or your scalp becomes itchy and irritated, it’s time to take the style down, even if it hasn’t been that long.
Can protective hairstyles cause hair loss?
Yes, if done incorrectly. Protective hairstyles that are too tight or too heavy can put excessive tension on your hair follicles, leading to a type of hair loss called traction alopecia. Always ensure your styles are comfortable and never pull at your scalp, especially around the delicate hairline.
How do I wash my hair in a protective style?
You can and should wash your hair while it’s in a protective style. Dilute a sulfate-free shampoo with water in an applicator bottle and apply it directly to your scalp. Gently massage your scalp with your fingertips (not nails) and let the suds run down the length of your braids or twists. Rinse thoroughly and follow up with a light, spray-on leave-in conditioner to remoisturize.